vRealize Automation Service Broker Policies allow us to provide the much-needed governance to our automated environment to protect us from a lot of possible undesirable outcomes. Whether it’s having the correct content available to the right groups and users, preventing lab systems from living too long or preventing destructive actions from the wrong hands, policies are here to help us achieve the right outcome.
There are several different types of policies available for us to setup and we will walk through them all to make sure we get everything right.
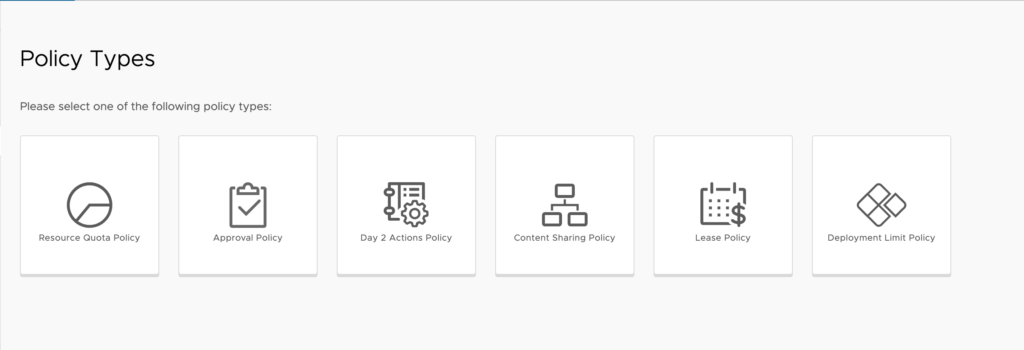
Resource Quota Policy
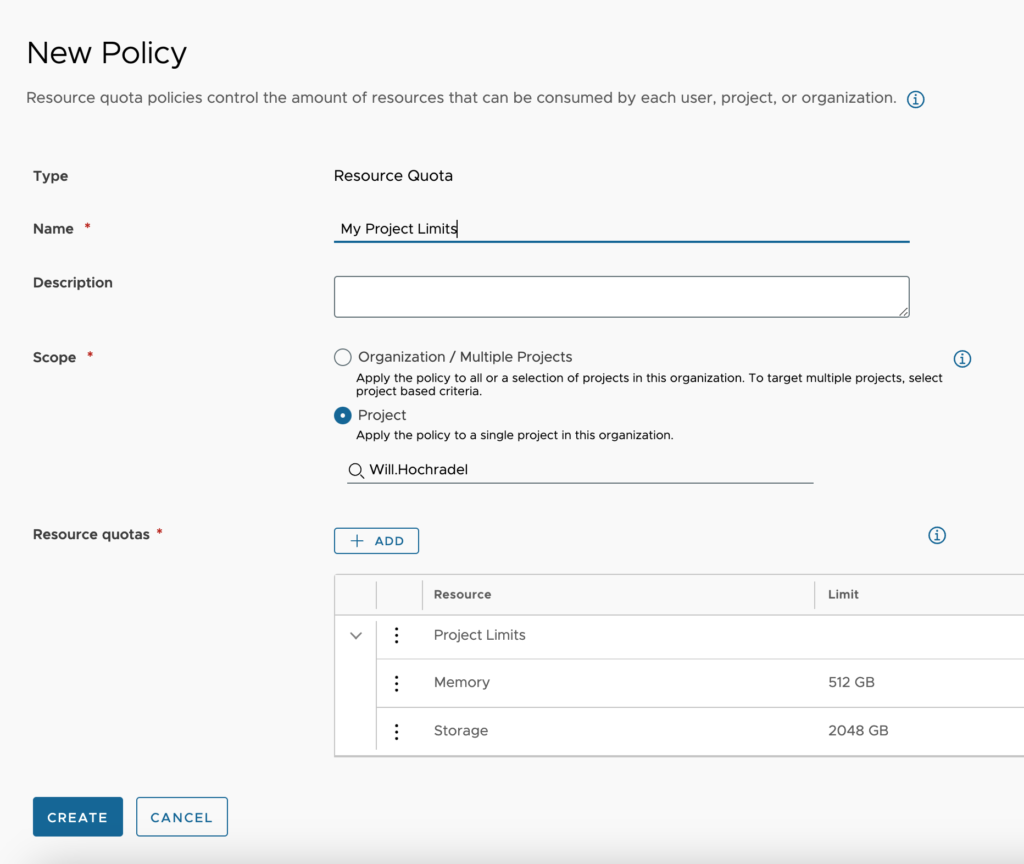
Resource Quotas allow us to set limitations on CPU, Memory, Storage and VM Count at different organizational levels. We can set this for an entire organization or per project and make it per user or the collective. These policies go well with Deployment Limit Policies as discussed later in this article. Let’s look at the settings for Resource Quota Policies.
Configuration:
- Name – We provide a name that describes in short what this policy is for.
- Description – We can use this field to provide any needed additional information about what this policy includes.
- Scope – We can choose one of the following options.
- Organizations / Multiple Project – If we select this radio button without defining additional criteria, it will define as the entire organization. Otherwise, we can choose some criteria for which projects to apply this to. This can be the project description, id, or name.
- Project – We choose this option to apply to a single project by name.
- Resource quotas – We’ll click Add to create one or multiple quotas.
Let’s look at the different options for setting up a resource quota.
Configuration:
- Scope level – The scope level is the level at which the quota will apply. There are 4 options, Organization Limits, Organization User Limits, Project Limits, Project User Limits. If we have the scope of the policy set to Organization then we will have the ability to choose from all 4 options, but if we have the scope set to Project, we can only choose from the 2 project-based scope levels.
- Resource – We can choose between CPU, VM Count, Memory, and Storage. We can only have 1 configuration per policy setup.
- Limit – We set the value of the upper limit for the quota. The Storage and Memory are in GB.
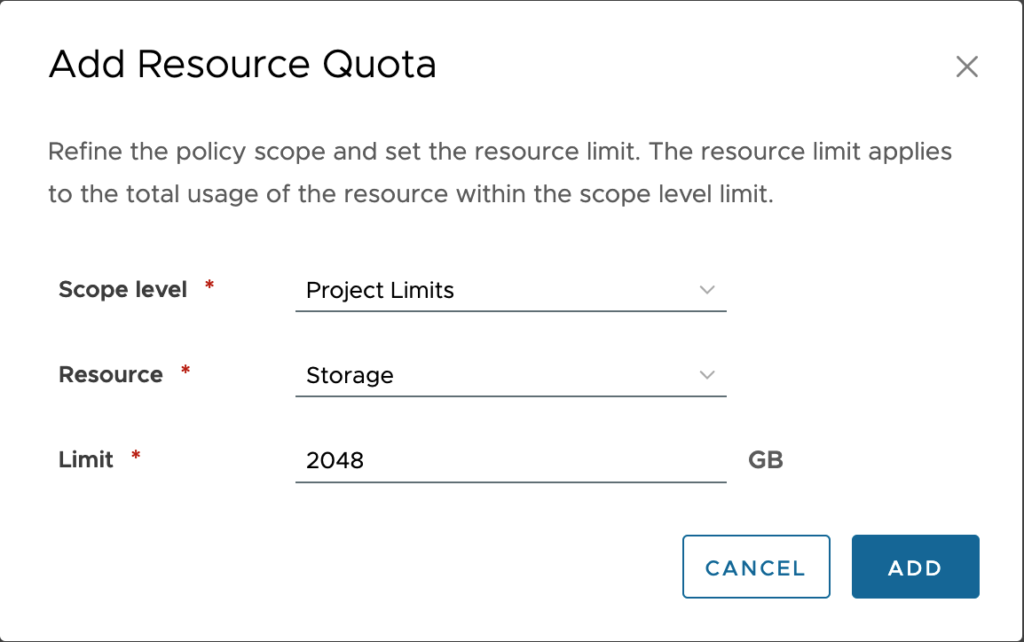
Once complete, we click Add.
Once we have added all the resource quotas to the new policy, we click Create.
Approval Policy
Approval policies are a way to set approvals for certain types of actions and apply them to certain groups or organization wide. These policies can be applied in multiple levels and have different approvers for each level.
Let’s look at a configuration and talk through the options.
Configuration:
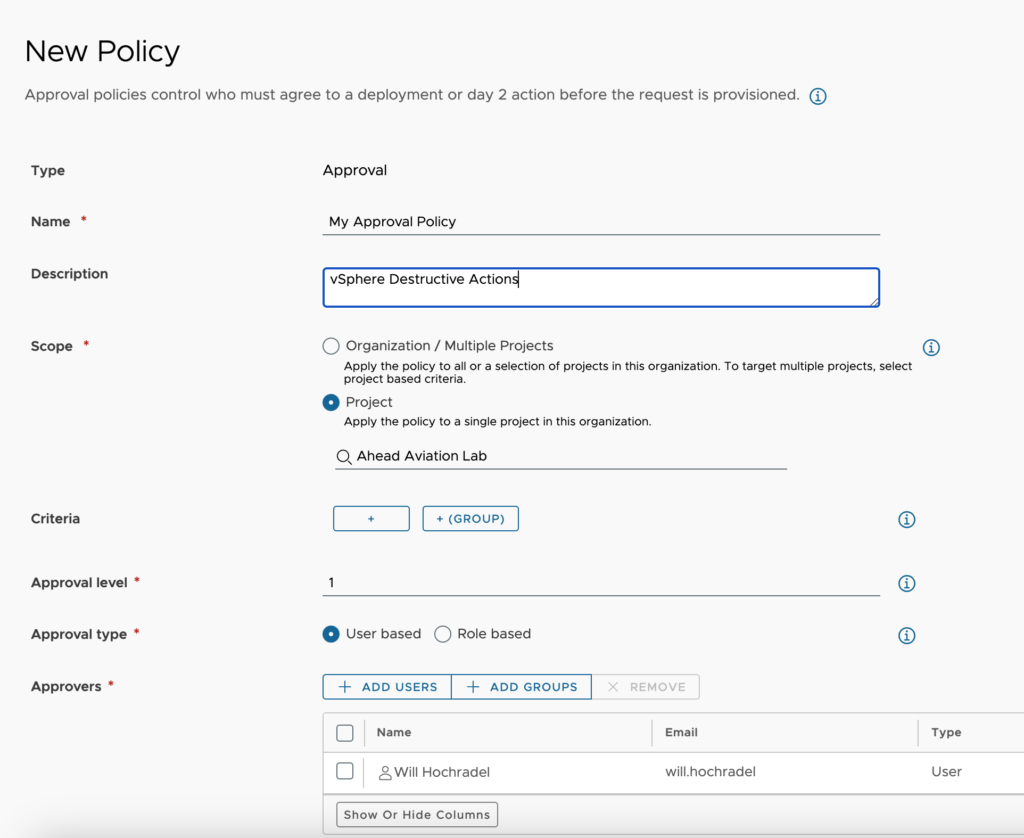
- Name – We provide a name that describes in short what this policy is for.
- Description – We can use this field to provide any needed additional information about what this policy includes.
- Scope – We can choose one of the following options.
- Organizations / Multiple Project – If we select this radio button while defining additional criteria, it will define as the entire organization. Otherwise, we can choose some criteria for which projects to apply this to. This can be the project description, id or name.
- Project – We choose this to apply to a single project by name.
- Criteria – Here we can set one or several criteria that must be met for this policy to apply. We can set this to only apply when CPU count requested is over a certain number, like 8 as shown here.

- Approval Level – We can setup multiple levels if needed. Perhaps with 8 CPU as the criteria, we require approval from the manager, but at 16 CPU we require the approval of a senior manager. We would have 2 separate policies created with different levels to accomplish this. The lower numbered approval level applies first. If a machine exceeds 16 CPU, policy level 1 applies, then once approved, it goes to level 2 to be approved.
- Approval Type – We can choose to specify individual users as approvers like a manager or the project team. We can also choose a role of AD Manager, Project Administrator or Project Supervisor.
- Approvers / Approval Role – based on the above selection of either User based or Role based, we must add at least one approver.
- Approver mode – We choose whether “Any” or “All” the approvers must approve before approval is granted.
- Auto Expiry Decision – If no approver has approved or rejected the request, this will be the default action to take. We choose either Approve or Reject.
- Auto Expiry Trigger – We can set how long in days the approval waits before the auto expiry decision is taken.
- Actions – We can specify the actions that this pertains to. There are over 130 options to choose from. In the below example, we have specified all the destructive actions for vSphere-based machines. If anyone from the assigned project attempts to do any of these actions, it must be approved before the action is executed.
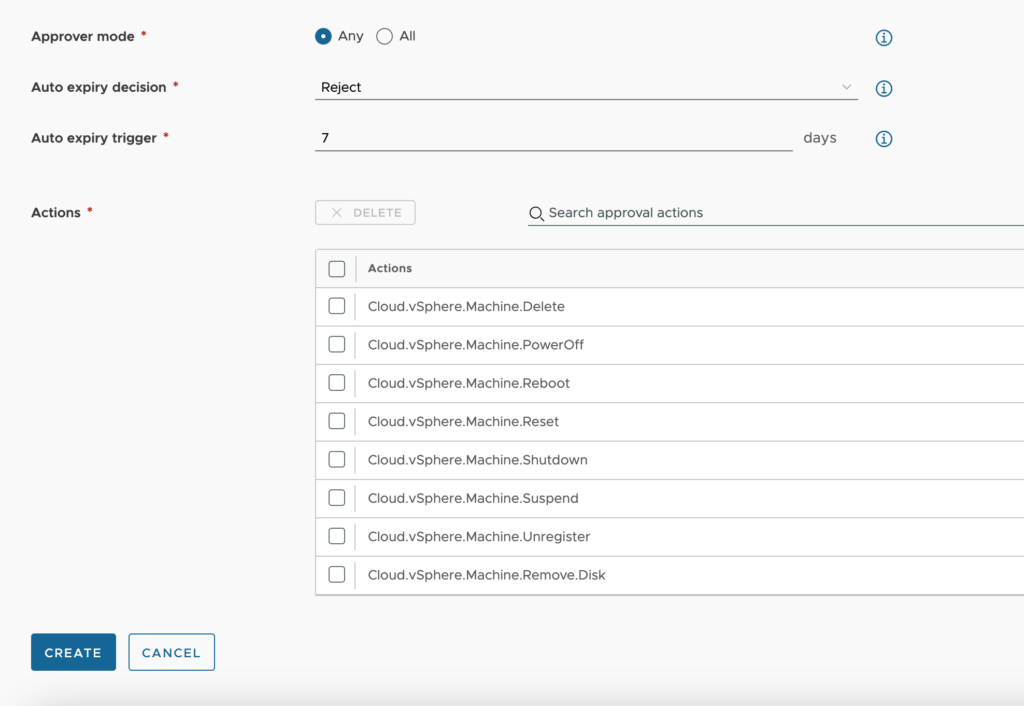
Once we have completed the configuration for this approval, we click Create. We can continue setting up additional policies as needed.
Day 2 Actions Policy
If we plan to allow users to manage their deployments from vRealize Automation, we will need to entitle them to their required actions. One that I always setup is a policy allowing Administrators all Day 2 Actions. Let’s walk through that one and discuss the options.
Configuration:
- Name – We provide a name that describes in short what this policy is for.
- Description – We can use this field to provide any needed additional information about what this policy includes.
- Scope – We choose one of the following options.
- Organizations / Multiple Project – If we select this radio button while defining additional criteria, it will define as the entire organization. Otherwise, we can choose some criteria for which projects to apply this to. This can be the project description, id or name.
- Project – We choose this to apply to a single project by name.
- Criteria – Here we can set one or several criteria that must be met for this policy to apply. We can set this to only apply when the catalog item or Cloud Template equals a particular item.
- Enforcement Type – We can choose either hard or soft. Hard policies will override soft policies when criteria are met where both would apply.
- Entitlement Type – We choose between User Based or Role Based.
- User / Role – Based on the selected entitlement type, we either choose a set of users or the appropriate group to apply this policy to.
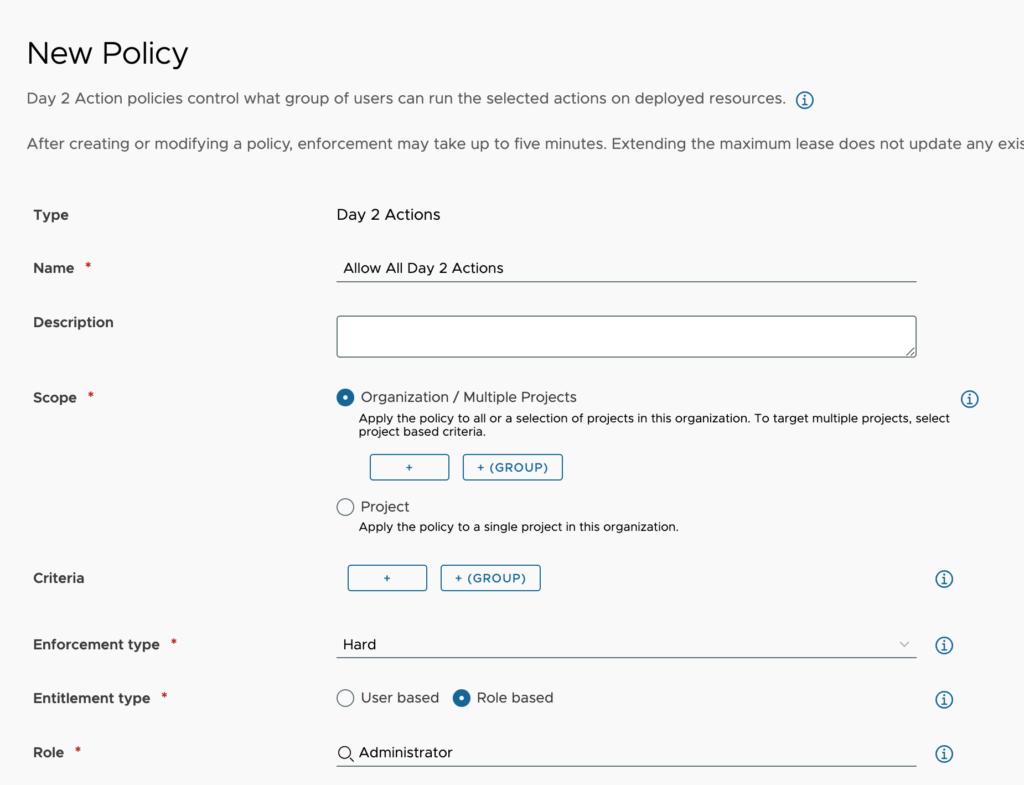
Actions – We can search for and select the desired actions to allow in this policy. An * means that all actions apply. There are several action groups that can be chosen which end in * as well. For example, Cloud.AWS.EC2.Instance.* means that you are granting access to all EC2 Instance actions.

Once complete, we click on Create. We can setup any additional Day 2 Policies that we need.
Content Sharing Policy
Content Sharing Policies are how we setup what users see in the catalog. If we do not have any Content Sharing policies defined, then no catalog items are available to users. To ensure that users can access specific catalog items, we must define the policies that entitle them to these catalog items. After we create or modify the policy, changes to users’ access to catalog items can take up to five minutes.
When a Cloud Template is listed as “Allow an administrator to share with any project in this organization”, the content can be added to other projects through Content Sharing Policies.
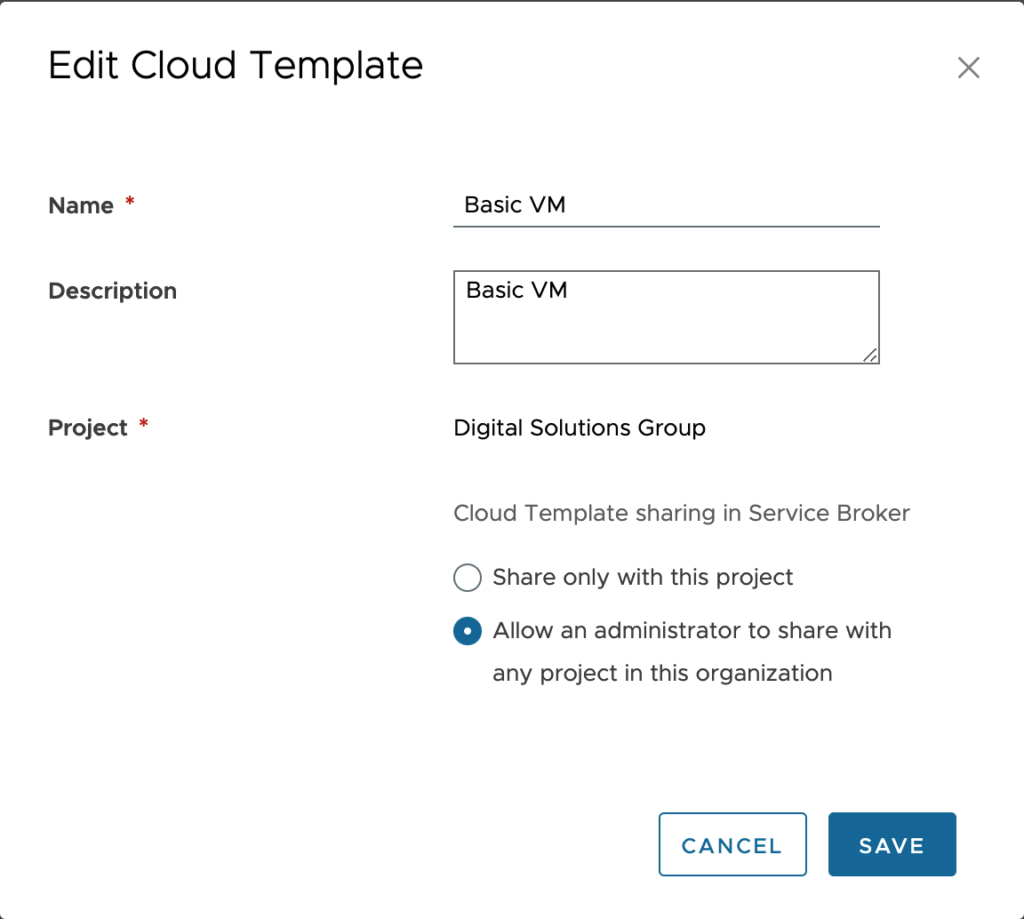
Let’s look at a configuration and talk through the options.
Configuration:
- Name – We provide a name that describes in short what this policy is for.
- Description – We can use this field to provide any needed additional information about what this policy includes.
- Scope – Here, we choose the project this applies to.
- Content Sharing – We click “Add Item” to select the content or content sources to share.
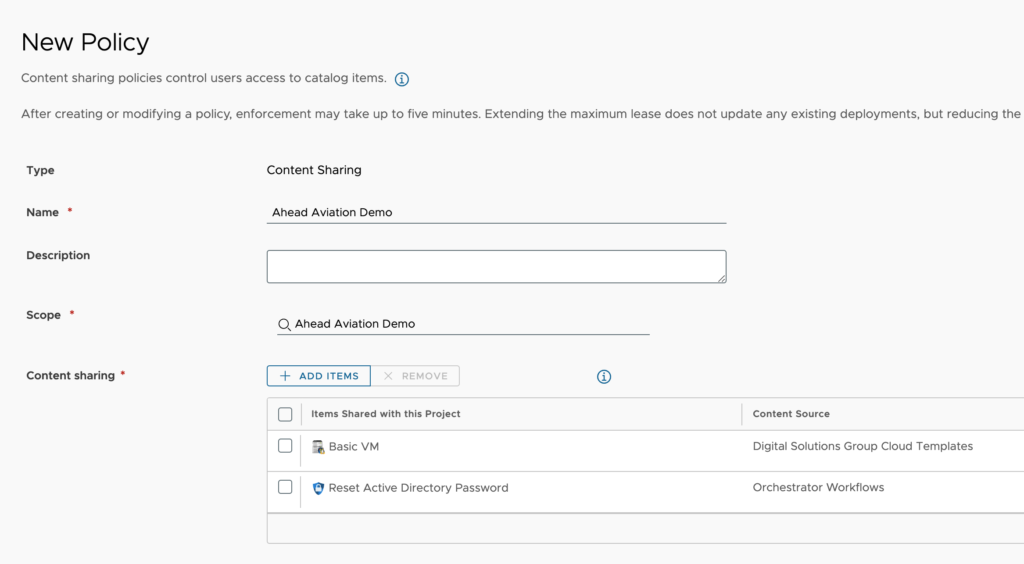
When sharing content in the policy, we can choose Content Sources or All Content.
Content Sources will share everything that is available from the content source. This is useful when new content is created and pulled into Service Broker as it will automatically be available to the users of the policy.
The “All Content” option allows us to select individual items to add to the policy. This may be the preferred way in many cases, as there will likely be a lot of content from content sources and not all needs to be available for a single group of users.
Once we are done adding our content in, we click Save and head back to the main policy page.

- Users – We have a couple options here. We can either share this content policy with all users and groups in the project selected in the scope of the policy or add users and groups individually.
Once we have completed the configuration of this policy, click Create.

Lease Policy
A lease policy defines how long the workloads are available. We can add policies for our entire organization or for an individual project.
When we create a policy, current workloads are evaluated and the policy is applied, if valid.
If we do not have any lease policies defined, none of our deployments expire. We must manually manage the cleanup of unused deployments.
Let’s look at a configuration and talk through the options.
Configuration:
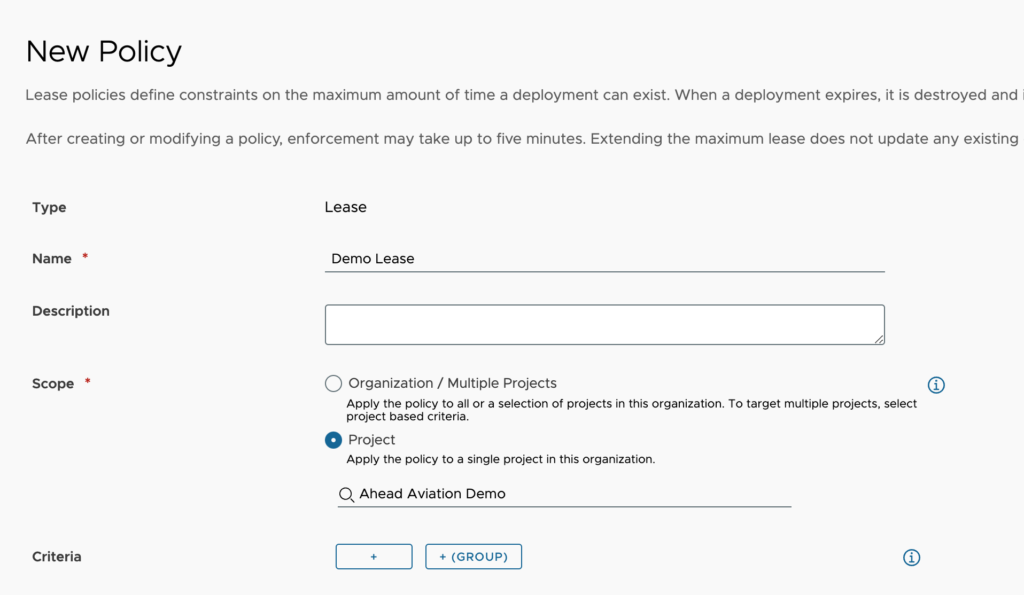
- Name – We provide a name that describes in short what this policy is for.
- Description – We can use this field to provide any needed additional information about what this policy includes.
- Scope – We choose one of the following options.
- Organizations / Multiple Project – If we select this radio button while defining additional criteria, it will define as the entire organization. Otherwise, we can choose some criteria for which projects to apply this to. This can be the project description, id or name.
- Project – We choose this to apply to a single project by name.
- Criteria – Here we can set one or several criteria that must be met for this policy to apply. For instance, we can set this to only apply when the catalog item or Cloud Template equals a particular item.
- Enforcement type – We can choose either hard or soft. Hard policies will override soft policies when criteria are met where both would apply.
- Maximum lease – The maximum number of days that a lease can be requested. A user can renew the lease for the same maximum duration up to the maximum total lease.
- Maximum total lease – The maximum lease duration including all renewals.
- Grace period – This is the period between the expiration and the deletion of the deployment. This allows a user time to renew the lease if needed.
Once everything is set the way we need it, we can click Create.

Deployment Limit Policy
Deployment Limit policies allow us to further control resource consumption by placing limits within a single deployment. We can set the maximum resources per deployment as well as resources per resource.
Let’s look at a configuration and talk through the options.
Configuration:
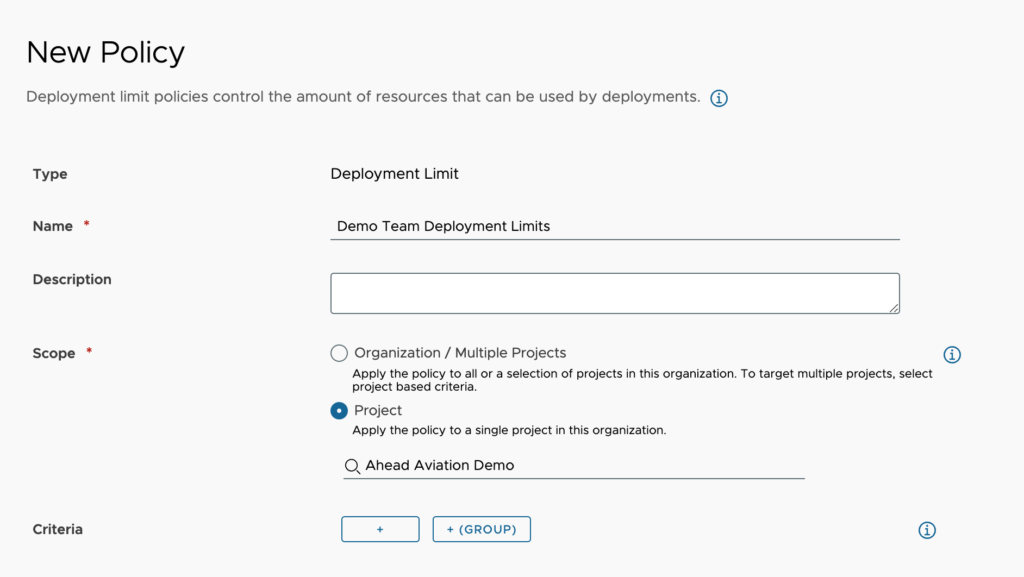
- Name – We provide a name that describes in short what this policy is for.
- Description – We can use this field to provide any needed additional information about what this policy includes.
- Scope – We choose one of the following options.
- Organizations / Multiple Project – If we select this radio button while defining additional criteria, it will define as the entire organization. Otherwise, we can choose some criteria for which projects to apply this to. This can be the project description, id or name.
- Project – We choose this to apply to a single project by name.
- Criteria – Here we can set one or several criteria that must be met for this policy to apply. For instance, we can set this to only apply when the catalog item or Cloud Template equals a particular item.
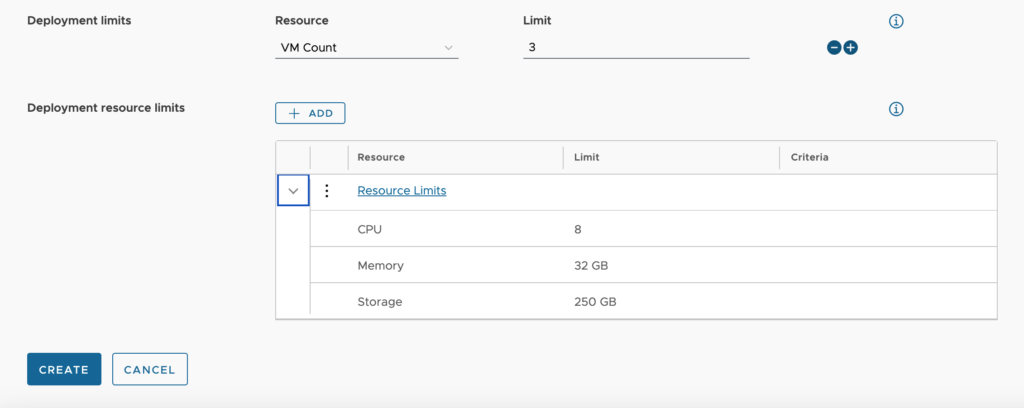
- Deployment limits – We can set the limitation(s) for the entire deployment. You can choose between CPU, VM Count, Memory and Storage. We may set one or all of these up, but only one of each is available.
- Deployment resource limits – This applies to a resource within the Deployment. For instance, a deployment may have multiple machines and even multiple additional disks. Each of these resources would be bound by these settings.
When adding a resource limit, we create a parent limit and assign potential criteria to be met. Perhaps we want to base it on a certain Cloud Template, or when deployed to a certain location like public cloud where costs may be higher. We can set up different configurations of criteria within the same Deployment Limit Policy.
Once done adding resource limits, we click Add.
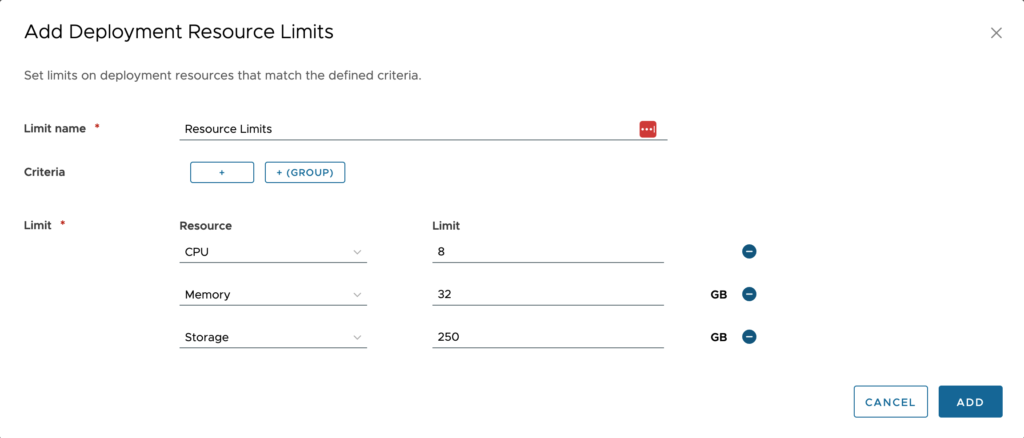
The above example sets that only 3 machines can be in a single deployment and that each one of them may not exceed 8 CPU, 32GB Memory and 250GB Storage. This is useful to limit requests from certain users when the Cloud Template allows for more resources than we want.



Leave A Reply