In vRealize Automation, secrets are how we store encrypted values. Let’s say we want to store a password that we can reference in a cloud template for joining a domain, or for remote access credentials. We set this up as a secret and call it as needed from anywhere. Or do we… Secrets got a little confusing for me at one time when I realized that there were ‘secrets’ in different areas. I discovered that there are secrets that are used in 3 different places, cloud templates, image mapping cloud configurations and Action Based eXtensibility (ABX) actions. I will cover all these options here but remember that these do not overlap and are maintained separately.
Infrastructure Secrets
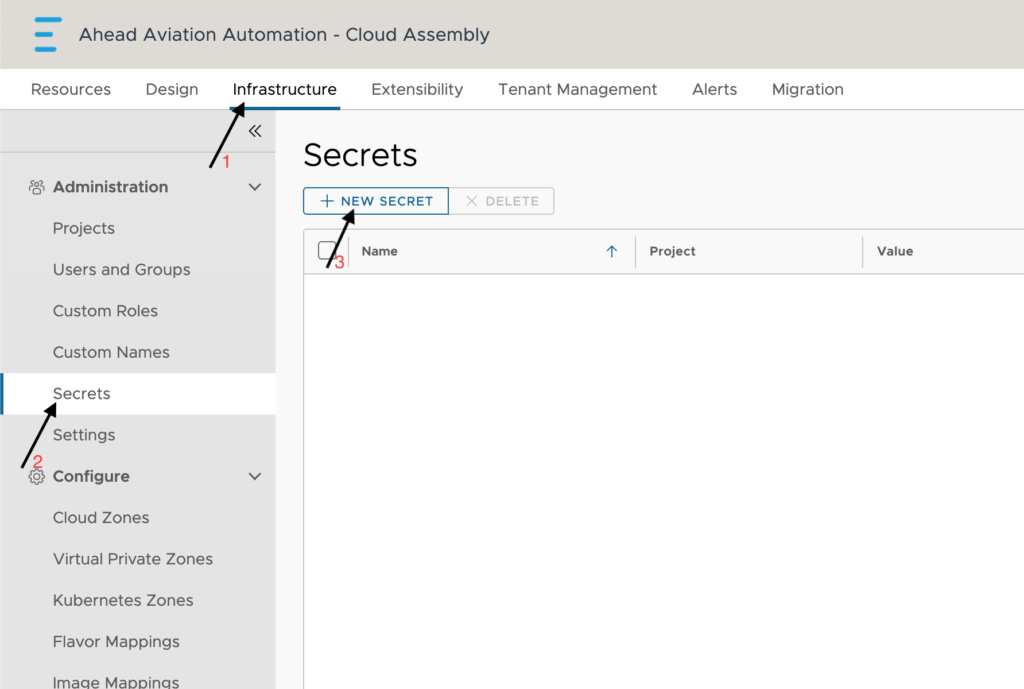
I am not sure that these are truly referenced as Infrastructure Secrets, but they are located in Infrastructure > Secrets as shown below and are regularly referenced in cloud templates.
Let’s create a secret for remote access purposes. Go ahead and click on New Secret.
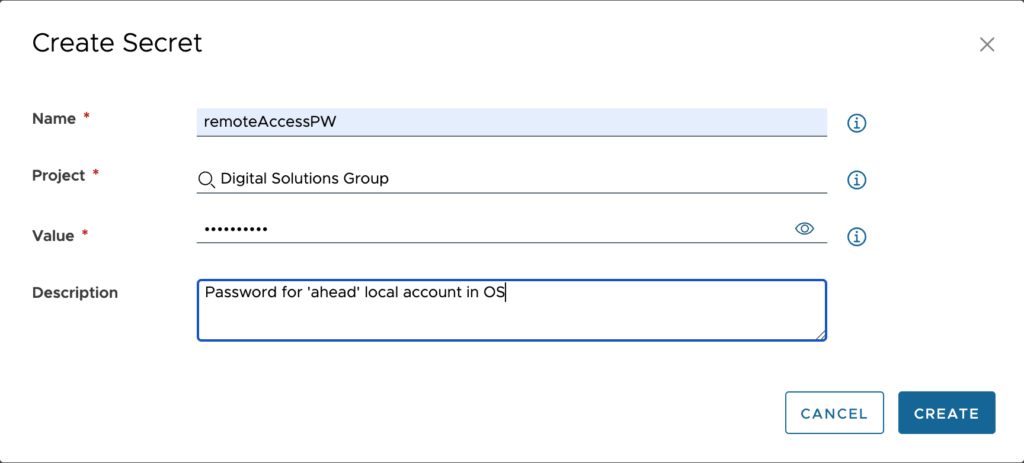
Configuration:
- Name – Supply a name that defines the purpose and is easy to understand as this will be referenced in the cloud templates.
- Project – Select the project that this belongs to. In my case, since this is the password for a local account in the images no matter which project it is, I will have to setup a secret for each project. I can supply the same name for each of them which helps maintain the code used within the cloud templates.
- Value – This is where we type in the password or other string value to be encrypted.
- Description – supply a description for what is encrypted if you want. This can help you determine what it is really for, but if you find having notes is a security risk, feel free to leave this blank.
Click Create once you are done.
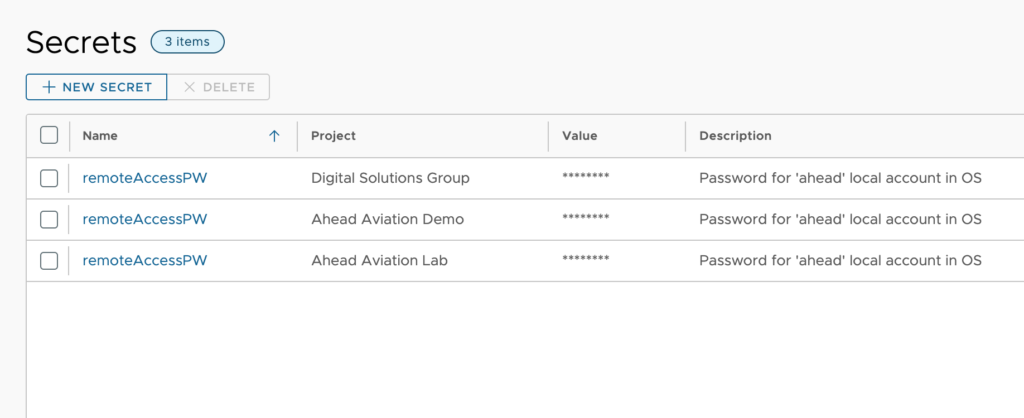
Here we can see all the remoteAccessPW secrets I created for different projects. When a user from any of these projects makes a request for a server that uses my cloud template, they will have their value passed in.
Let’s peek at the cloud template code that utilizes this secret so we can see how we make the reference. We can reference the secret by simply using ${secret.<name of secret>}.
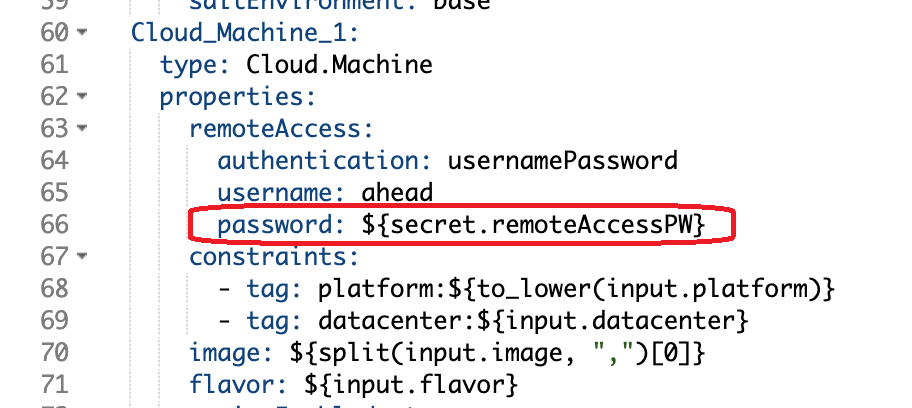
Image Mapping Cloud Configuration Secrets
Unfortunately, we are not able to use infrastructure secrets in the image mapping cloud configurations. Personally, I am not a fan of how this is working currently, but it is what we must work with. Let’s look at setting up a domain join command in Cloud Configuration that uses a secret.
First, we will open one of our Windows OS image mappings and click Add or Edit if you are modifying an already existing Cloud Configuration.

You will key in what you want to encrypt into a secret in the following format as shown below, ((sensitive:<stringToSecure>)). Once you have finished with your entry, click Save.
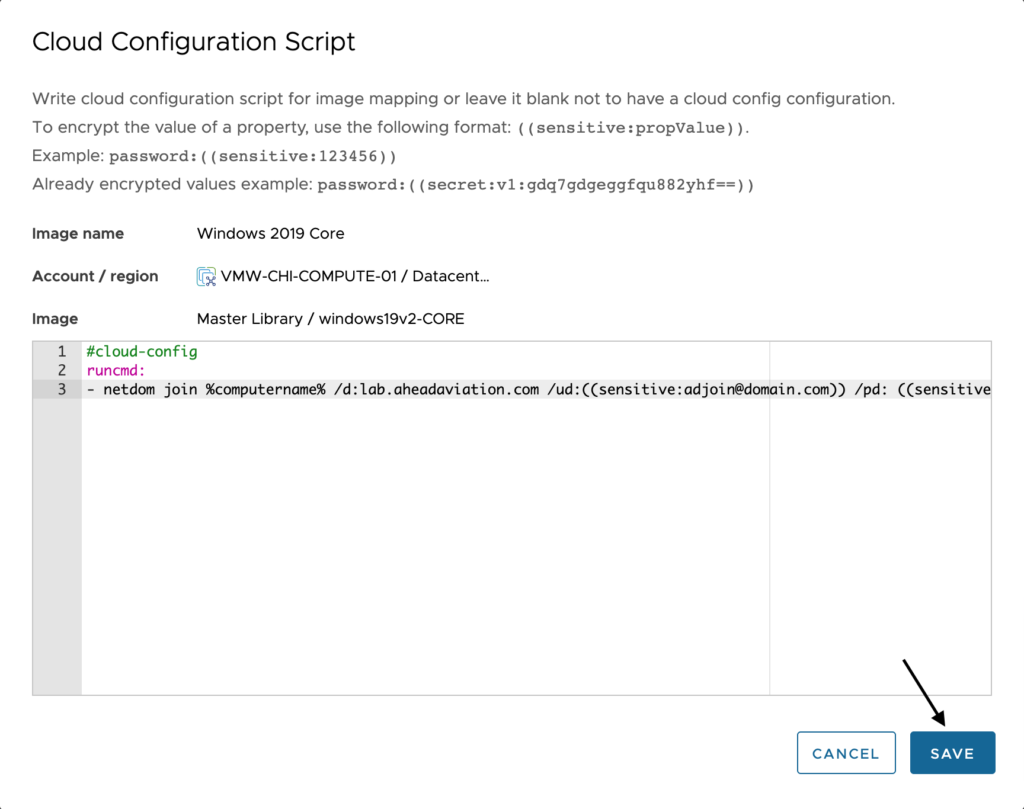
Click Save again on the main image mapping window. This encrypts the data.

If we go back into the cloud configuration, you will see that where you had entered ((sensitive:<stringToSecure>)) is now ((secret:v1:<encryptedString>)). This new secret can be copied and use across any image mapping within this vRealize Automation environment. This secret is not able to be used in another vRealize Automation environment.

Action Based eXtensibility (ABX) Actions Secrets
Creating ABX Secrets is straight forward, but these are actually called Action Constants. Action Constants are created and stored at a global level, meaning they are not project specific like we saw with infrastructure secrets. However, the ABX actions themselves are project specific therefore you are still required to create multiple actions for the same purpose when the action applies to more than 1 project. I’ll show this here in just a moment.
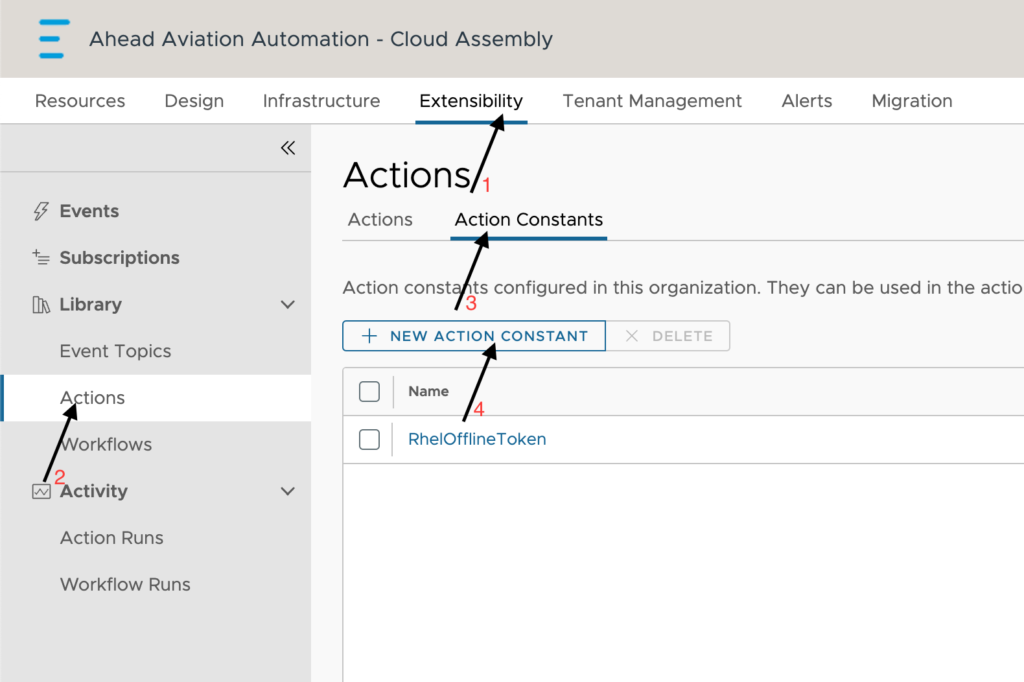
Let’s go ahead and create an action constant. Click on Extensibility > Actions > Action Constants and then click New Action Constant.
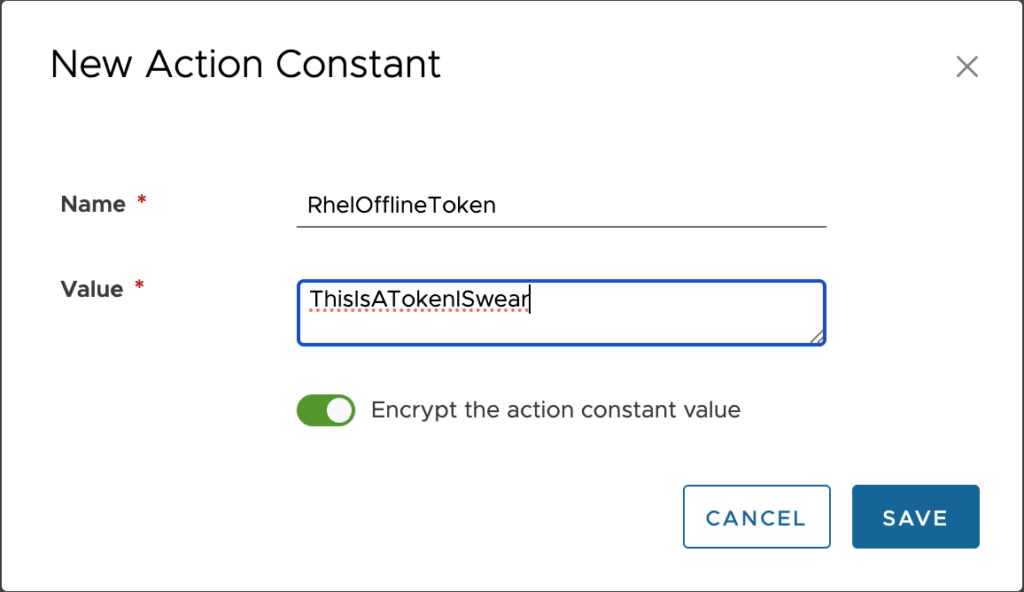
Give your action constant a name and supply the value. This is only encrypted if you have the toggle bar turned to encrypted as shown here. Once you are done, click Save.
Now we should see our new action constant saved and the value is hidden with *****.

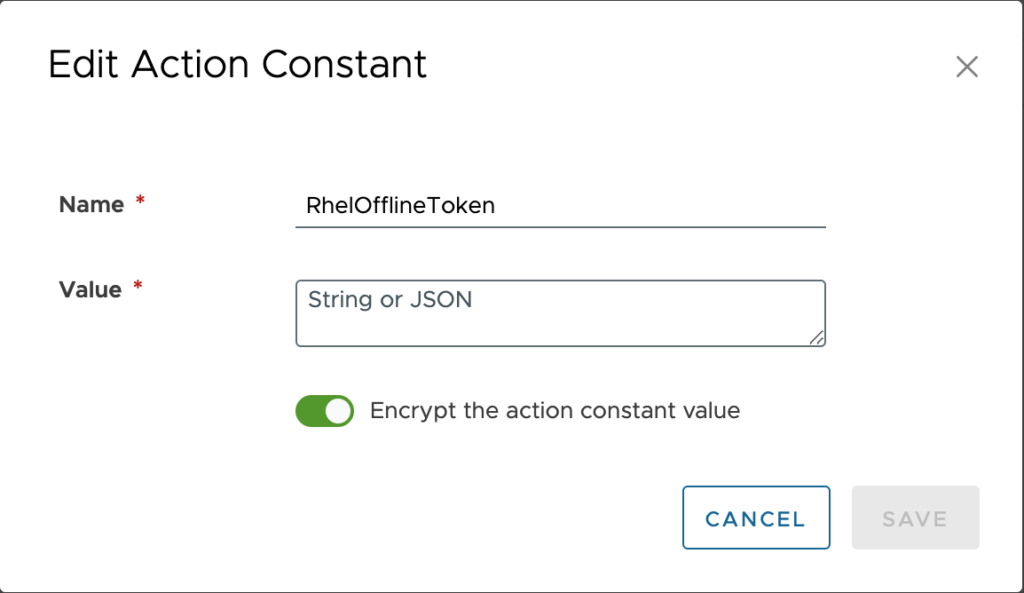
If we go back into the action secret, we are shown an empty value box as if there was nothing there. You can input a new value in here to overwrite the existing value.
Here we can see where we have created 3 separate ABX actions, one for each project. Let’s go ahead and open one up and see how we are using this action constant.

If you scroll down on the right side of the ABX action window, to the Default inputs section, we have added the Action constant and searched for the token we created earlier.

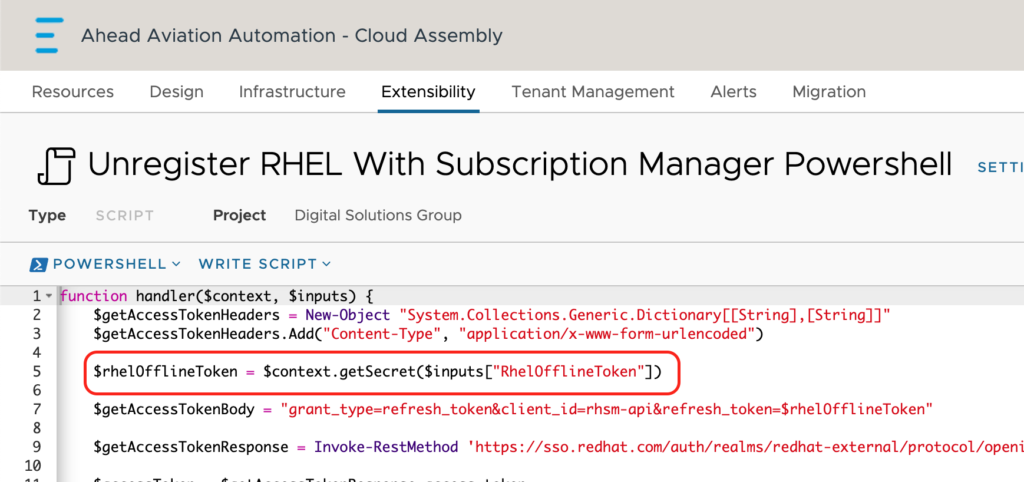
On the left side with all our code, we reference the getSecret function within the context to pull the value from the input and store this as a variable within our code. From here we can reference this anywhere in this script.



Leave A Reply