SaltStack Config is a tool that allows you to manage machine configurations, by installing and monitoring drift of the required software for a given machine. Whether using it to install monitoring agents across all machines or deploying database applications or full application stacks, SaltStack Config can help you accomplish these tasks.
First let’s look at the architecture of the platform. SaltStack Config sits on top of Salt Open Source. Salt Open Source is a command line tool where a Salt Master maintains configuration elements and applies them to Salt Minions. Salt minions are all the machines that are managed by Salt. SaltStack Config applies a graphical UI layer, adding in job scheduling, reporting, scalability and more to Salt Open Source.
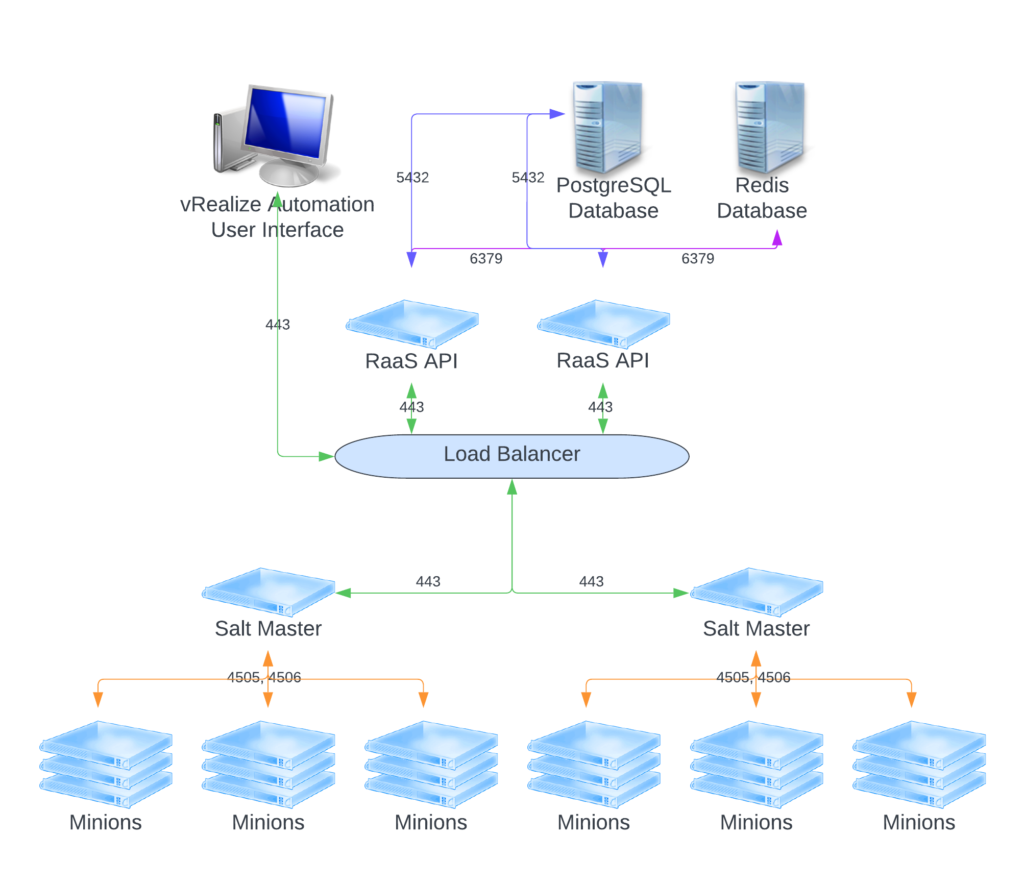
There are 3 different methods of setting up SaltStack Config: vRealize Suite Lifecycle Manager, SaltStack Standard and VMware Cloud Services. We will discuss the vRealize Suite Lifecycle Manager install here.
With the installation of SaltStack Config from vRealize Suite Lifecycle Manager, we will be deploying all the above architecture within a single appliance, but all the components and functionality are still there.
NOTE: This method is currently not intended for production use. The purpose for this installation should be to test the waters of SaltStack Config in an environment where you plan to manage no more than 1000 minions.
SaltStack Config Deployment
NOTE: You will be deploying a new appliance during this process. You must have DNS A and PTR records setup for this server and it’s IP address before completing the deployment.
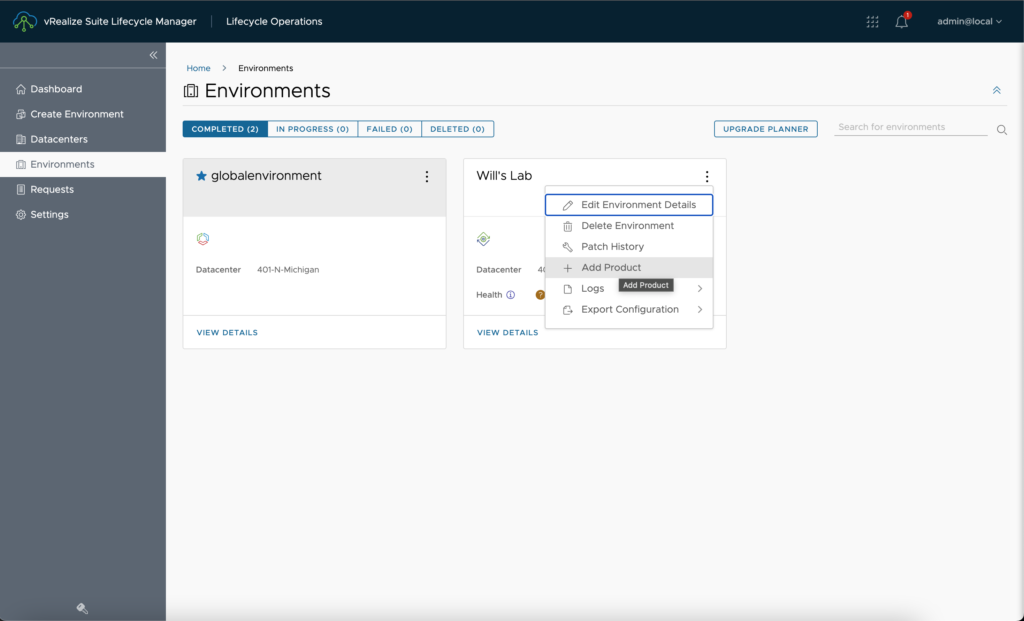
Let’s go ahead and login to vRealize Suite Lifecycle Manager and navigate our environments. Clicking on the 3 dots at the top of our vRealize Automation environment, I can click on Add Product as shown below.
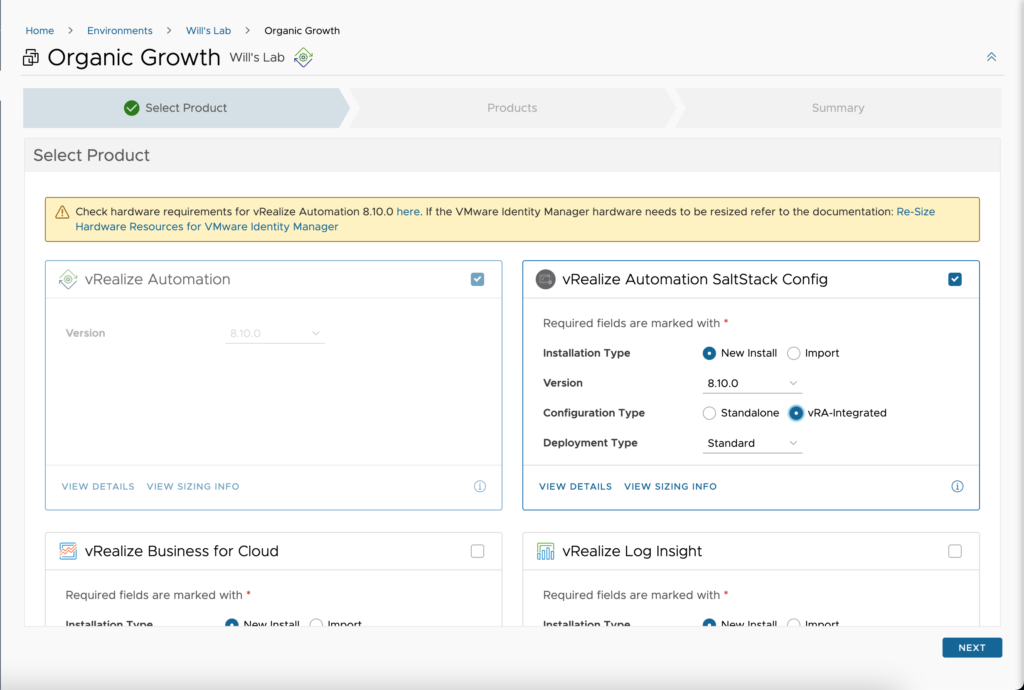
Now we will select the vRealize Automation SaltStack Config application and specify a few options here.
- Installation Type – a new install will be deploying a new SaltStack Config appliance whereas Import will pull and existing SaltStack Config into this Lifecycle Manager environment.
- Version – Select from any version that is supported in the currently installed Product Support Pack in Lifecycle Manager.
- Configuration Type – A standalone type is one which you deploy SaltStack Config without having it integrated with vRealize Automation. vRA-Integrated will go ahead and configure the master plugin to connect with vRealize Automation so that you can begin deploying and automating builds with SaltStack Config.
- Deployment Type – Standard is the only option we have here, so we can just move on.
Once you have completed this, just click Next at the bottom.
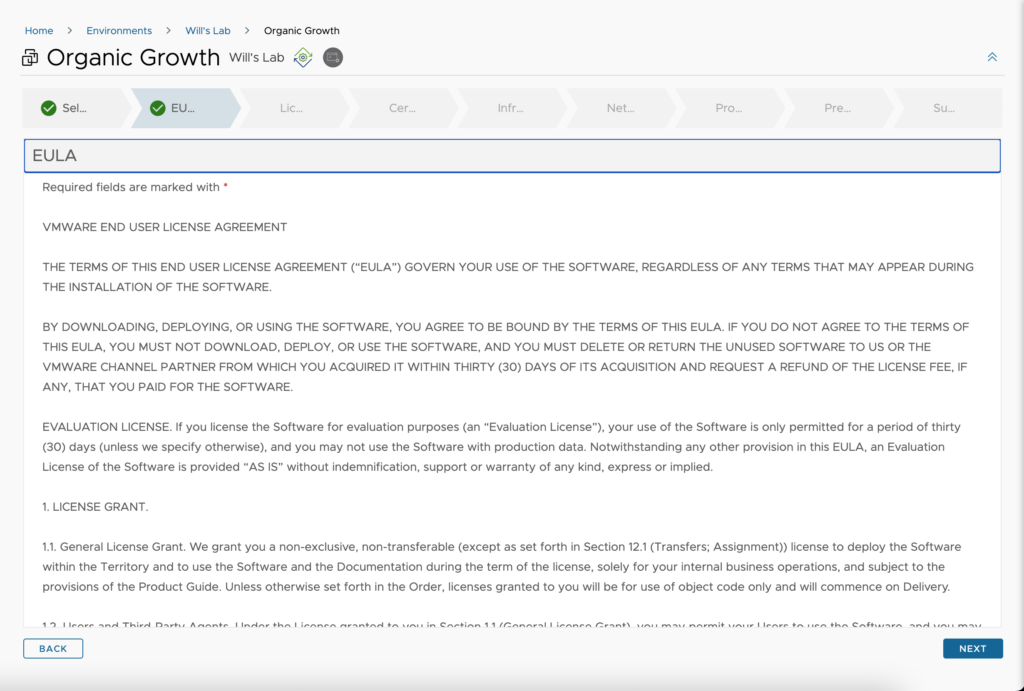
On the EULA page, just click Next.
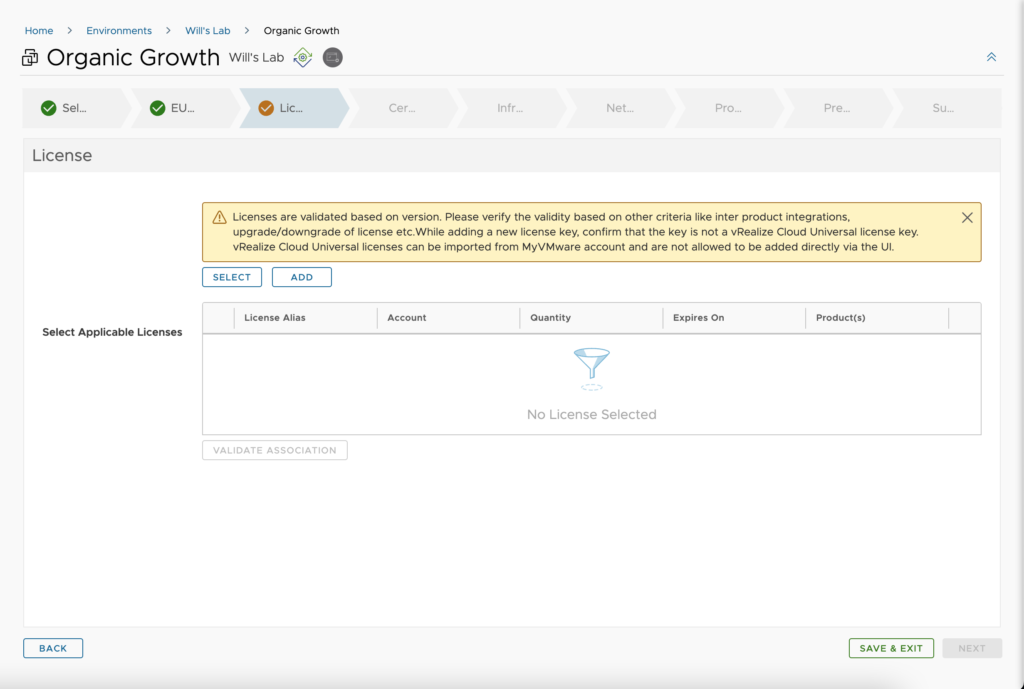
If you have your MyVMware account setup in Lifecycle Manager, you can click Select and choose from a discovered License key. If this has not been done, or you do not see the license key, you can click Add and supply the License alias and key, validate the key then add it to Lifecycle Manager.
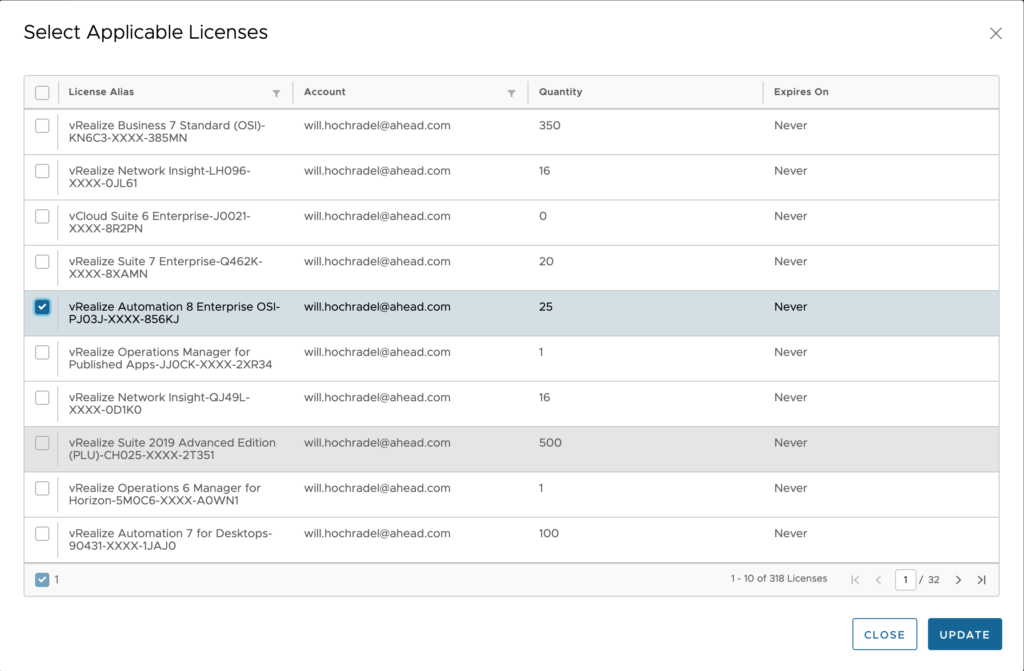
Select a license key from the list and click update.
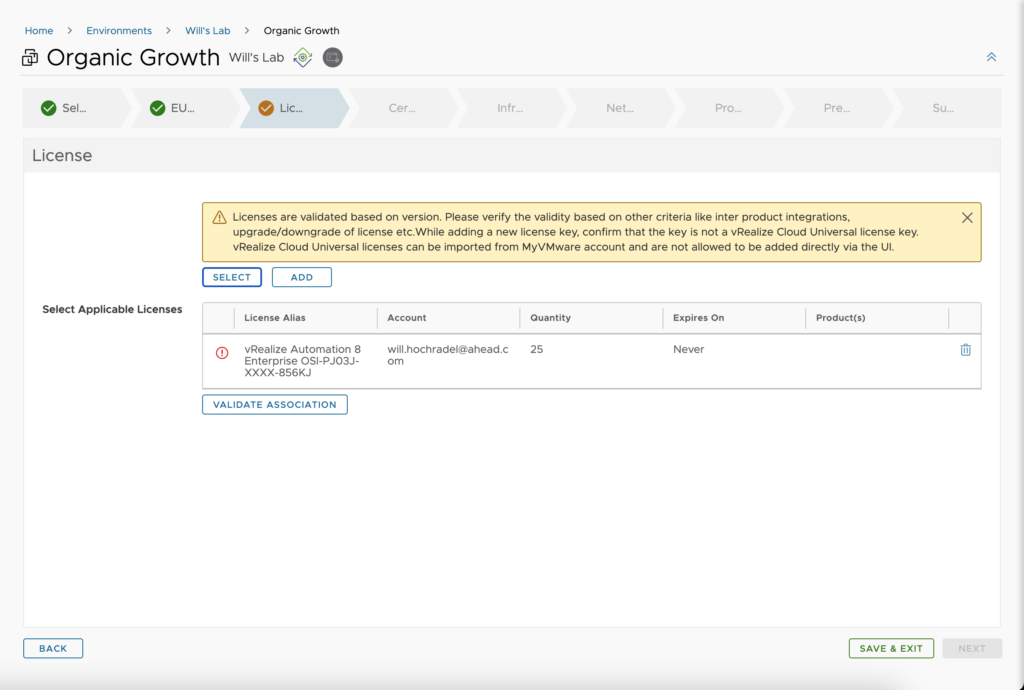
Now that we have a key listed in the box, we must validate before we can proceed. Click on Validate Association.
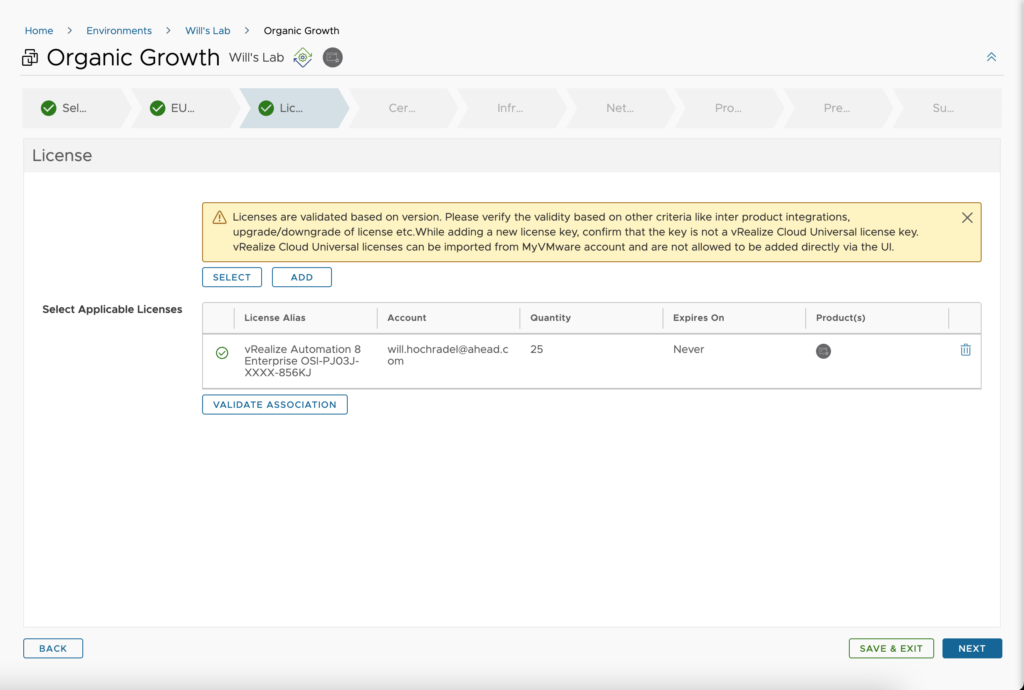
If validation is successful, you will now see a green checkmark next to the license. Click Next.
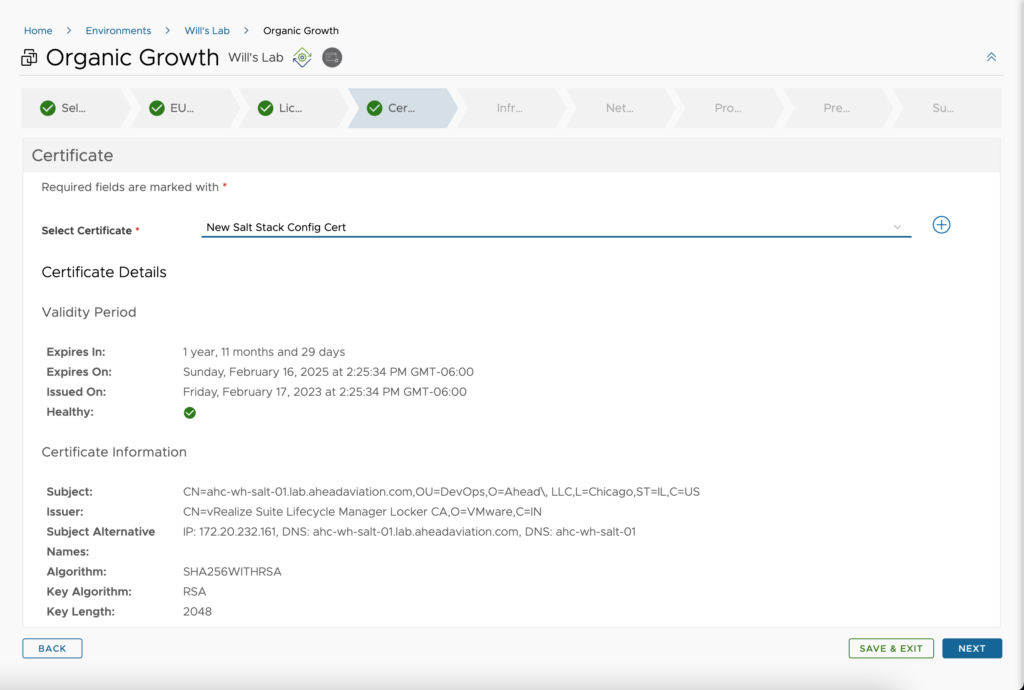
We need to assign an SSL certificate to SaltStack Config. If you already have an SSL certificate in Lifecycle Manager generated that you want to use for SaltStack Config, select it from the drop down, otherwise click the plus sign to create a new one. I already had one, so I have selected it from the list. Click Next.
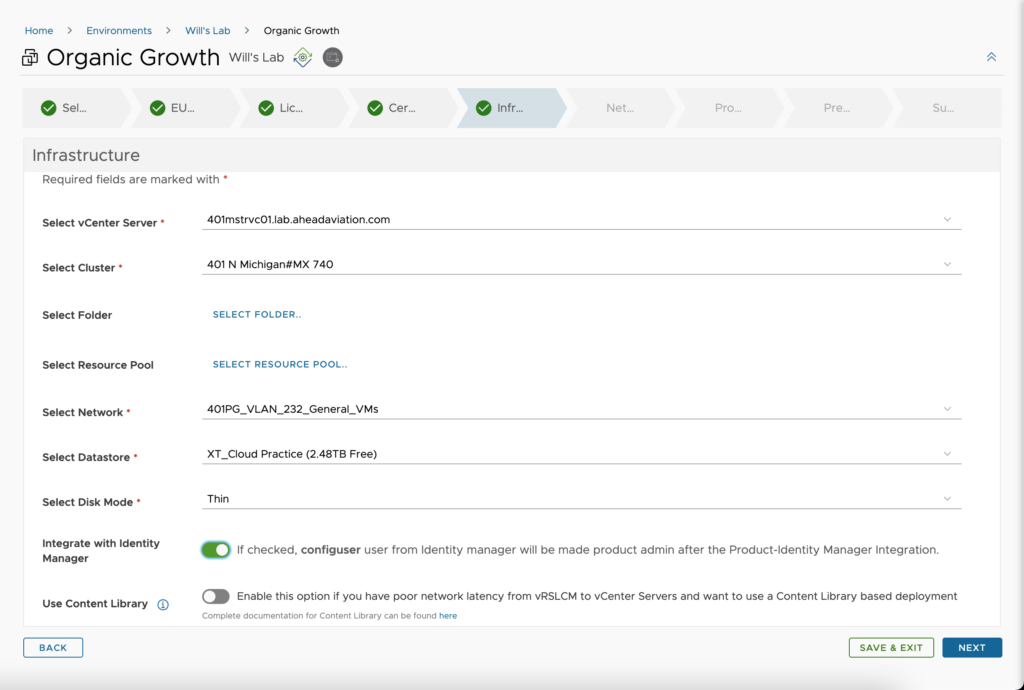
Now we need to select all our settings for the underlying infrastructure for SaltStack Config to be deployed to.
Configuration:
- Select vCenter Server – Choose the vCenter where you will be deploying the SaltStack Config appliance.
- Select Cluster – Choose the vSphere cluster to deploy the appliance to.
- Select Folder – Choose a virtual machine folder to deploy the appliance into. Not selecting anything will place the appliance at the root of the virtual datacenter.
- Select Resource Pool – Choose a resource pool to deploy the appliance to. Leaving this black with deploy into the cluster itself.
- Select Network – Choose the virtual machine network to connect the appliance to.
- Select Datastore – Choose the datastore or datastore cluster to deploy the appliance to.
- Select Disk Mode – Choose between Thin, Thick or Eager-zeroed Thick.
- Integrate with Identity Manager – When enabled, you can authenticate to SaltStack Config with credentials from Identity Manager, otherwise you will use local user accounts to authenticate.
- Use Content Library – You could select this and choose the appliance from the vCenter Content Library if you need to do this. This is only helpful if you are attempting to deploy across the WAN over slow links.
Once complete, click Next.
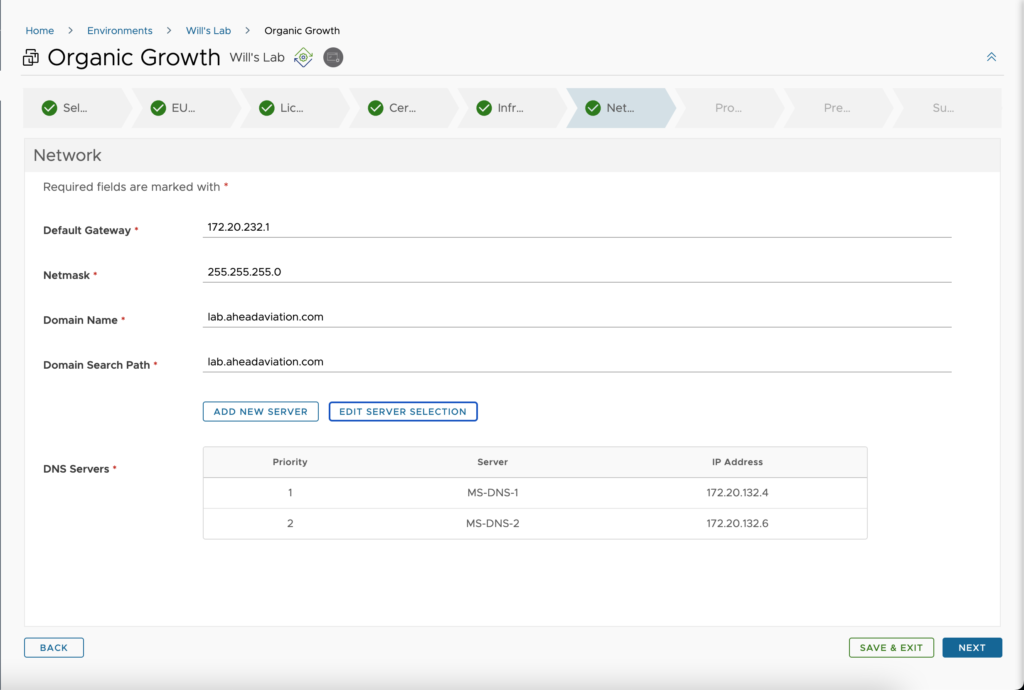
Next, we will be entering in all the information about the network we are deploying to.
Configuration:
- Default Gateway – This is the default gateway for the network you chose in the previous step.
- Netmask – The subnet mask for the network in X.X.X.X format
- Domain Name – The domain name the appliance will be a part of.
- Domain Search Path – These are the search suffixes that are to be applied when resolving short hostnames.
- DNS Servers – Edit the server list to allow selection of DNS that has already been configured within Lifecycle Manager. If what you need is not there, click Add New Server to create the needed DNS servers.
Once complete, we can click Next.
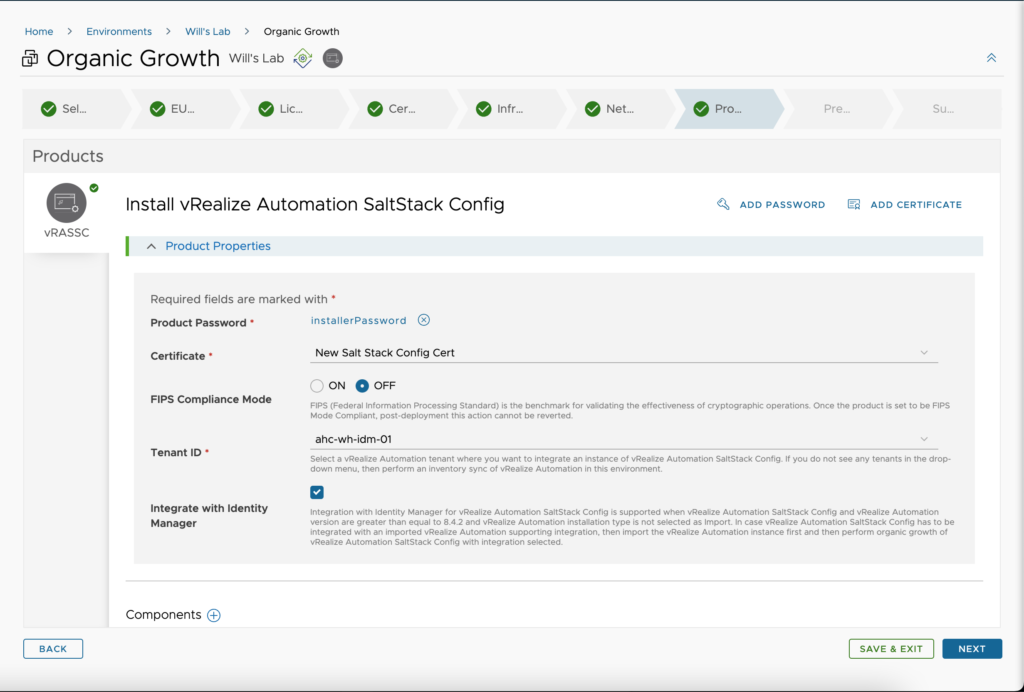
Now we will enter in all the information specific to the appliance itself.
Configuration:
- Product Password – Select from any password stored in your Lifecycle Manager locker.
- Certificate – Select the same certificate you chose 3 steps previously.
- FIPS Compliance Mode – Chose to either enable or disable FIPS compliance.
- Tenant ID – Because we chose the vRA-Integrated option earlier, we need to choose which vRealize Automation organization to deploy to.
Integrate with Identity Manager – Again, we need to check the box to specify whether we are integrating into Identity Manager for authentication purposes.
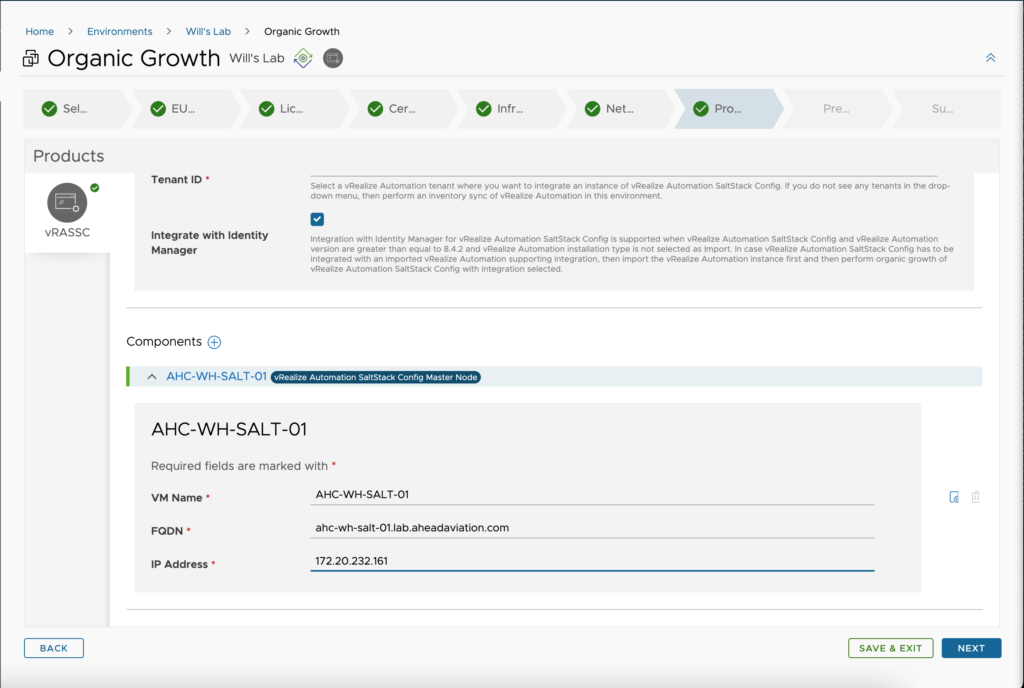
Scrolling down a bit, we have more to fill out for the appliance itself.
Configuration:
- VM Name – The name for the machine as seen in vCenter.
- FQDN – The fully qualified name of the appliance.
- IP Address – The IP Address you are assigning to the appliance.
Click Next when complete.
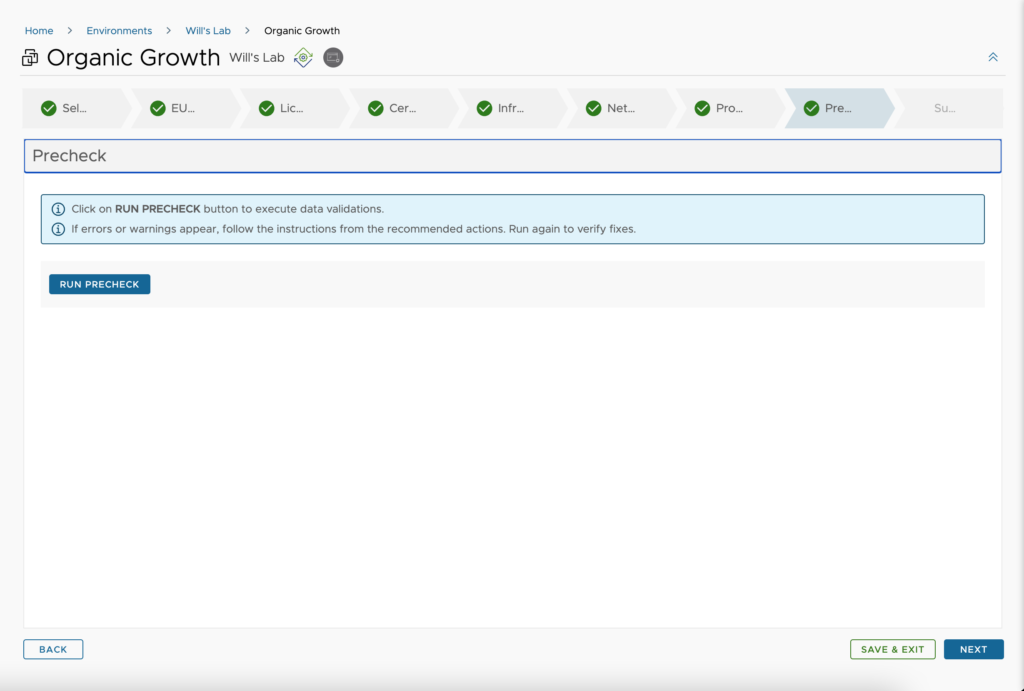
Click Run Precheck to run a series of test before we attempt deployment.
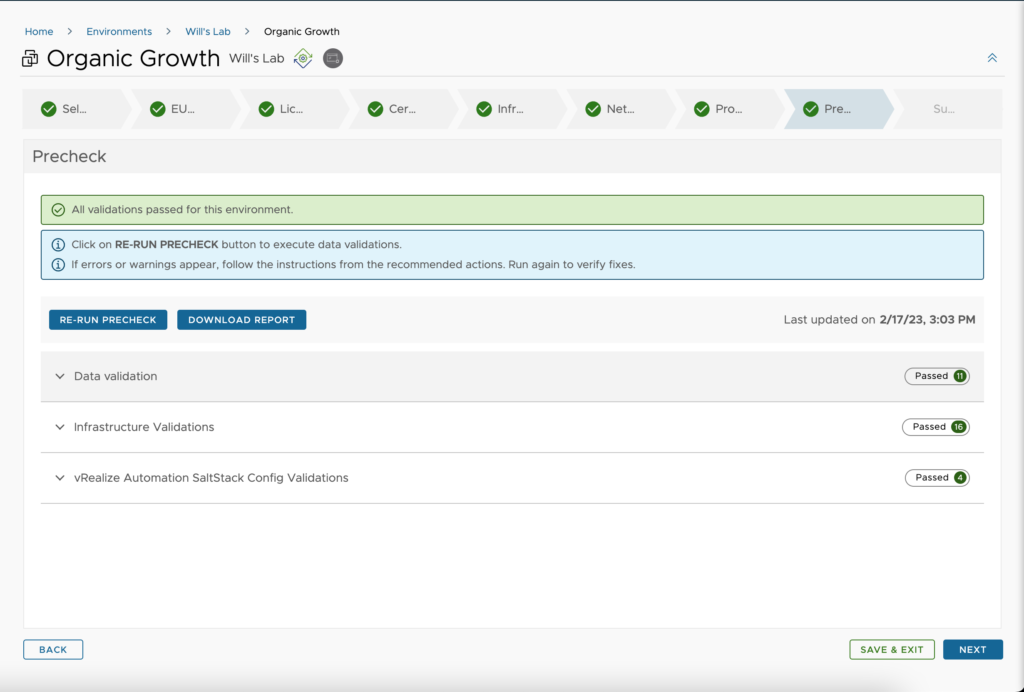
If all precheck tests are successful, it should look like the below image. You can expand each option to see the individual tests run or you can click to download the report. Once you are ready to review all your deployment details, click Next.
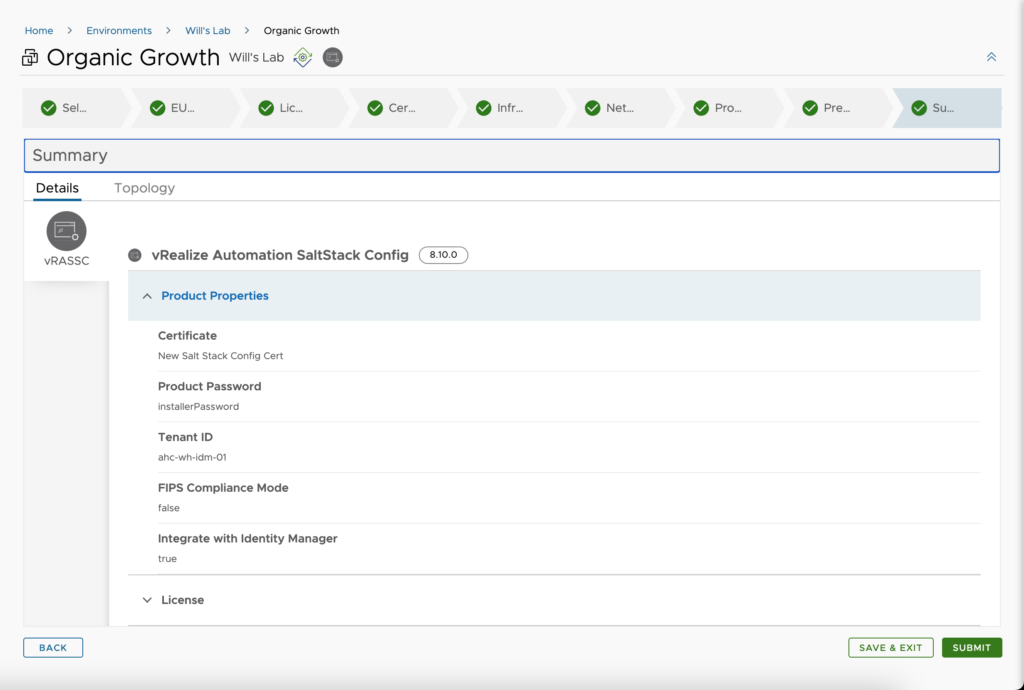
Review your deployment information and make sure everything is correct. Just because all tests we passed doesn’t mean that everything looks the way you need it to be, so look through it anyway. Click submit to begin the deployment.
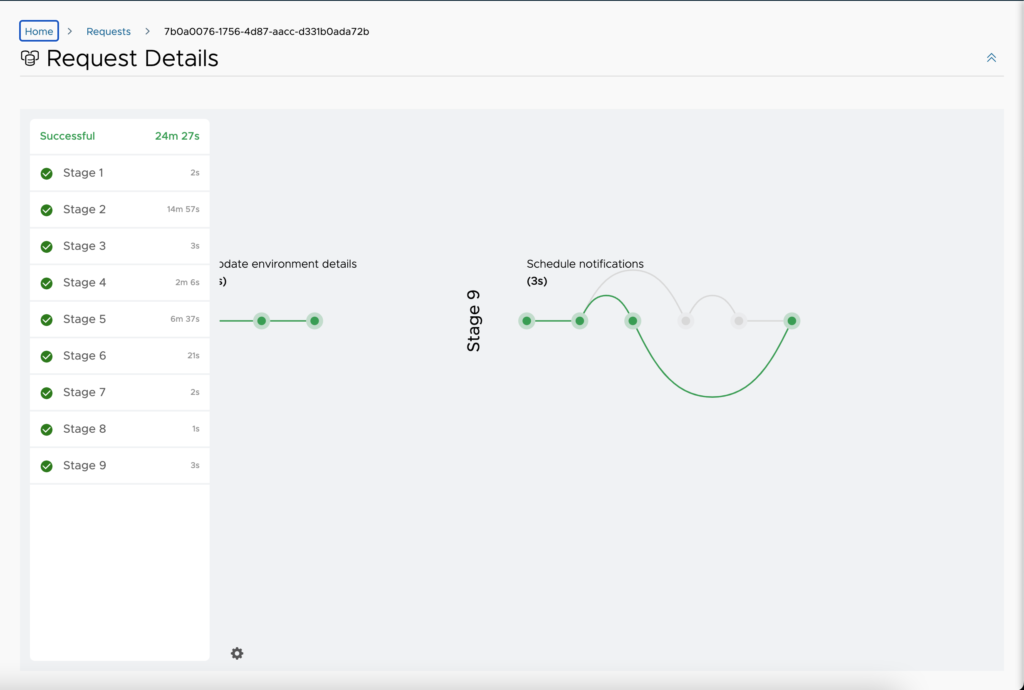
The deployment in my environment took just under 25 minutes to complete, so now is as good a time as any to go grab some coffee.



Leave A Reply