Projects are how we bring everything together and control consumption. We will setup users and groups access, resource availability, custom properties and custom naming. We will also be able to see specific integration configurations that are applied to the project. We are going to setup a project called Development Team. We will assign some basic resources to this project to get the team off the ground provisioning servers to do their job.
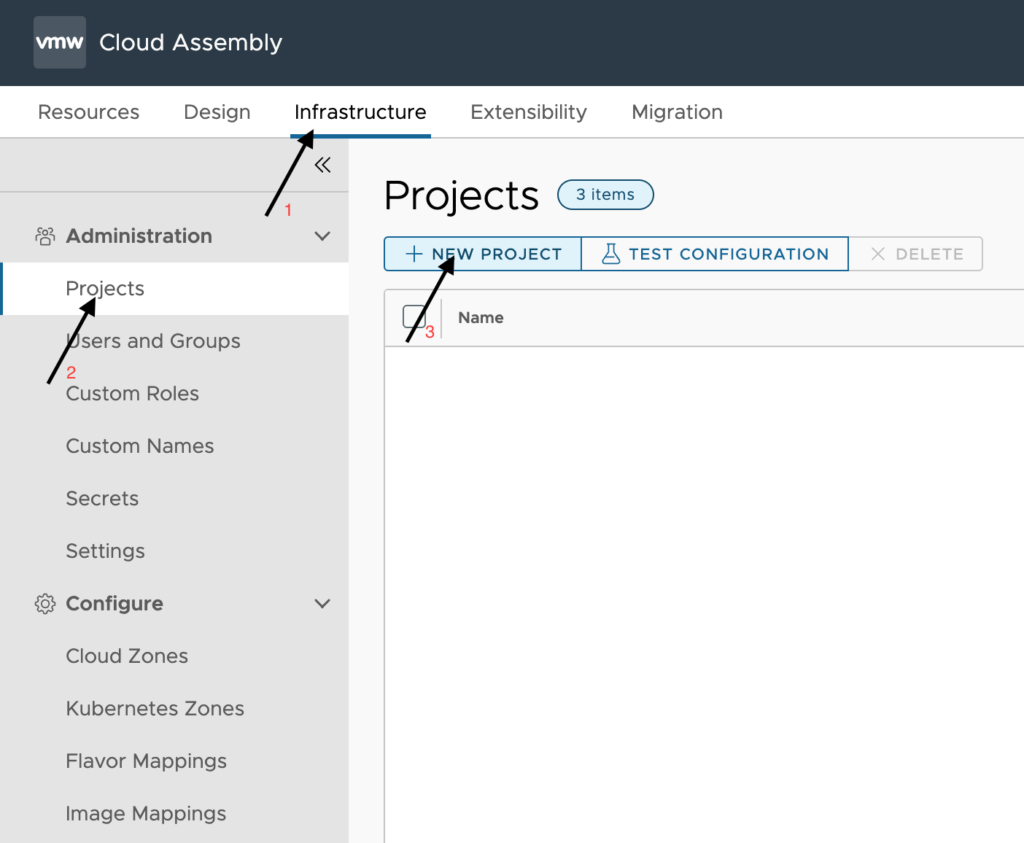
To begin configuring a project, click on Infrastructure > Projects > New Project as shown in the image.
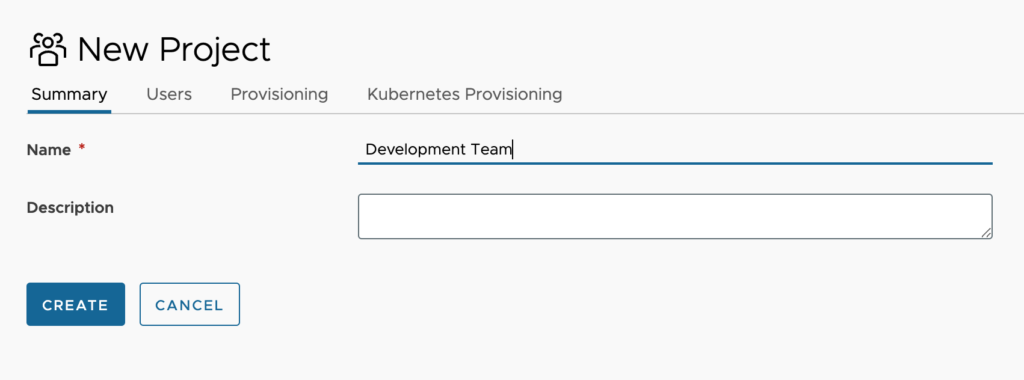
Supply the name and a basic description further signifying the projects purpose.
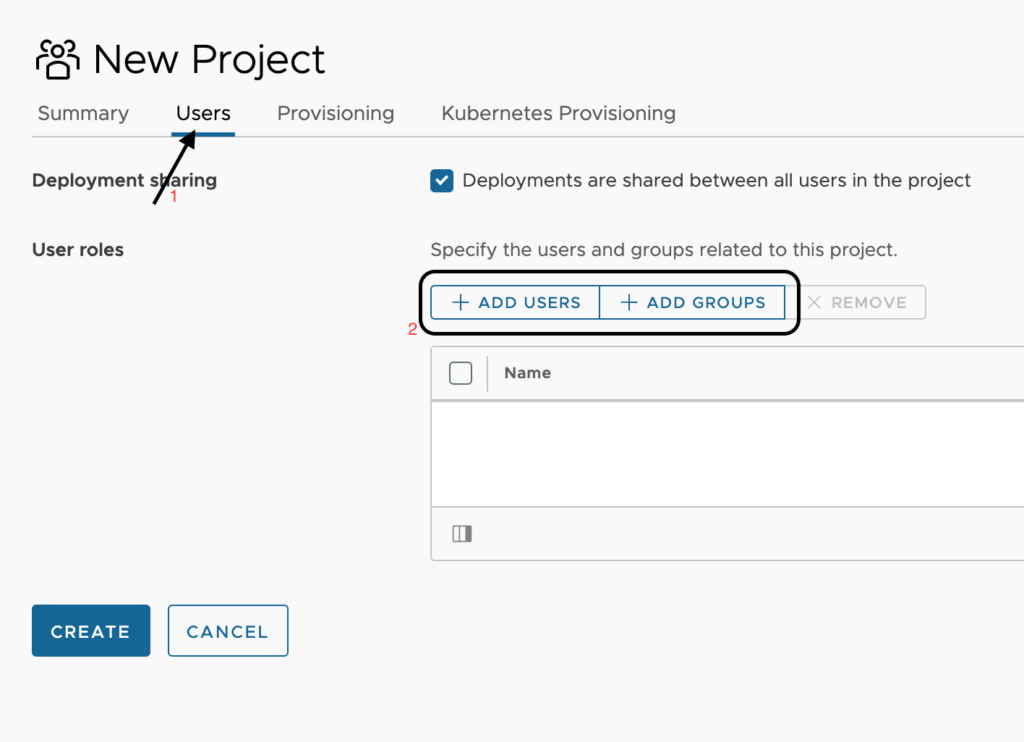
Click over to the Users tab and click to add user or groups.
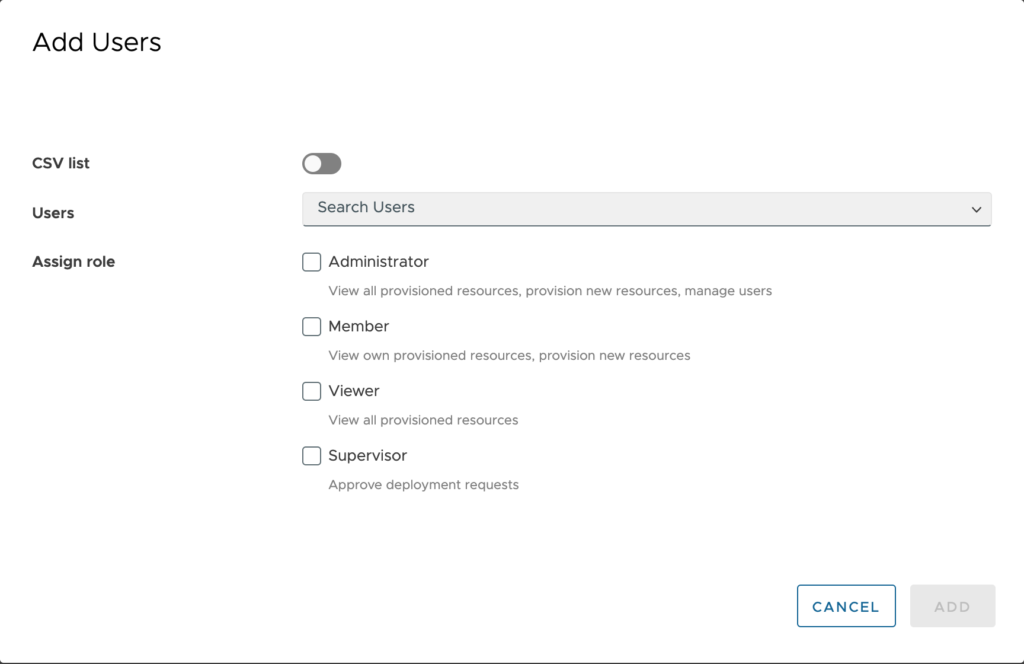
Here we see the Add Users window. The Add group window is the same except here we can use a CSV list to assign a role or roles to many users more easily. Whether using the CSV option or searching for multiple users, you will be assigning the same role or roles to all of them.
Let’s clarify, a bit more, the role permissions beyond what is noted underneath.
- Administrator – This is a project administrator. They will have full permissions within this project and this project only. This means they can deploy new systems, see all systems that belong to this project, approve new system requests for this project (when approvals are configured) as well as manage users and their role assignments within this project.
- Member – Here we take away the ability to manage users and deal with approvals, and a member can see only their deployments and request new ones.
- Viewer – A viewer can see all deployments in the project.
- Supervisor – This role only allows a user to approve requests for the project. They are not able to see any deployments or manage user or group roles.
Once you are done with assigning all users or groups for the specified role(s), click add. You can repeat this for additional assignments at any time.
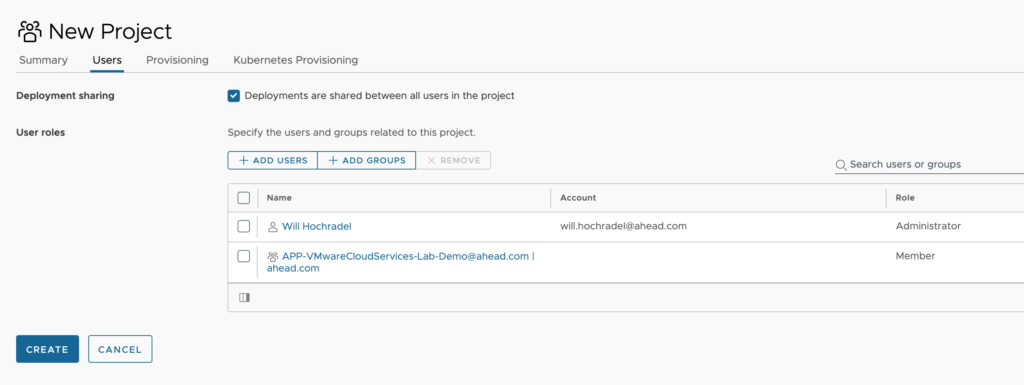
Here we can see a user and group account added and their assigned role(s)
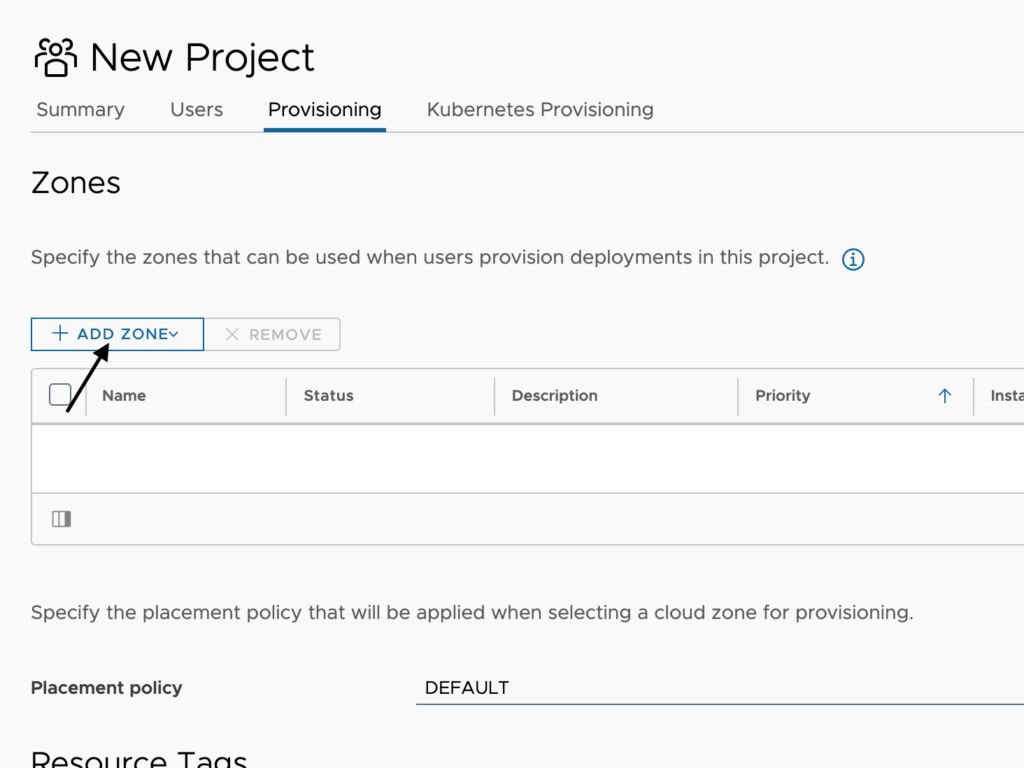
Click over to the Provisioning tab and then Add Zone as shown below to add a cloud zone or virtual private zone for this group to be able to provision to. Although virtual private zone is a selectable option here in VMware’s SaaS offering, virtual private zones are only configurable in the On-Prem version. We are going to select cloud zone.
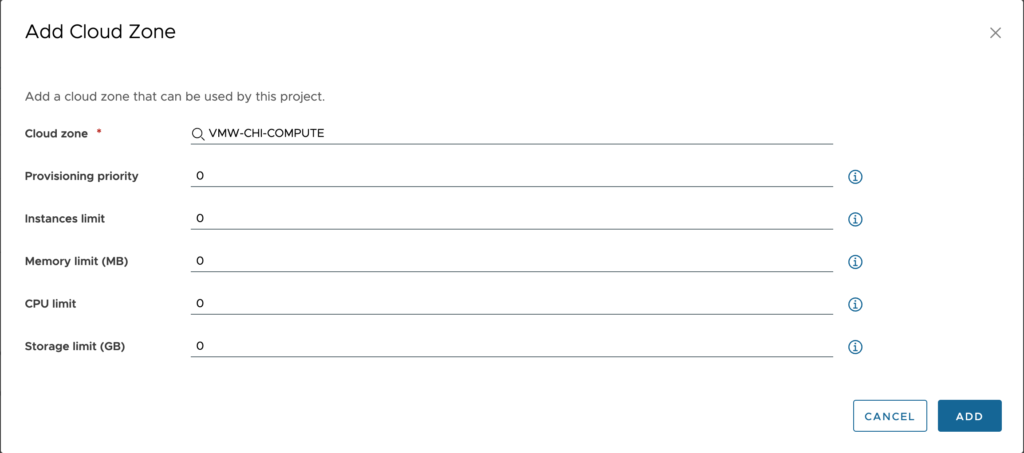
Here we will select which cloud zone to add and can set some limitations and a priority to this cloud zone. I will keep the defaults as shown which is leaving everything unlimited with the highest priority. Let’s dive into each option a bit to help explain.
Configuration:
- Cloud zone – Select from any cloud zone you have already created. Once a project has been assigned to a cloud zone, it is no longer available to select again within this project.
- Provisioning priority – The Priority value shows the precedence of this compute over another when there are matching criteria. Think of a race with 1st place, 2nd place and so on. Let’s say we have 2 clouds zones that are from 2 different vSphere cloud accounts. These would be for development purposes and have the same capability tags. Priority 0 means highest priority or first and the higher the number the lower the priority. Priority 0 is the default setting and if 2 or more matching cloud zones have the same priority for a given project, they will then round robin deployments between them. Otherwise, they will follow the lowest number starting at 0 for ordering.
- Instance limit – We can set a total number of machines that can be provisioned by this project to this cloud zone.
- Memory limit (MB) – This is the total amount of memory in MB that can be deployed by this project to this cloud zone. If the value is set to 0, memory is unlimited.
- CPU limit – This is the total number of virtual CPU’s that can be deployed by this. If the value is set to 0, CPU count is unlimited.
- Storage limit (GB) – This is the maximum amount of storage in GB that can be consumed from this cloud zone no matter what datastore, datastore cluster or cloud storage is selected. If the value is set to 0, storage is unlimited.
Once done filling out all your settings, click add.
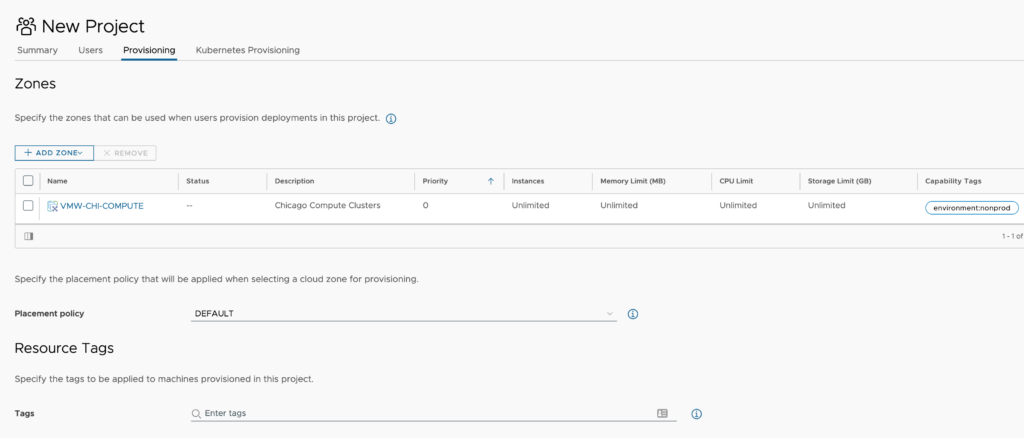
Back on the main Provisioning window, we can see all our priority and limitations setting which can help you to visualize how consumption will work for the members of this project.
Next, we need to finish the remaining pieces of setting up this project, starting with placement policy.
Placement Policy
There are three options we can choose from here.
- DEFAULT – Place compute resources on the first applicable host.
- SPREAD – Provisions compute resources, at a deployment level, to the cluster or host with the least number of virtual machines. For vCenter Server, Distributed Resource Scheduler (DRS) distributes the virtual machines across the hosts.
- SPREAD BY MEMORY – For public cloud, provisions compute resources, at a deployment level, to the cluster or host with the most amount of remaining free memory. This is the host/cluster with the least amount of allocated memory. For private cloud, provisions compute resources, at a deployment level, to the cluster or host with the smallest ratio of allocated memory to total memory. If all hosts/clusters are empty, the biggest one is prioritized.
Resource Tags
Resource tags are the tags that are applied to deployed machines. We can assign as many resource tags here that we need to apply to every machine deployed by this project. This is useful for tagging static tags like the project name, team lead or support group.
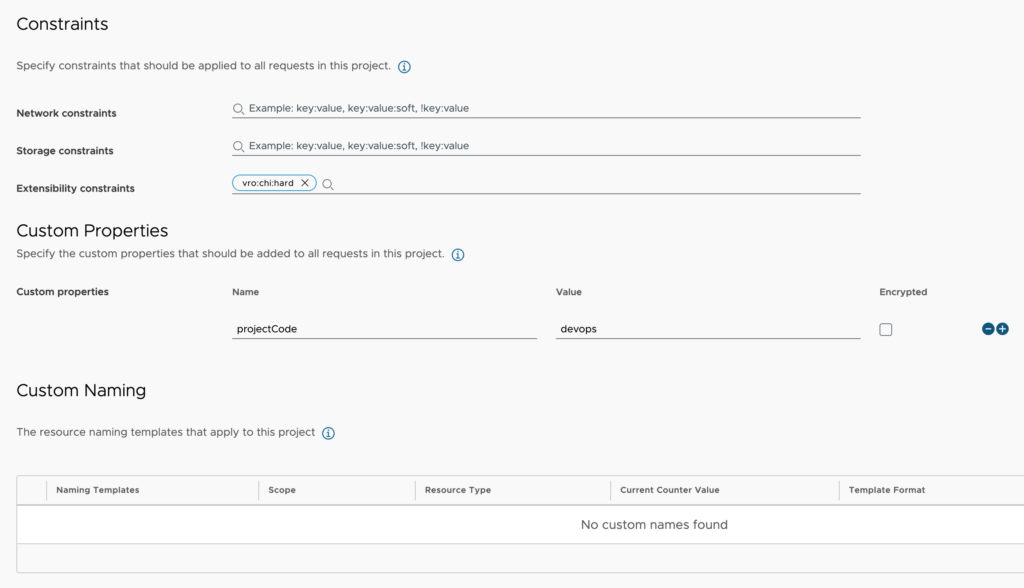
Constraints
These are the tags that target the resources available for use by referring to capability tags that are assigned to similar resources. Specifically, network constraints will match to networks and network profiles, storage constraints to storage and storage profiles and extensibility constraints to vRealize Orchestrator and Extensibility Action On-Prem integrations. All these resources can have capability tags and here, within the project, we can constrain our usage of these through constraint tags. Here you can see that I am setting a constraint tag for extensibility constraints. This limits me to only use vRealize Orchestrator and Extensibility Actions On-Prem integrations that have the matching capability tag.
Custom Properties
Custom properties are applied to resources and can be referenced dynamically in Cloud Templates as well as a part of the payload available from event subscriptions. Custom properties defined here are applied to all resources deployed which includes networking, storage and machines and can be used in Action Based Extensibility (ABX) or vRealize Orchestrator workflows.
Custom Naming
Your project can have a maximum of two template types. One organization-level naming template and all named resource types, and one project-level template with all named resource types. If you have naming templates for both the organization and the project scope, the project takes precedence over the organization. If no templates are defined, the deployments for this project use the system default naming. To learn more, check out my Custom Naming article.
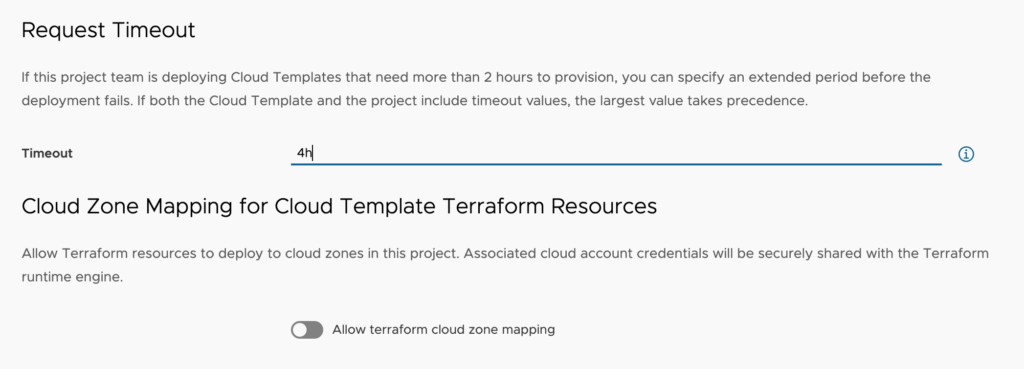
Timeout
By default a deployment is allowed to take 2 hours to complete. As you add more and more integrations and extensibility, the time to deploy can extend beyond this 2 hours. When this is the case you can expand the time here in seconds, minutes, hours or days (i.e. 1s, 1m, 1h, 1d).
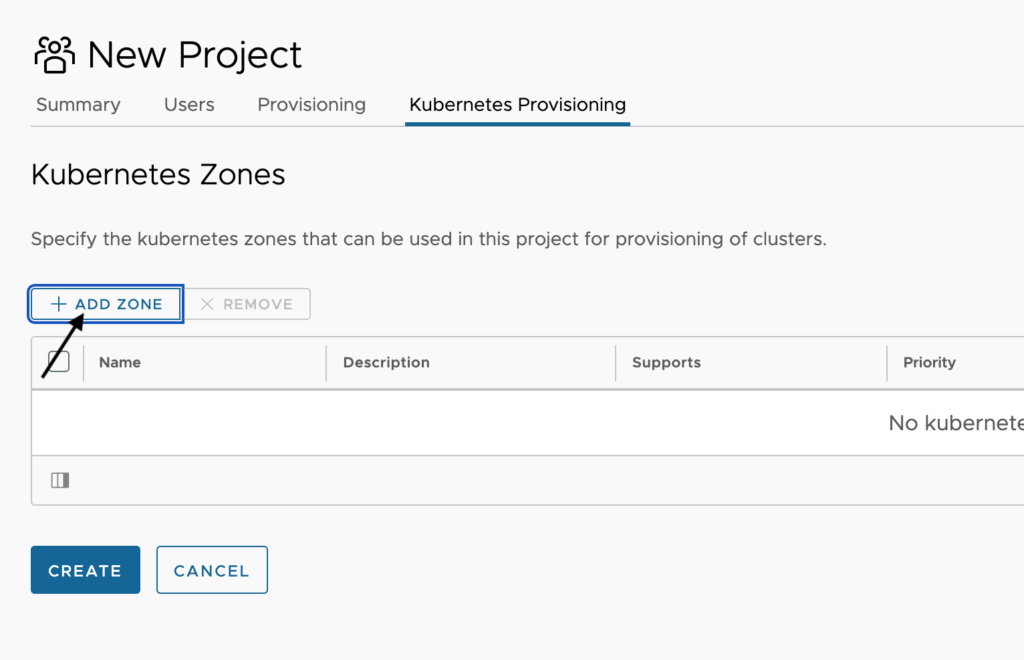
If you will be assigning Kubernetes Zones to this project, Click over to the Kubernetes Provisioning tab then Add Zone as shown below to add the Kubernetes Zone(s) to provision to.


Leave A Reply