Custom hostnaming is something we have all dealt with in our careers. Maybe you have a 50-page document that lays out the standards for a custom hostname structure, or perhaps you really don’t care what the machine name is if a CMDB knows everything about it. In cloud, do we care what the ‘location’ is anymore when we can move machines between regions or even clouds now?
Whatever your requirements are and wherever you may be heading in the future, vRealize Automation can accommodate in 1 of 4 ways. The first 2 are a bit similar and are the primary focus of this article. The other 2 are via the use of Action Based eXtensibility (ABX) actions and vRealize Orchestrator workflows. These last 2 options require a greater code writing skillset but provide a greater amount of function and validation capabilities.
The first 2 options I mentioned will be our focus from here. The On-Prem offering still provides you the ability to build easy custom naming structures on a per-project basis but in more recent versions you can enroll in a globally managed method. Keep note that once you enroll in the globally managed configuration, you cannot go back. The SaaS offering only allows using the globally managed method.
Per-Project Custom Naming
Handling custom naming per project means that each project has its own configuration and can use different naming schemes. Where there are pitfalls with this method, and my honest opinion why VMware added global configurations, is that if this is your method of naming, there is only one naming scheme that can be applied per project. So, if you have a different naming strategy for different domains, you need a separate project so that you can have different custom naming. Keep this in mind when determining which method to use going forward and remember, if you choose to enroll in globally managed custom naming, there is no going back (without backups).
To setup per-project custom naming, click on Infrastructure > Projects > <select project> as shown below.
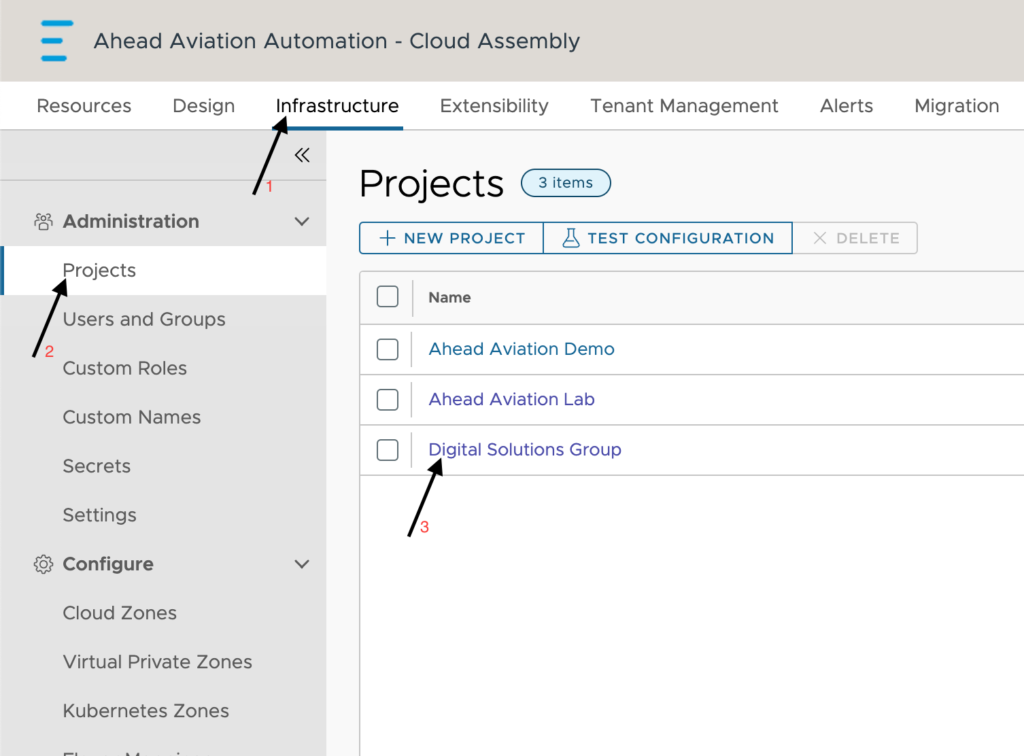
Once in the project you want to setup naming for, click on the Provisioning tab.

Scroll down to the Custom Naming section to setup your naming scheme. I am setting up something simple here to show the basic formatting.
Within ${} you will supply properties that exist from endpoints (cloud accounts), the resource itself, custom properties in the project etc. Anything that is specified outside of ${} will be literal, as you see my use of a – separator. Finally, we specify a quantity of numbers to be at the end with ${##}. This will be 2 digits starting at 01. The sequence numbering increments for all objects the project deploys and does not follow the custom naming prefix. For example, you may deploy CHI-WEB-01 but when you deploy your first APP server it will be CHI-APP-02. This may not be an issue for you but given that all names will use a single sequence, you should make this larger like ${####} to allow many more names to be generated.

Here are the base options to pull properties from as you begin typing after ${

Migrating to Global Custom Naming
If you are running an On-Prem vRealize Automation and would like to utilize the advanced abilities of the global custom naming, you will need to enable this feature. The process is quite simple.
To begin the enablement of this feature, click on Infrastructure > Custom Names > Enroll Now
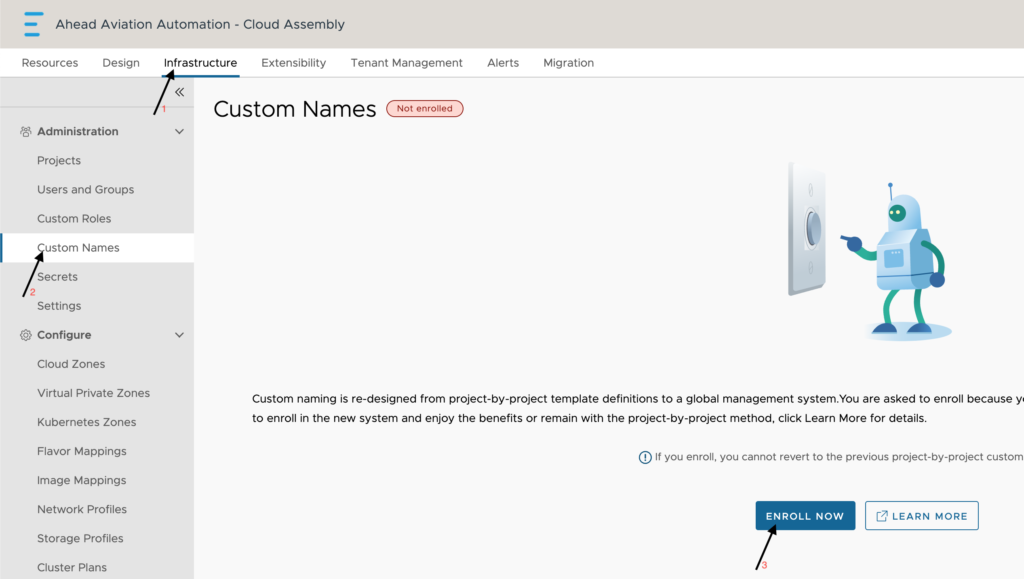
You can choose to either migrate your current templates from within all of your projects or skip them.
The Do not migrate method is recommended because the project and resource-level improvements are significant. To take advantages of the changes, you must build new custom naming templates.
The Migrate method creates one template for each project that has a template. Depending on the number of projects with templates, migration might result in many templates to manage. It is also possible that some templates fail to migrate due to unsupported formats. Migration is not guaranteed for all the naming templates. Migration can result in an unmanageable number of project-level templates. Once you make your selection, just click Enroll. Once you do this, you are not able to switch back to per-project custom naming.

Below is an example of a migrated per-project naming standard. The name is generated as <project name>-template and each resource type is set to generate with the same template from the old standard. Notice that the starting counter set itself to 301 and we are only set to use 2 digits. I am not sure what that is all about. You are not able to edit these naming templates, nor can you create a new one since you can only have 1 naming template per resource type.

After migration, you can view the migration status from Infrastructure > Custom Names. This will show the discovered naming template from each project and the status of creating each one.

Global Custom Naming
With global custom naming, we can now set naming standards per resource type including gateway, load balancer, machine, NAT, Network, resource group, security group and storage. With these naming standards we can then apply them to different projects.
Here is a list of resource type in the deployment that match to the custom naming resource types.
| Custom Naming Resource Types | Deployment Resource Types |
| Machines | Cloud.Machine Cloud.vSphere.Machine Cloud.AWS.EC2.Instance Cloud.GCP.Machine Cloud.Azure.Machine |
| Networks | Cloud.Network Cloud.vSphere.Network Cloud.NSX.Network |
| Storage | Cloud.Volume Cloud.vSphere.Disk Cloud.AWS.Volume Cloud.GCP.Disk Cloud.Azure.Disk |
| Load Balancers | Cloud.LoadBalancer Cloud.NSX.LoadBalancer |
| Resource Groups | Cloud.Azure.ResourceGroup |
| Gateways | Cloud.NSX.Gateway |
| NAT | Cloud.NSX.NAT |
| Security Groups | Cloud.SecurityGroup |
To begin creating a naming standard, click on Infrastructure > Custom Names > New Custom Name
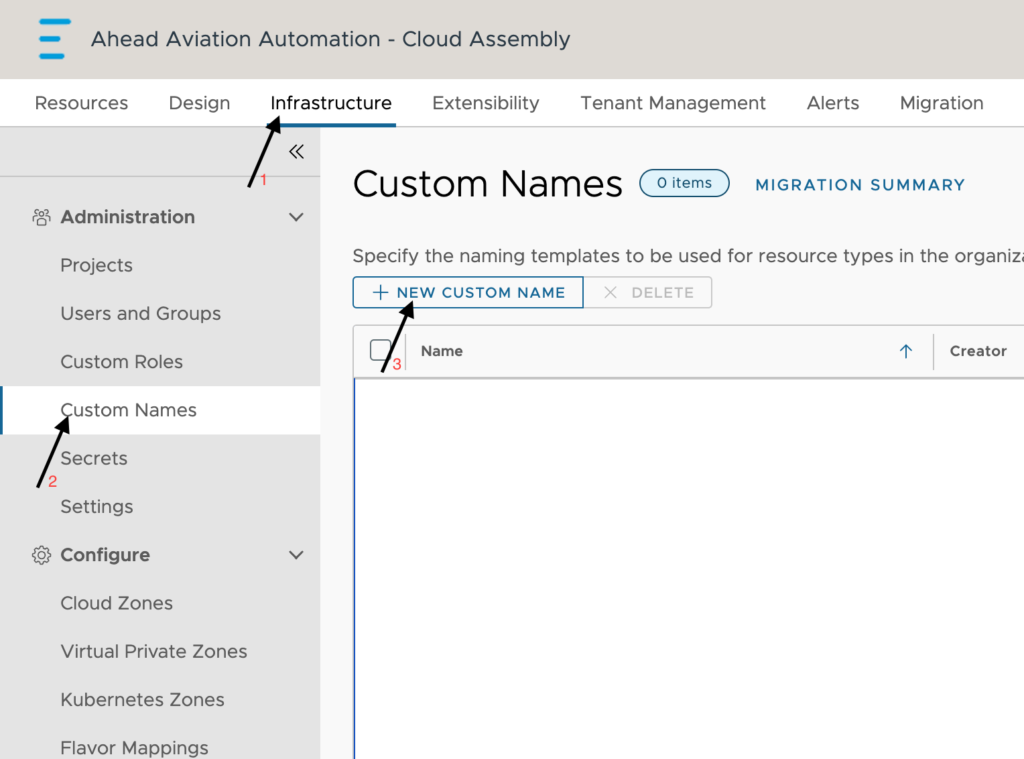
I am going to go ahead and set up the organizational custom naming policy first. This is the general standard for all systems. I’ll explain the differences more below between ‘Organization’ and ‘Projects’ options, but project custom names take precedence over the organizational one.
Configuration:
- Name – Provide a name for this custom naming configuration. Since this is organizational and the standard, I am choosing to name as Org-wide Standard Naming
- Description – Provide any further detail needed to understand this configuration. Scope – Choose which scope applies for this configuration.
- Organization: Create a default naming template that is applied to all deployments that do not have a project-level naming template. You cannot create more than one organization template. If the organization scope is not available, one already exists.
- Projects: Create a naming template specific to the assigned projects. If both an organization and a project template exist, the project naming template takes precedence over the organization template.
- New Naming Template – Click this to add the naming configuration for each resource.
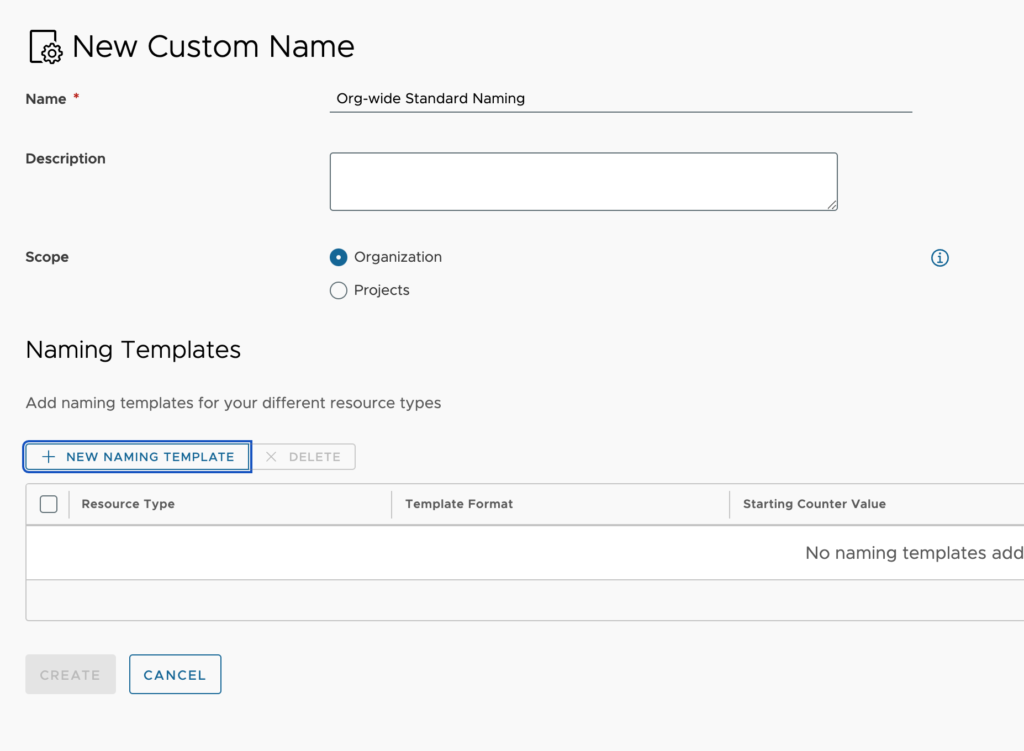
Configure the naming templates for each resource type that you plan to deploy. I will go ahead and create one for each resource type, starting with Machine.
Configuration:
- Resource type – Choose between the different resource types. Only one naming template per resource type is allowed.
- Validate compute name for uniqueness – This check box looks at all deployments within vRealize Automation for uniqueness before choosing a name.
- Template format – This is the format used for this resource type. Enter the properties and strings that you want generated as the resource name. Names must be unique. To ensure uniqueness, you must add the number generator to the template. You can reference different properties from the system using ${} to wrap around the property. You are no longer able to reference custom properties from the resource when using global custom naming. The only resource property available is resource.name. I will construct the entire naming prefix within the cloud template for the machine resource as the name property.
- Starting counter value – Set this to the first number you want to begin using. If this standard is already in practice within the environment, you may want to set a starting number above what may already be assigned.
- Increment step – What value to increment by.
Advanced – Expand this to allow adding matching patterns. This will have vRealize Automation keeping track of which numbers it has assigned out for each prefix. Without setting this, you would get something like CHI-WEB-01 and then CHI-APP-02 rather than CHI-APP-01. You will have the add each pattern match individually and are not able to do it with variables.

Click on Add Matching Pattern and type in each option to allow vRealize Automation to keep track of each naming prefix.
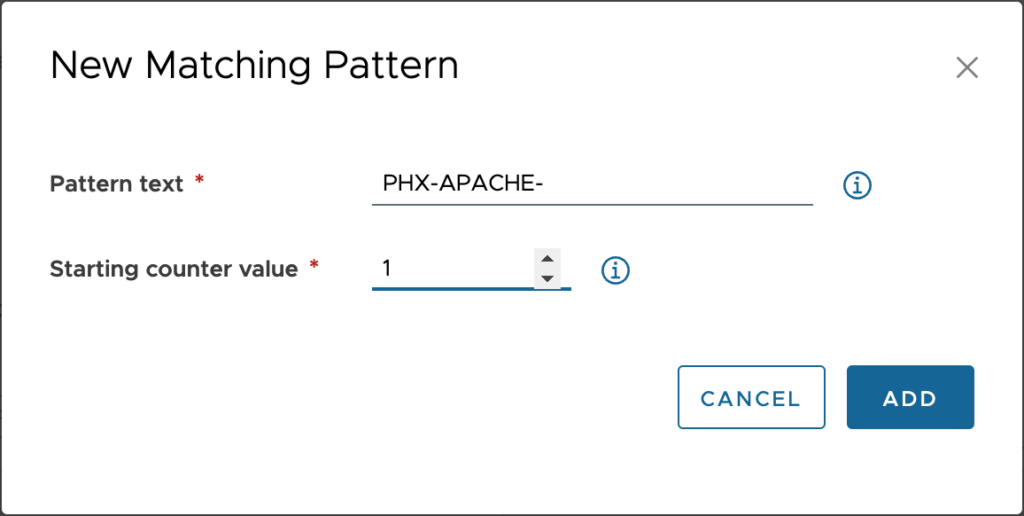
Once you complete adding new matching patterns for now, click add for this resource type.

Once you have added all the resource types you want, click on Create.

When creating a new custom name and specifying ‘Projects’ rather than ‘Organization’ as we just walked through, you will have an additional section displayed in your configuration window as shown below. This is where we can assign the configuration to individual projects.

Once a project has been added, you can click on the project name and view all the resource types and expand to see the matching patterns you added.



Leave A Reply