vRealize Automation Service Broker Content is all the templates that have been brought in by the Content Sources. This can be Cloud Templates, vRealize Orchestrator workflows, CloudFormation templates, Extensibility Actions (ABX) or Code Stream pipelines. Once these are brought into Service Broker, we can customize them and make them a bit more appealing and useable to an end user.
We can design custom forms and set logos to something more specific than defaults. By default, the form is a single page with the inputs in the order as they are in the source. The default logo used matches the Content Source type.
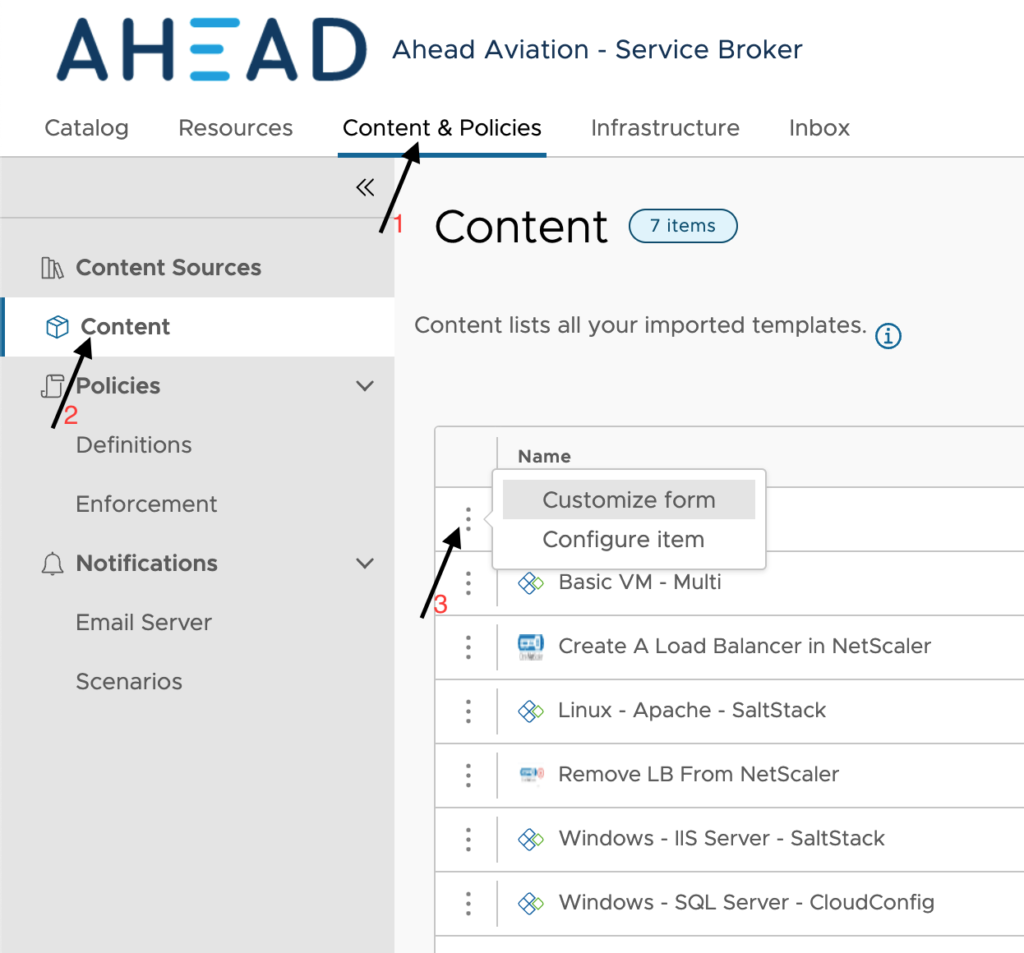
Let’s go over making these changes. We want to go to Content & Policies > Content to view your items. Clicking the 3 dots to the left of an item gives the options to Customize form or Configure Item.
Configure Item
Let’s start with configure item. We can only make 2 changes here.
Configuration:
- Max. instances per request – How many deployments can a user request at one time.
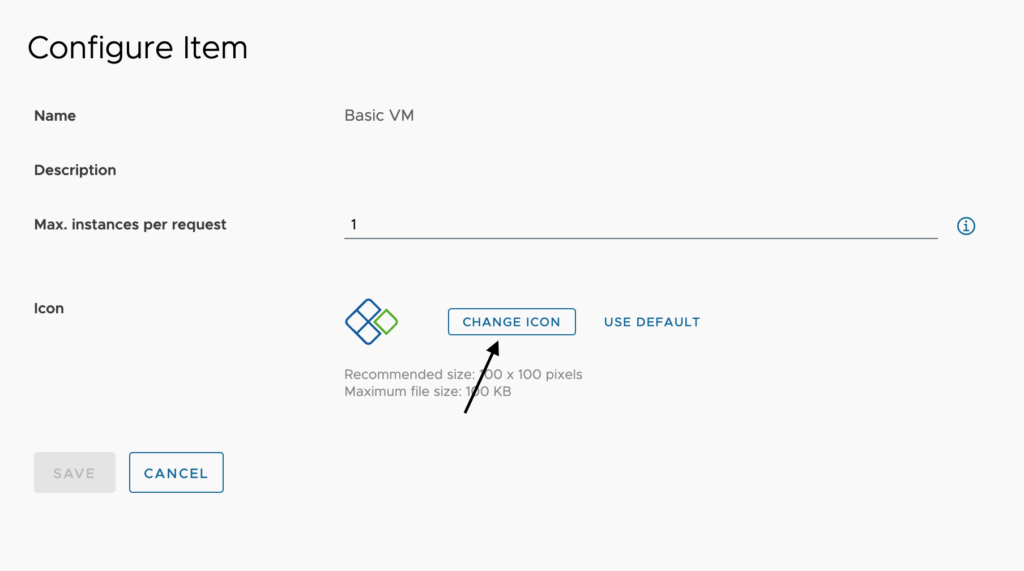
- Icon – We can click the Change Icon button to browse our local system for an image that we may be interested in using.
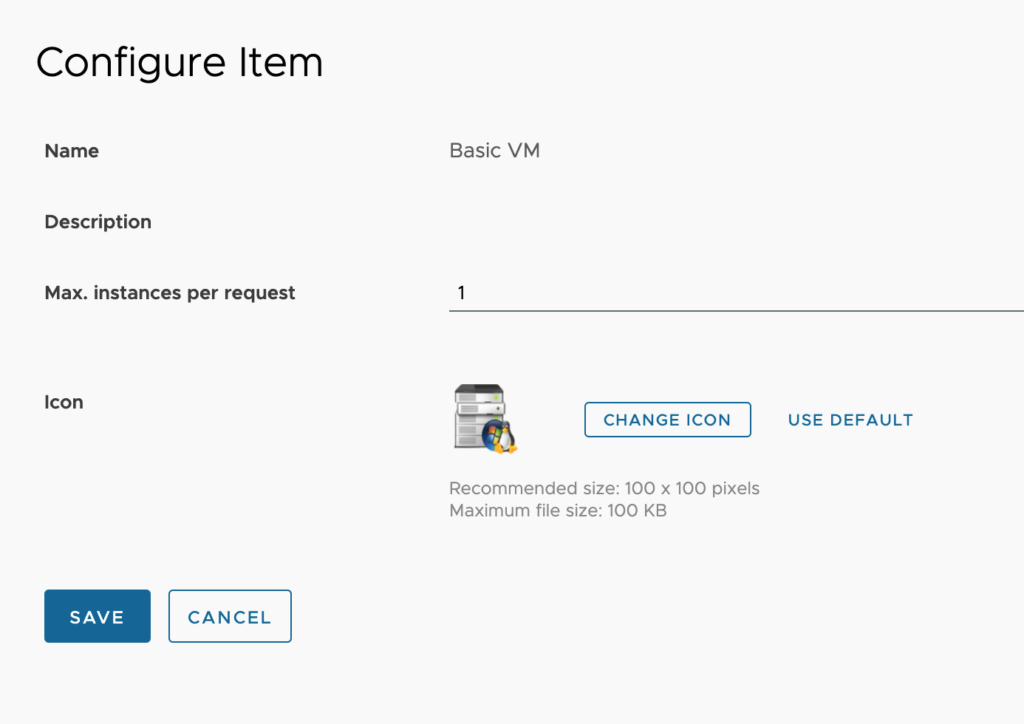
We should now see the image we added before we click save. Once happy with the look, click Save.
NOTE: Check out this compiled list of icons I use regularly.
Customize Form
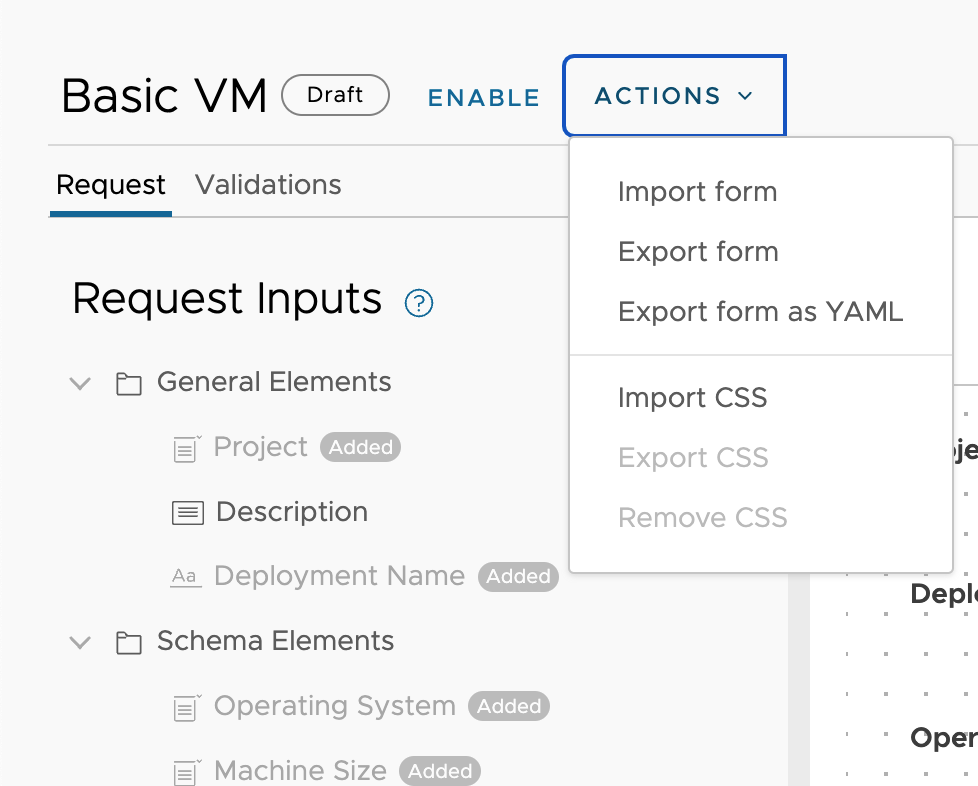
Before we dive into all the functions of the custom form designer, I’d like to mention that there are some actions that we can run against this content item. First, we can Import an existing form configuration that is in JSON or YAML formatting. We will also notice that we can export in either of these formats.
If we want to utilize custom CSS to set a specific format for our text in the form, we can import our CSS here as well. I will cover that in more detail in another article.
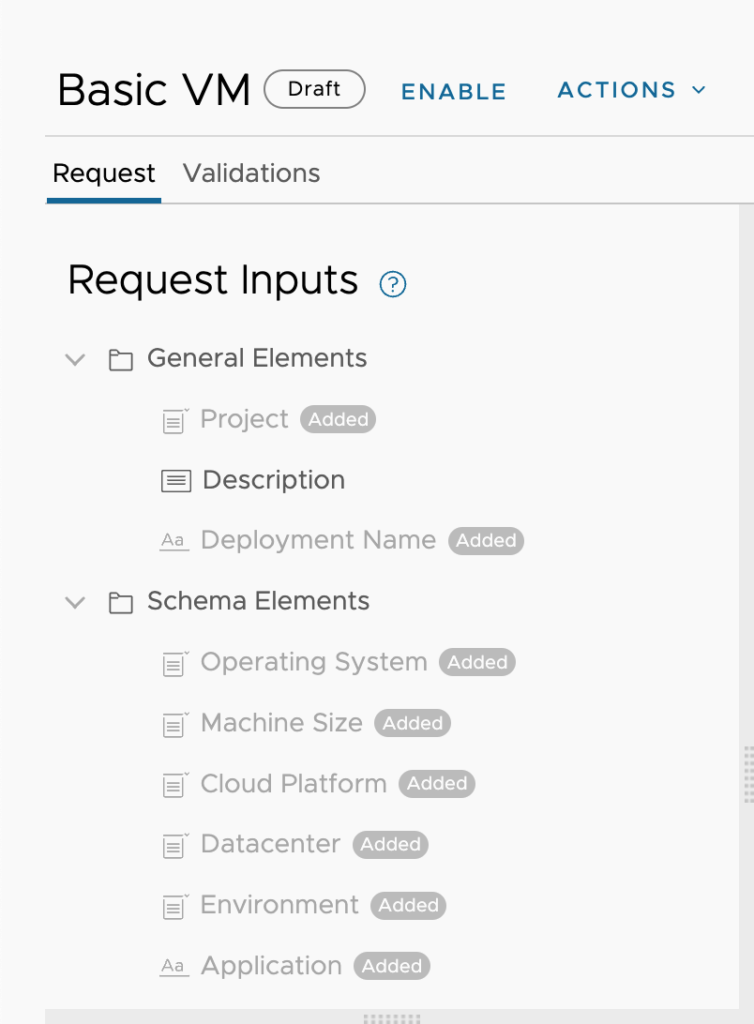
Request Inputs
On the left side, we see the Request Inputs. There are 2 types we see, General Elements and Schema Elements. General Elements are the default standard fields and by default the 2 that are required are added to the form. If we would like to add the description field, we just drag it onto our custom form canvas.
Schema Elements are all the inputs that are defined in the content from the source. In this example, we are looking at a Cloud Template from Cloud Assembly.
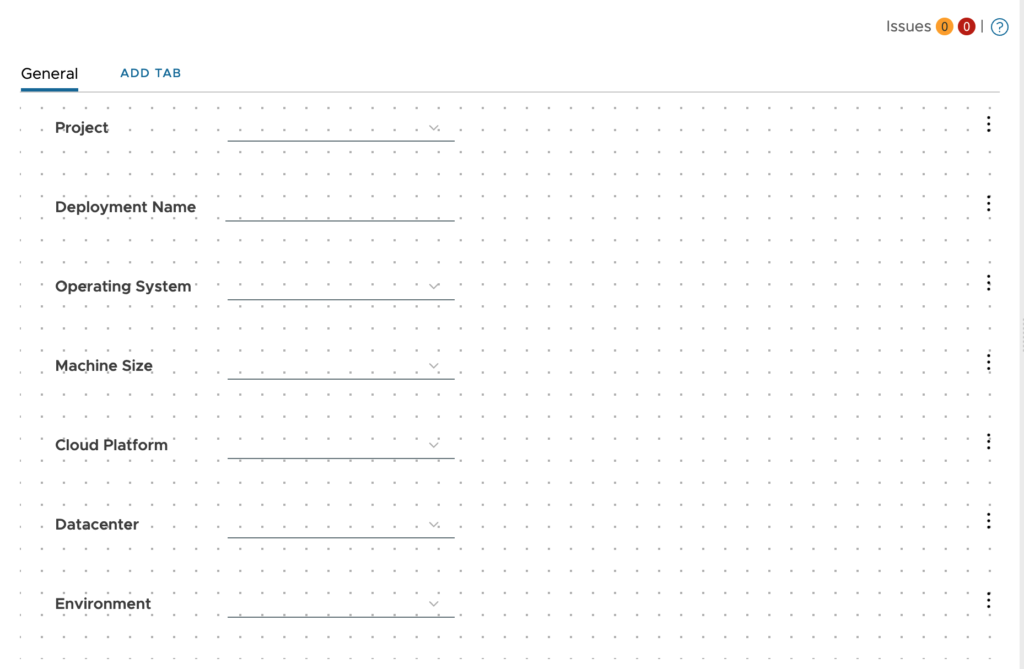
In the center, is our custom form canvas. This shows us the layout of the fields on the page. We can click on Add Tab at the top to create additional pages that we would click through. This can help organize your inputs better when large applications or application stacks are the base for this form. We can reorganize any of the items on the form by dragging the item around to another column or above or below a different item. When clicking on a specific item, the configurational aspects of it will be brought up on the right side of the screen.
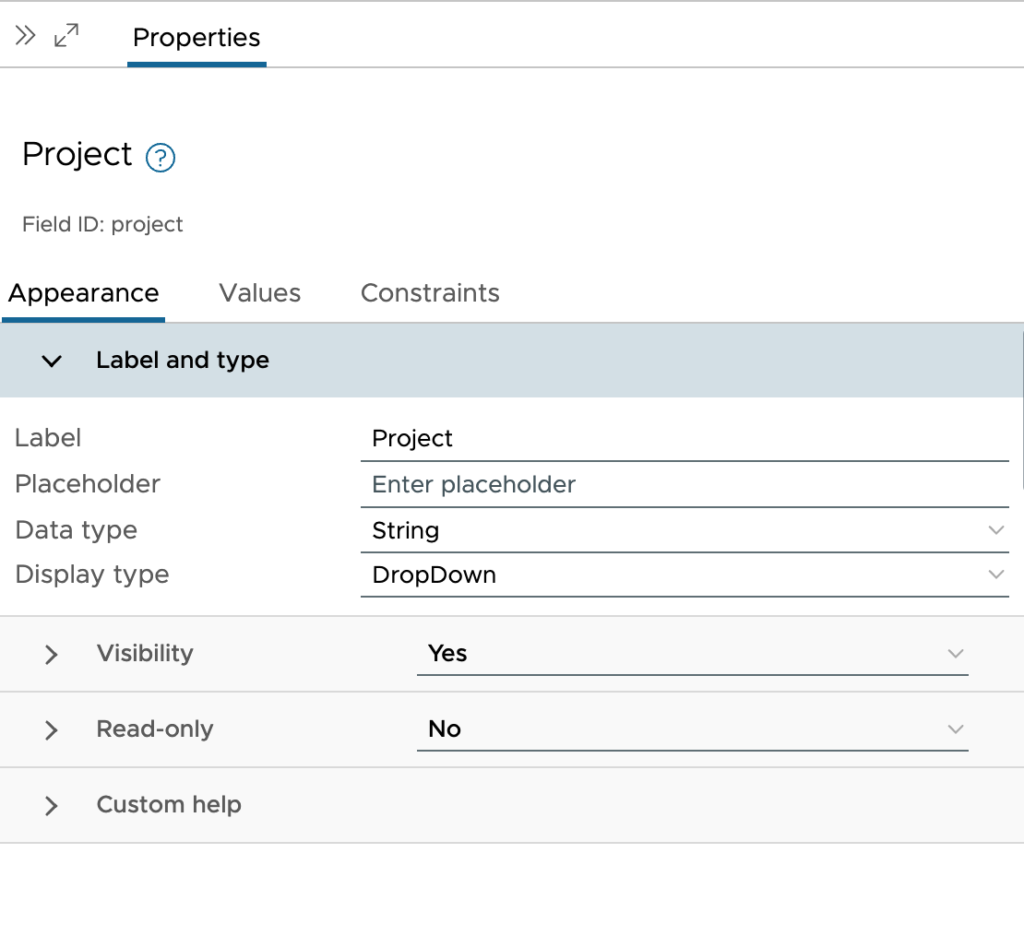
Let’s look at the Project field and go over the configurable aspects. All fields will have the same options available.
Appearance:
- Label and Type
- Label – This is the display name as seen by the user. The actual property name is listed at the top under the name of the field. In this case, it is project.
- Placeholder – This is what will be in the field when the request is instantiated. This can be a question or command to the user for specific data.
- Data type – This is brought in by the Content Source. We can choose between Integer, Decimal or String
- Display type – This is how the user can interact with this field. The default is pulled in by the Content Source if it is defined. In the case of a Cloud Template, we have defined this in the Cloud Template Inputs and shouldn’t need to set this here.
- Visibility – We can choose Yes or No, depending on if we want this field seen by the requester. If we choose no, the field is still a part of the request but not seen.
- Value Source – We need to choose one of the following options.
- Constant – Allows us to select Yes or No.
- Conditional Value – We choose this to set a series of if / then like statements for determining if Yes or No.
- External Source – This will pair the field to a vRealize Orchestrator Action. The input fields of the action will be populated for us to fill out once selected. The action will then decide if Yes or No.
- Bind Field – This allows us to bind this field to another field that is Boolean.
- Value Source – We need to choose one of the following options.
- Read-only – We Choose Yes or No, depending on if we want this field modifiable by the requester. If we choose yes, the field is visible, but greyed out.
- Value Source – We need to choose one of the following options.
- Constant – Allows us to select Yes or No.
- Conditional Value – We choose this to set a series of if / then like statements for determining if Yes or No.
- External Source – This will pair the field to a vRealize Orchestrator Action. The input fields of the action will be populated for us to fill out once selected. The action will then decide if Yes or No.
- Value Source – We need to choose one of the following options.
- Custom help – We can expand this section to provide additional help information to the requester. We can also choose the placement of the information in relation to the field.
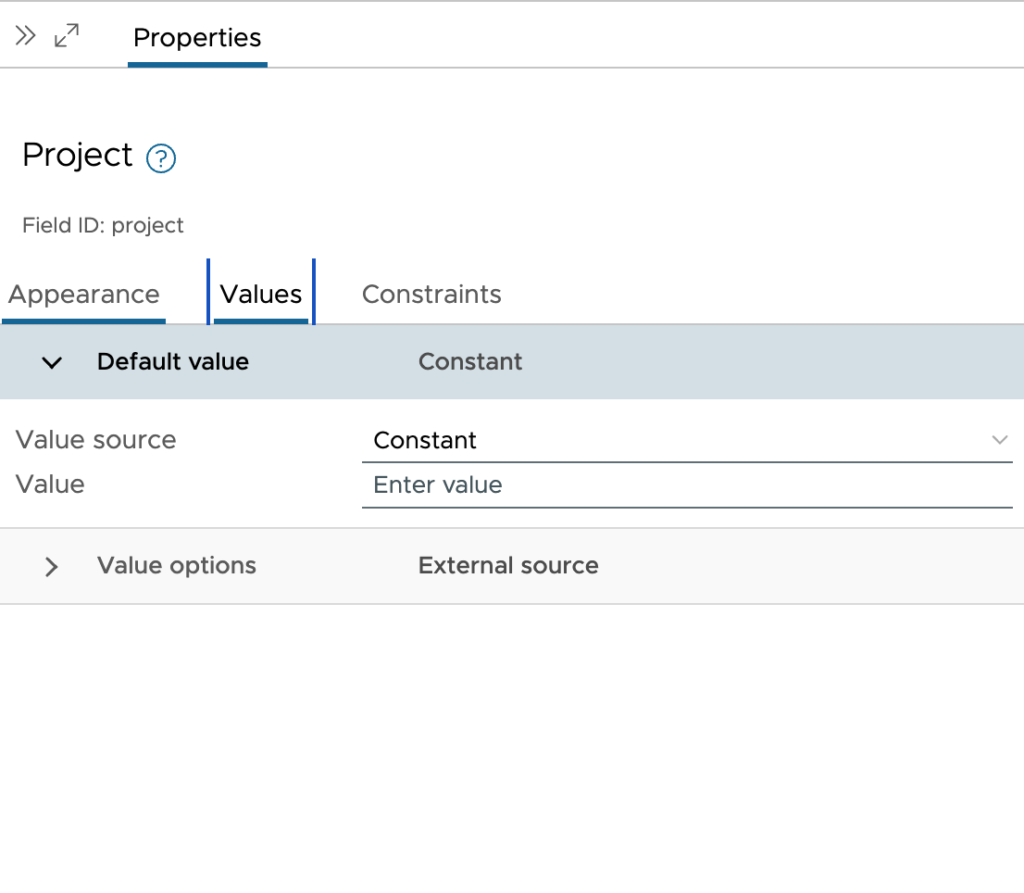
Values:
- Default value
- Value Source – We need to choose one of the following options.
- Constant – Allows us to select Yes or No.
- Conditional Value – We choose this to set a series of if / then like statements for determining if Yes or No.
- External Source – This will pair the field to a vRealize Orchestrator Action. The input fields of the action will be populated for us to fill out once selected. The action will then decide if Yes or No.
- Bind Field – This allows us to bind this field to another field that is Boolean.
- Computed value – This allows us to concatenate constants and fields together.
- Value Source – We need to choose one of the following options.
- Value options
- Value Source – Choose one of the following options.
- Constant – Allows us to set a value.
- External Source – This will pair the field to a vRealize Orchestrator Action. The input fields of the action will be populated for us to fill out once selected. The action will then provide a value or selection of values to choose from.
- Value Source – Choose one of the following options.
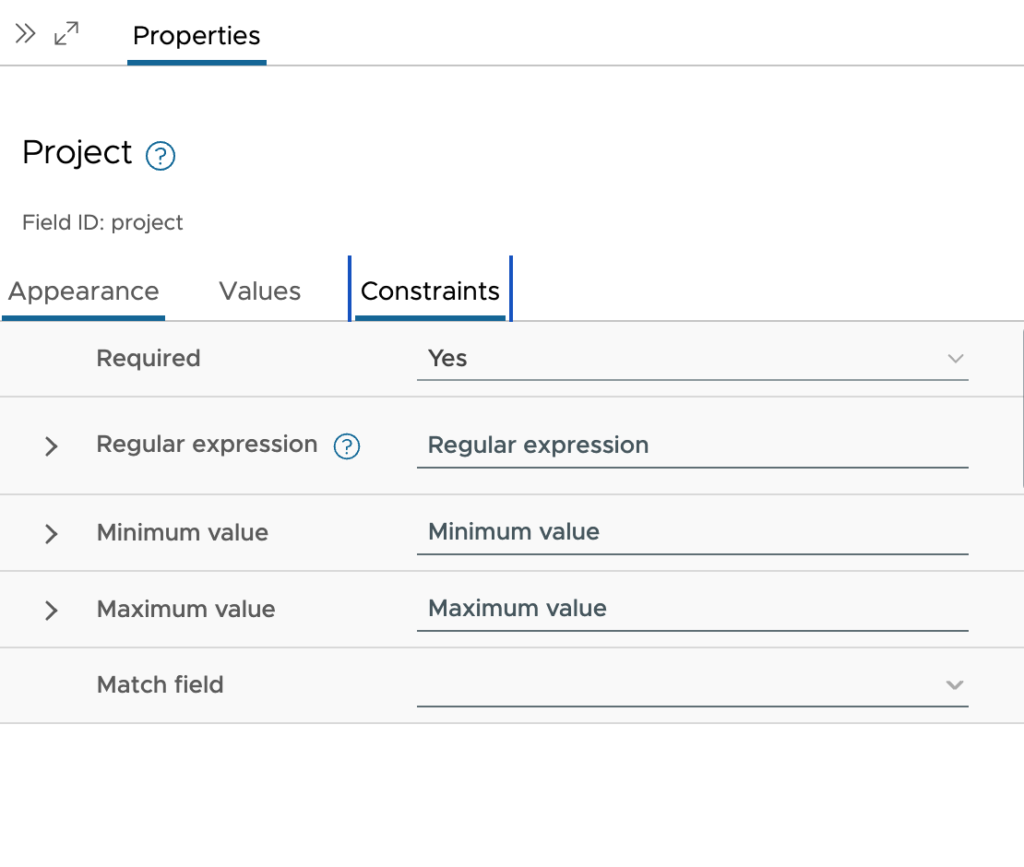
Constraints:
- Required – We can choose Yes or No to toggle this between a required field or not. We must have a default set on the Cloud Template input if we want to be able to select No.
- Regular expression – Here, we set the regular expression to be used for validation of the field.
- Value Source
- Constant – This is the default and allows us to specify the RegEx you want to use as the validator.
- Conditional value – We choose this to set a series of if / then like statements for determining the appropriate RegEx to use.
- Value Source
- Minimum value – We set this if there is a minimum value. This could be used for minimum length of a string.
- Value Source
- Constant – This is the default and allows us to specify the minimum value we want to use.
- Conditional value – We choose this to set a series of if / then like statements for determining the appropriate minimum value to use.
- External source – This will pair the field to a vRealize Orchestrator Action. The input fields of the action will be populated for us to fill out once selected. The action will then provide a value.
- Value Source
- Maximum value
- Value Source
- Constant – This is the default and allows us to specify the maximum value we want to use.
- Conditional value – We choose this to set a series of if / then like statements for determining the appropriate maximum value to use.
- External source – This will pair the field to a vRealize Orchestrator Action. The input fields of the action will be populated for us to fill out once selected. The action will then provide a value.
- Value Source
- Match field – We can set this to match another string field.
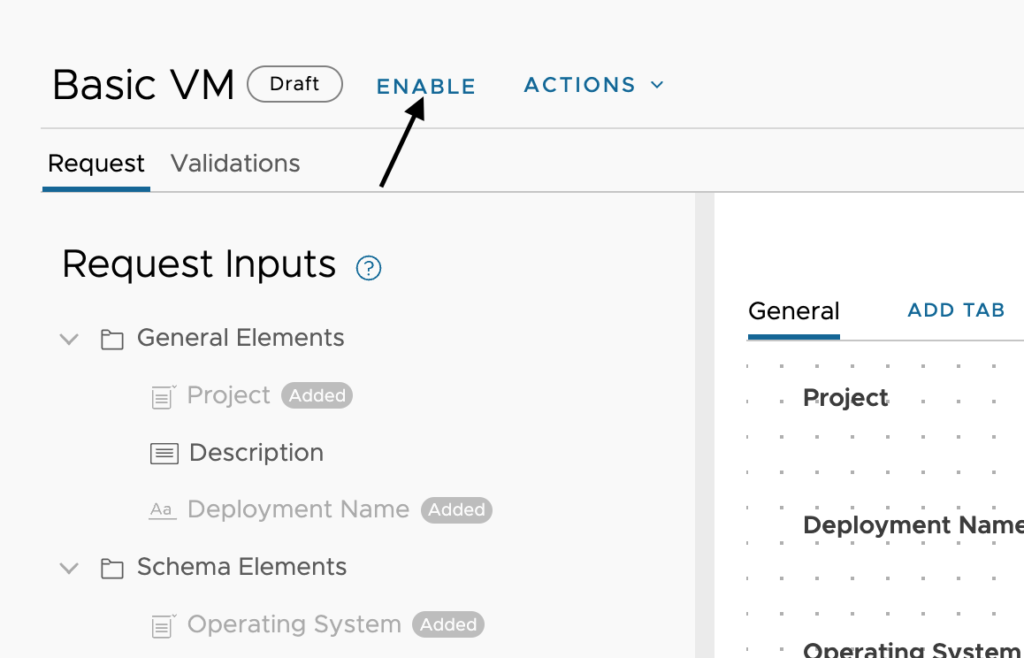
Once we are done with setting up all the fields for our custom form, we have just one last thing to do. We need to click Enable at the top of the page. Until we enable the form, the default form is presented to the user. We can come back and enable or disable the form at any time.



Leave A Reply