
Prerequisites: Cloud Accounts
Once we have cloud accounts configured, we can begin slicing and dicing the infrastructure that you have selected to bring into vRealize Automation. Cloud accounts brought in regions from your AWS, Azure or GCP environments and even your virtual datacenters in VMC on AWS or On-Prem vSphere. Now we need to further define the infrastructure by it’s intended uses. This can be code rev environments, business units, operating systems or DMZ / Internal zones as examples.
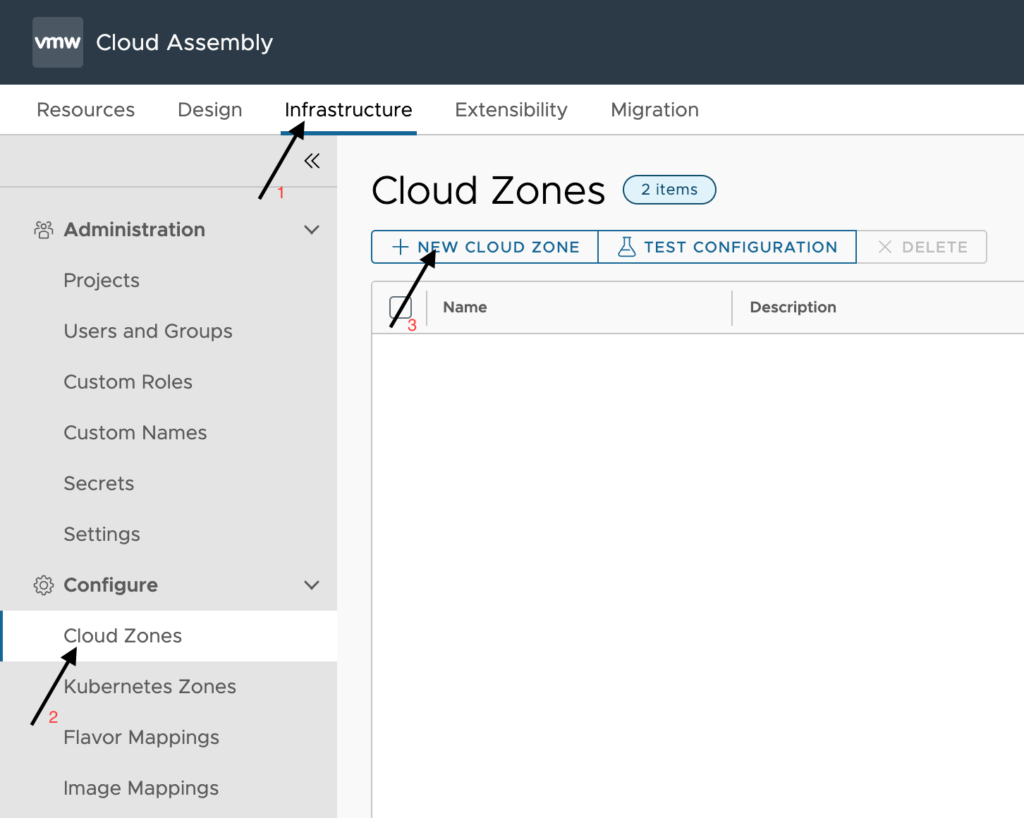
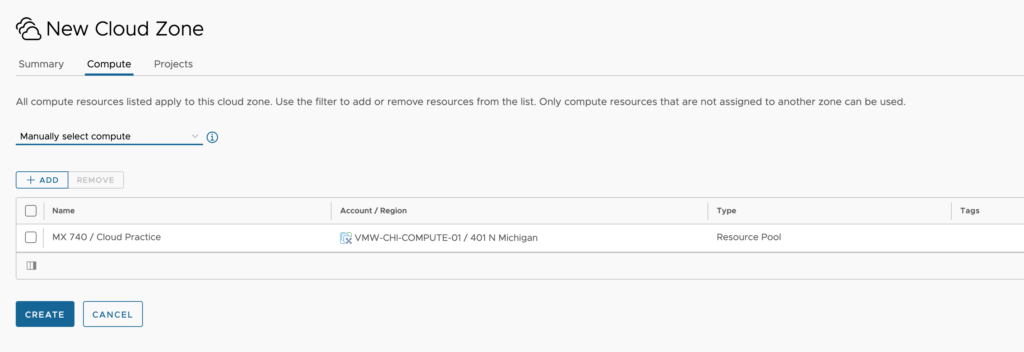
To begin configuring a cloud zone, click on Infrastructure > Cloud Zones > New Cloud Zone as shown in the image.
As you can see below, when we search for regions in the Account / region field, we will see each region displayed. Cloud zones are a direct mapping to a single region or virtual datacenter. However, we are allowed to create multiple cloud zones for a single region. This comes in handy, for instance, when you split operating systems across different clusters in On-Prem environments.
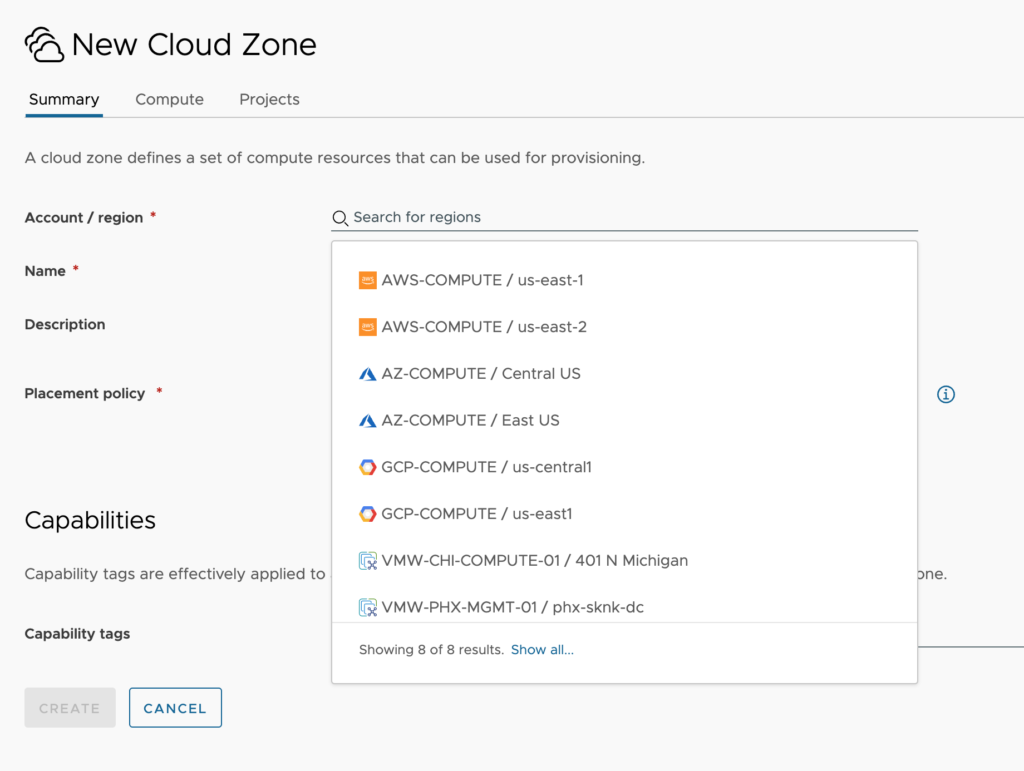
Let’s go ahead and setup a vSphere cloud zone first.
NOTE: AWS cloud zones also provide a toggle switch to enforce spot instances. If enabled, the cloud zone will only be allowed to create spot instances and On-Demand instances cannot be created.
Configuration:
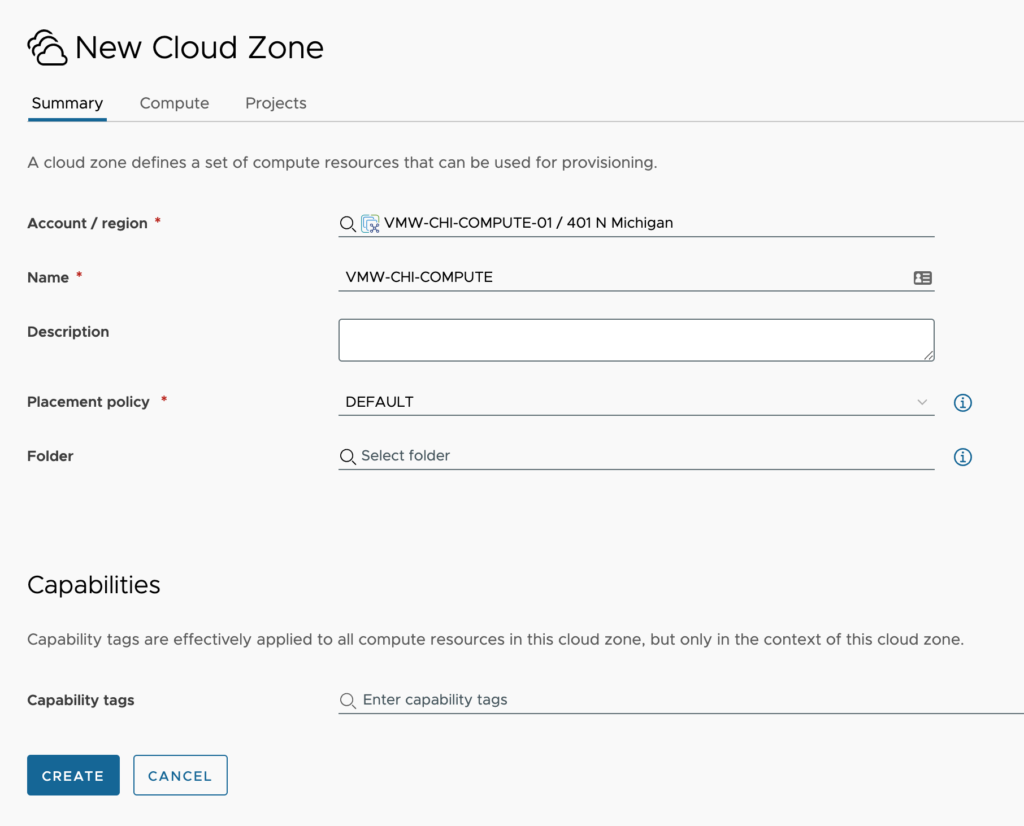
- Name – This is a friendly name to designate this cloud zone. When working in larger environments, I tend to use the cloud account name and something that signifies how this is different than others within the same cloud account. Using my earlier example of splitting operating systems, we could do VMW-CHI-COMPUTE-01-WINDOWS. I will keep it easy here since I have only one cluster.
- Description – <optional> Supply additional details about this cloud zone
- Placement policy – Choose between DEFAULT, BINPACK, SPREAD or SPREAD BY MEMORY
- DEFAULT – Place compute resources on the first applicable host.
- BINPACK – Will place compute resources on the most loaded host that still has enough resources to run the given compute.
- SPREAD – Provisions compute resources, at a deployment level, to the cluster or host with the least number of virtual machines. For vCenter Server, Distributed Resource Scheduler (DRS) distributes the virtual machines across the hosts.
- SPREAD BY MEMORY – For public cloud, provisions compute resources, at a deployment level, to the cluster or host with the most amount of remaining free memory. This is the host/cluster with the least amount of allocated memory. For private cloud, provisions compute resources, at a deployment level, to the cluster or host with the smallest ratio of allocated memory to total memory. If all hosts/clusters are empty, the biggest one is prioritized.
- Folder – <optional> Choose a virtual machine folder for vRealize Automation to deploy machines into when using this cloud zone. If there is no single folder for this cloud zone, then one can be defined in the cloud templates later on. Also, if you leave this blank and do not specify one in the cloud template, vRealize Automation will create a VRM folder and deploy machines there.
- Capability tags – <optional> These are the tags used to further define the capabilities of this Cloud Zone.
Next, we want to click on Compute at the top to specify how we want to assign compute resources to this cloud zone. Compute resource types for vSphere are Resource Group, Cluster and Host and for AWS, Azure and GCP they are Availability Zones. The drop-down options are as follows
- Include all unassigned compute – Adds all unassigned compute resources for the account/region to the cloud zone.
- Manually select compute – Select from the list to add or remove compute resources manually.
- Dynamically include compute by tags – Add tags to dynamically include compute resources in this zone. Unassigned compute resources with tags that match the filter are included in this zone.
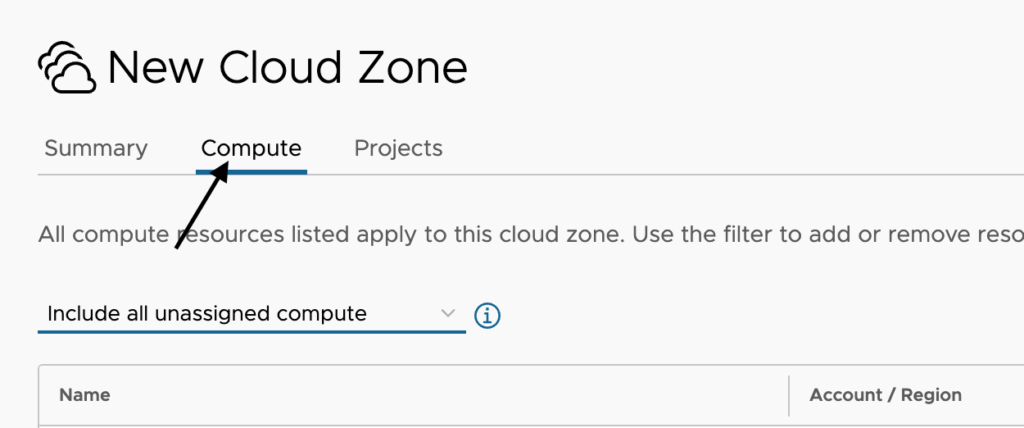
I have selected to Manually select compute and assign a resource group.
Once you have assigned compute, lets click over to the Projects tab to discuss this. I will include a screenshot that contains projects for discussion purposes, but projects are not added here. They are only visible once a cloud zone has been assigned within a project and only viewable here for troubleshooting purposes.
When projects have been assigned this cloud zone, they will be visible here and show their overall assignments. Check out my article on projects for more details on setting these assignments.
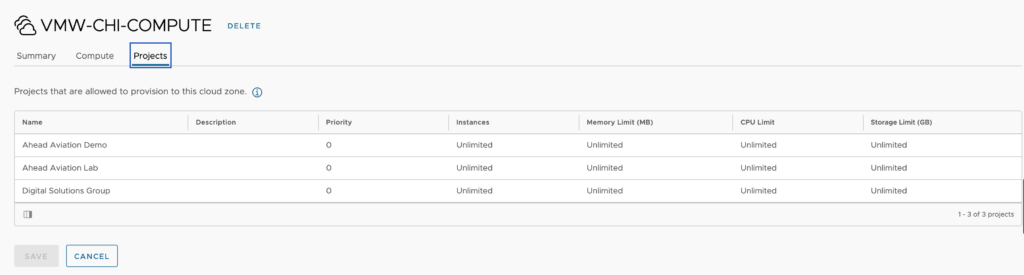
The Priority value shows the precedence of this compute over another when there are matching criteria. Think of a race with 1st place, 2nd place and so on. Let’s say we have 2 clouds zones that are from 2 different vSphere cloud accounts. These would be for development purposes and have the same capability tags. Priority 0 means highest priority or first and the higher the number the lower the priority. Priority 0 is the default setting and if 2 or more matching cloud zones have the same priority for a given project, they will then round robin deployments between them. Otherwise, they will follow the lowest number starting at 0 for ordering.
Instances, Memory Limit (MB), CPU Limit and Storage Limit (GB) all show the ratio of deployed quantity vs the maximum allowed to this cloud zone by the project. The default assignment is 0 or Unlimited
You might also like

Leave A Reply