
Cloud proxies are the facilitators of communication between vRealize Automation Cloud and your on-prem systems. There are 2 kinds of Cloud Proxies to be aware of, standard Cloud Proxies and Cloud Extensibility Proxies. A single cloud proxy of the appropriate type is sufficient for use for all components in a datacenter. Below is a table showing each cloud proxies uses.
| Standard Cloud Proxy | Cloud Extensibility Proxy |
| Cloud Account – vCenter Server | Integration – Extensibility Actions On Prem |
| Cloud Account – VMware Cloud on AWS | Integration – vRealize Orchestrator |
| Cloud Account – NSX-V Manager | Integration – Active Directory (via ABX) |
| Cloud Account – NSX-T Manager | Integration – GitHub Enterprise (via ABX) |
| Integration – Ansible | Integration – IPAM (via ABX) |
| Integration – Ansible Tower | |
| Integration – Puppet | |
| Integration – Red Hat OpenShift | |
| Integration – VMware Enterprise PKS |
Cloud Proxy Prerequisites
A cloud proxy is an OVA appliance that is deployed in a vSphere environment. If you plan to deploy the appliances with a static IP address, you will need to acquire DNS A and PTR records for the cloud proxy prior to deploying the appliance. There are 4 URL’s that these proxies must have access to over port 443 for facilitating this communication. If a network proxy is needed to be used to gain access to these URL’s, that information can be entered in during the deployment as shown later.
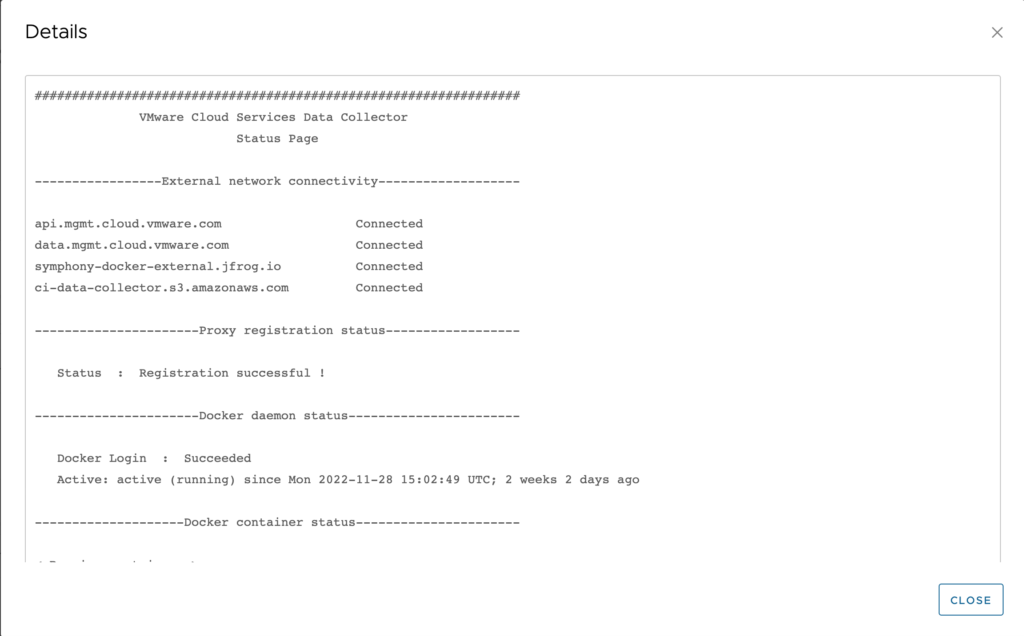
- api.mgmt.cloud.vmware.com – For Web API Access
- data.mgmt.cloud.vmware.com – For data pipeline services
- symphony-docker-external.jfrog.io – For the docker images within the cloud proxy
- ci-data-collector.s3.amazonaws.com – for downloading and updating the cloud proxy
The appliances also require the below resources be available for them to run.
| Appliance: | Cloud Proxy | Cloud Extensibility Proxy |
| vCPU: | 4 | 8 |
| Memory: | 12 GB | 32 GB |
| Storage: | HDD 1 – 60 GB HDD 2 – 20 GB | HDD 1 – 50 GB HDD 2 – 128 GB HDD 3 – 8 GB HDD 4 – 20 GB |
Deploying the standard cloud proxy
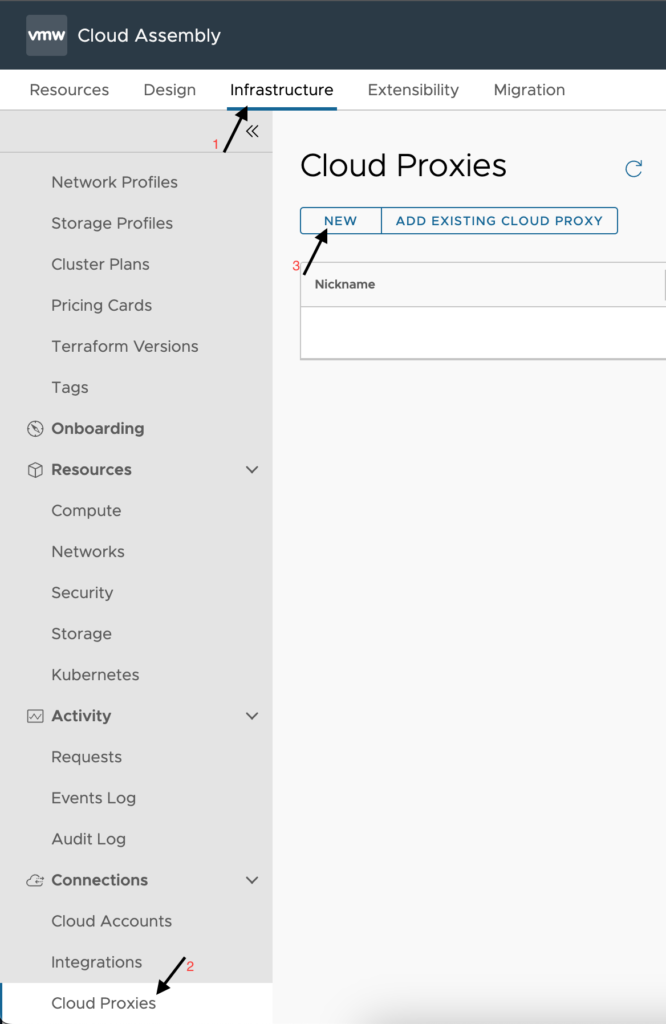
Login to vRealize Automation and launch the Cloud Assembly Service. Navigate to Infrastructure > Cloud Proxies and click on ‘New’.
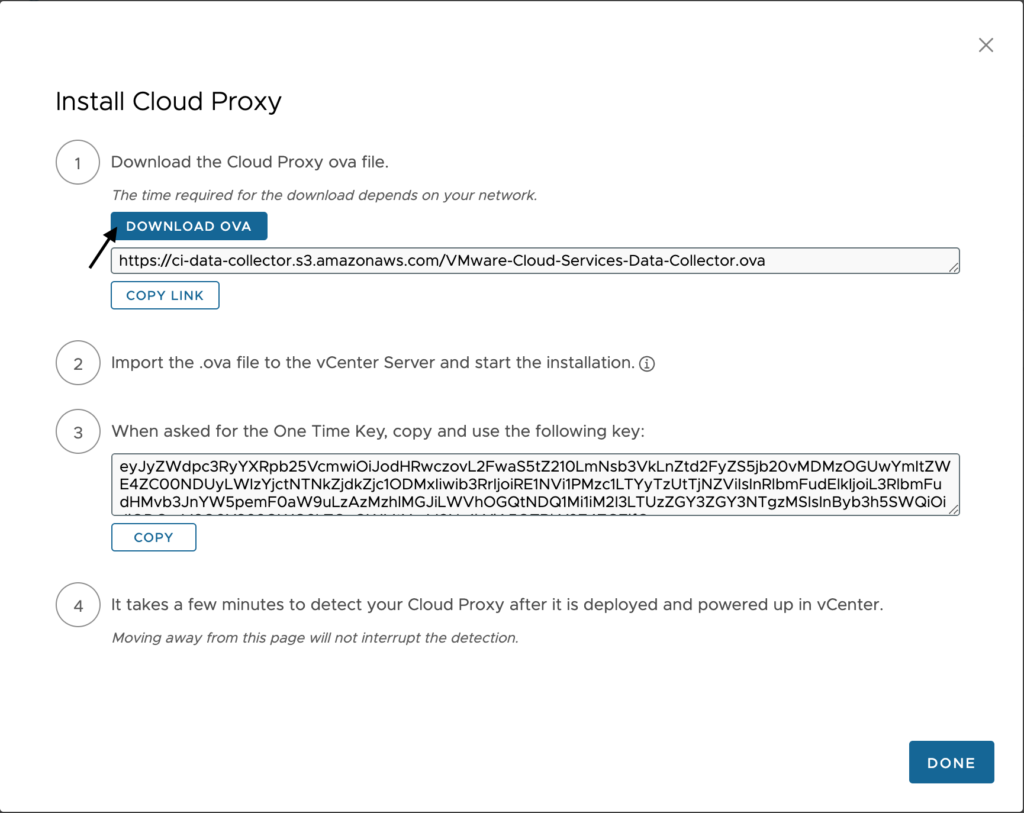
Download the OVA by clicking on “Download OVA”, or by copying and browsing to the URL provided. Leave this window up for later when we need the One Time Key (OTK) during deployment.
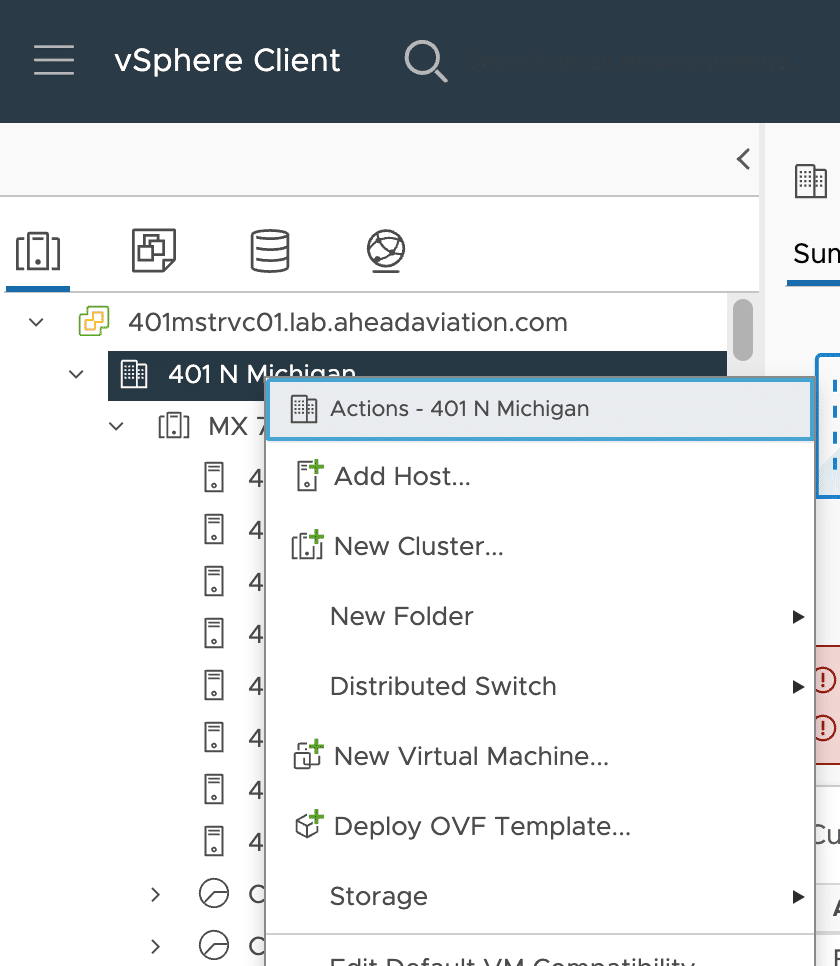
Login to the vCenter where you are deploying the appliance. From the vDC or most any other location point you will be installing the appliance into, you can right click and Deploy OVF Template.
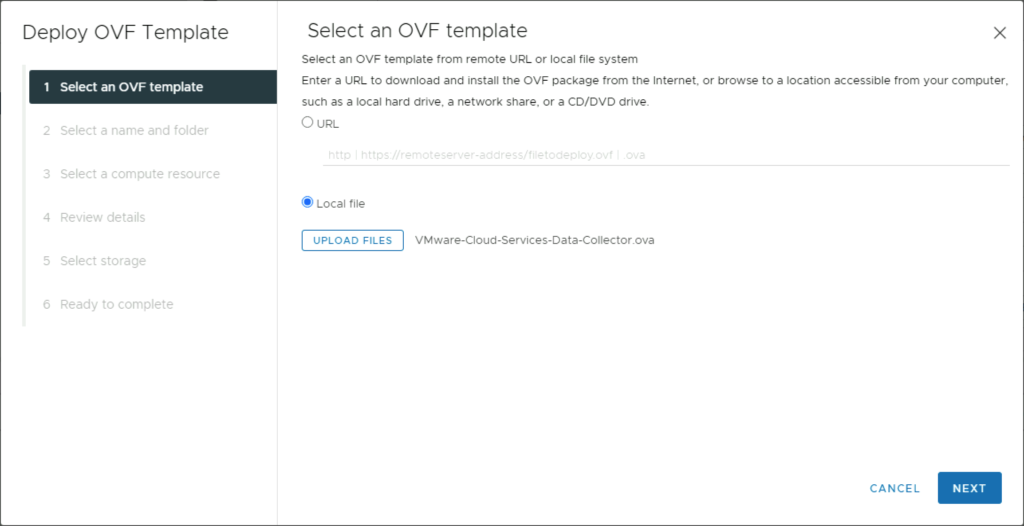
Choose local file, if you downloaded the OVA or you may use the URL copied from Step 2 above, click Next.
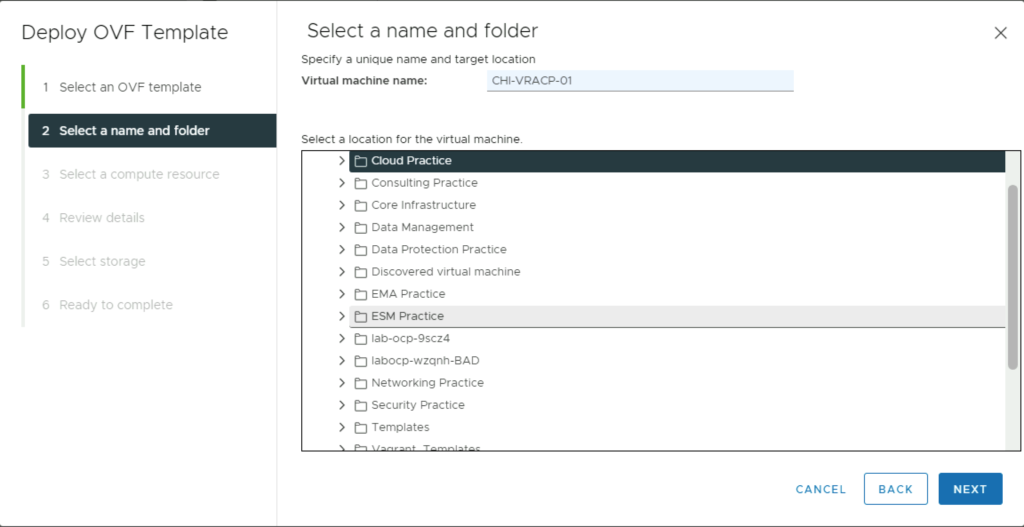
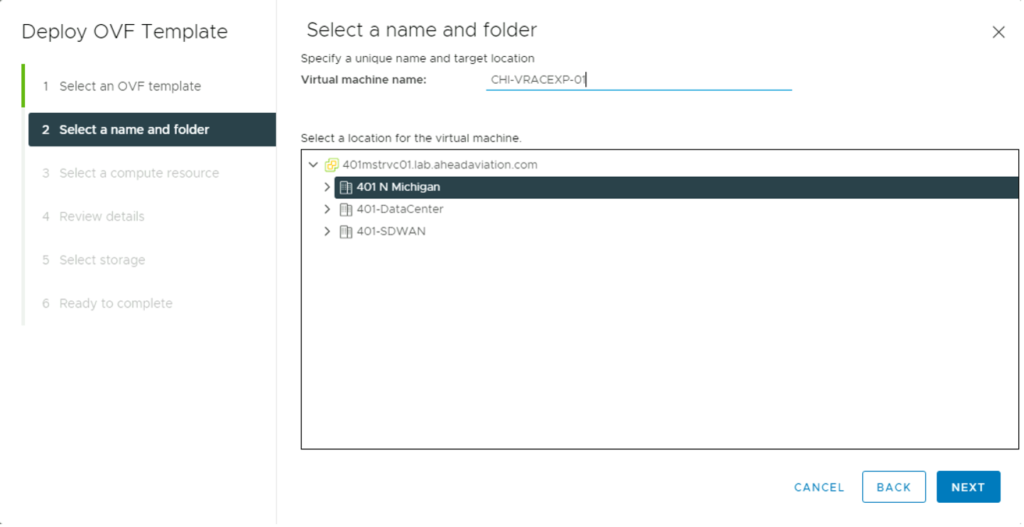
Enter the Virtual machine name and select a VM folder location for it, click Next.
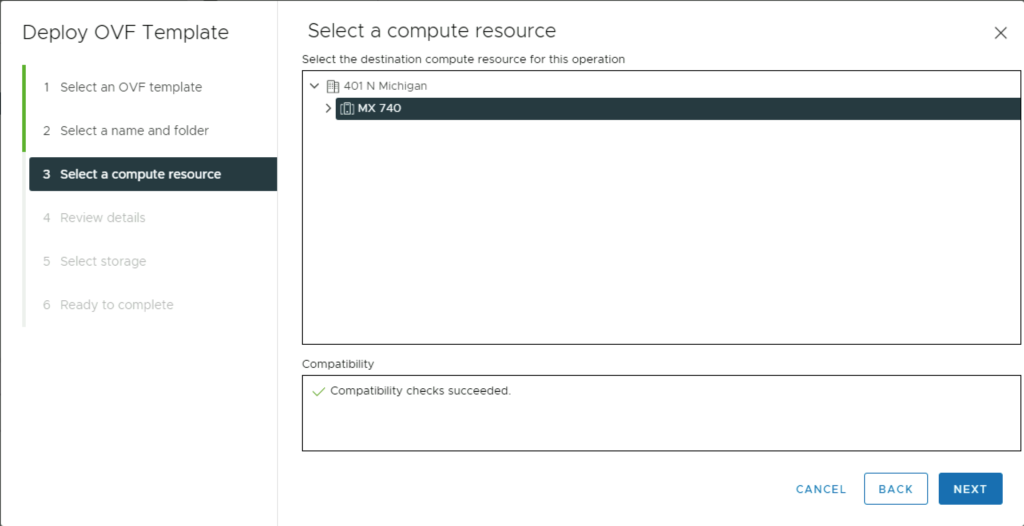
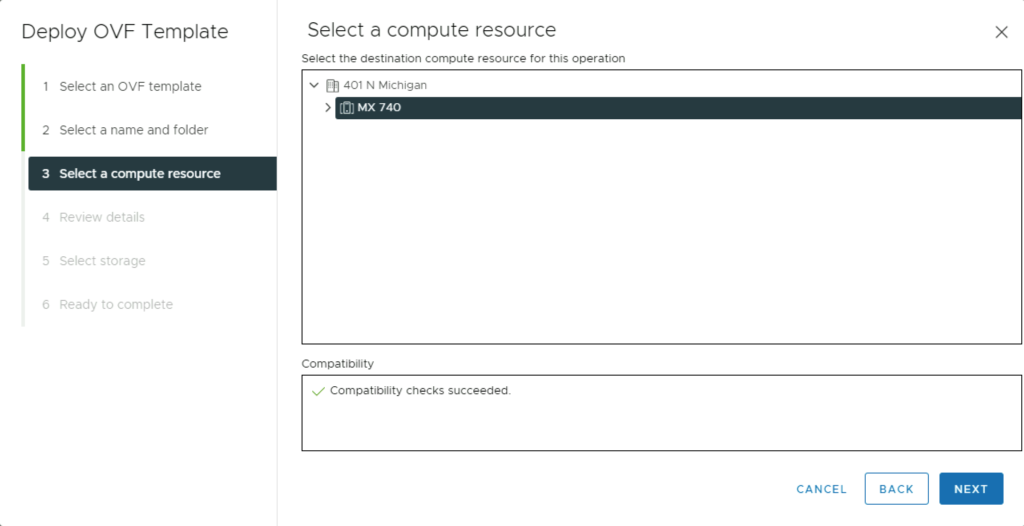
Select the ESXi host or cluster to deploy to, click Next.
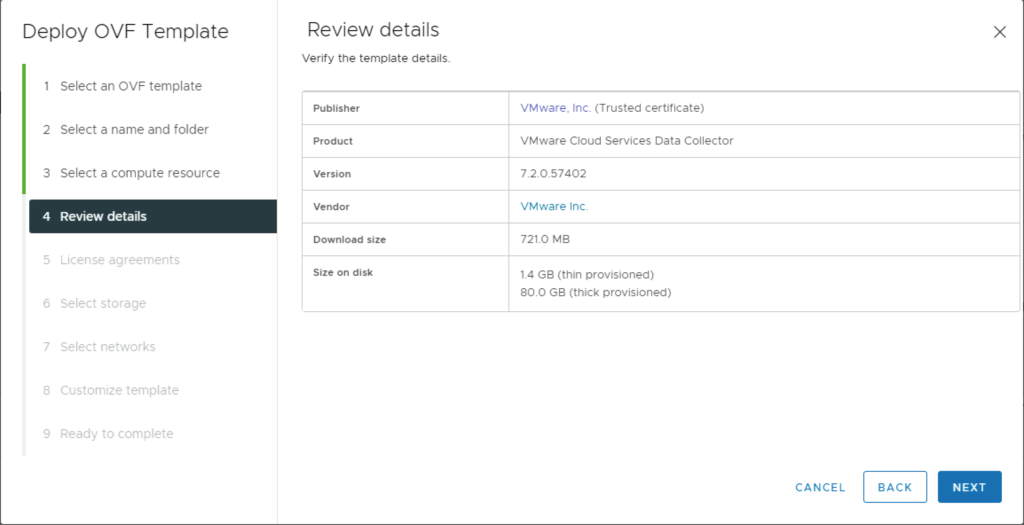
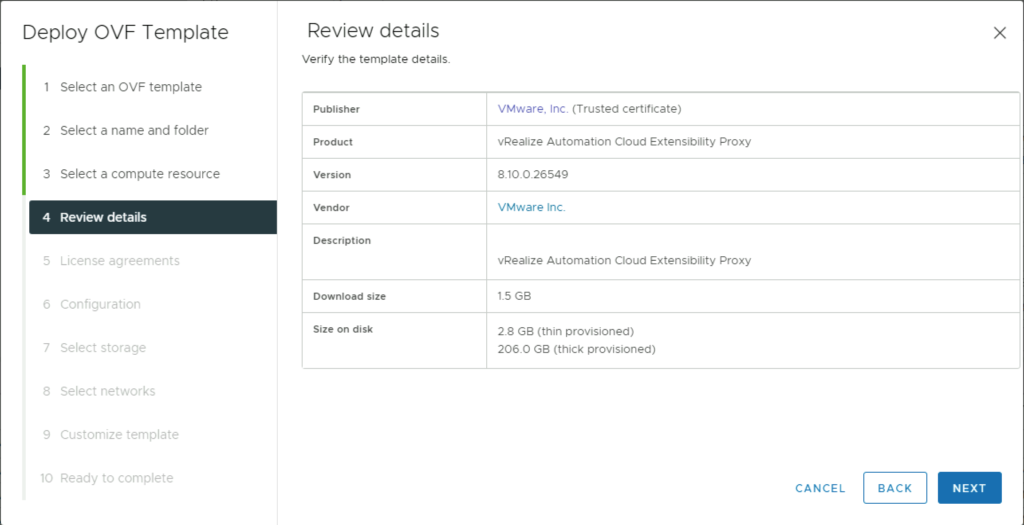
Review the details of the appliance, click Next.
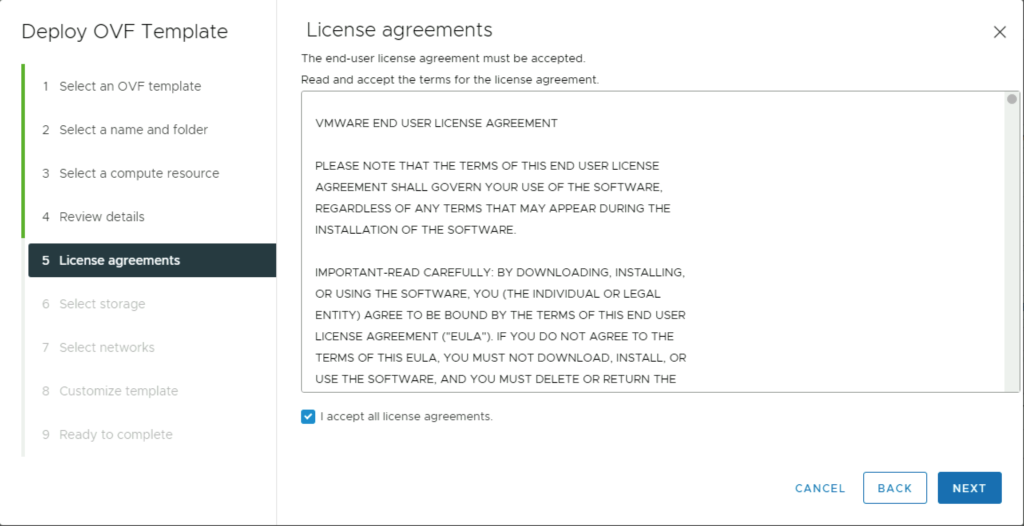
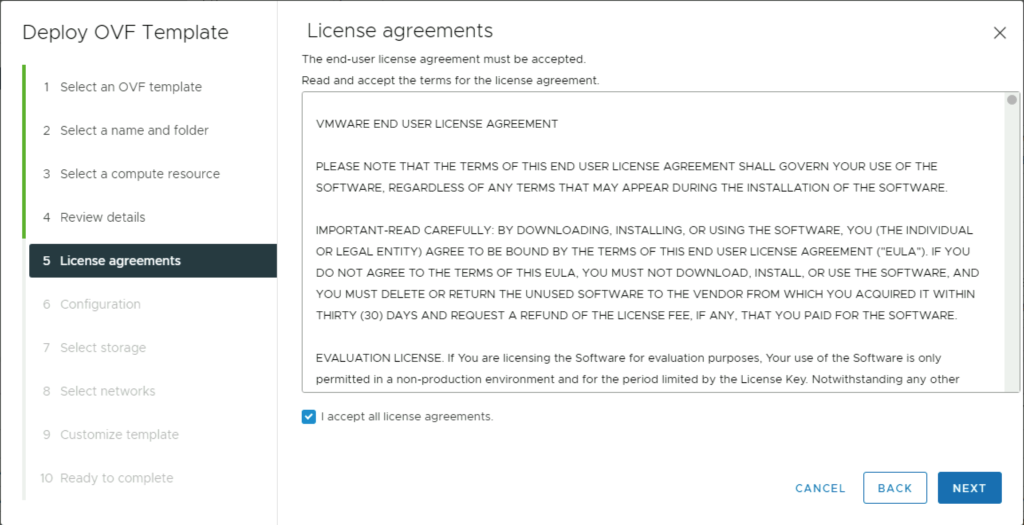
Accept the license agreement, click Next.
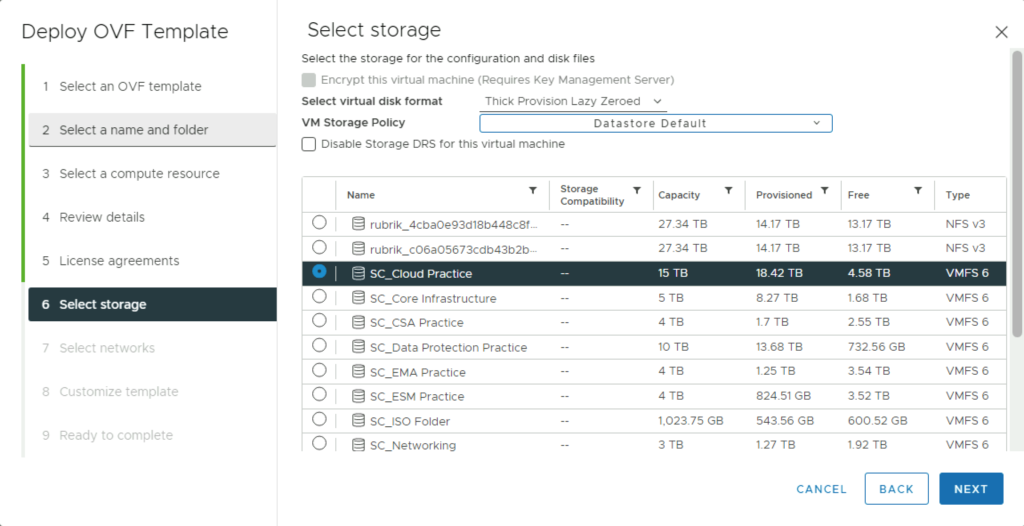
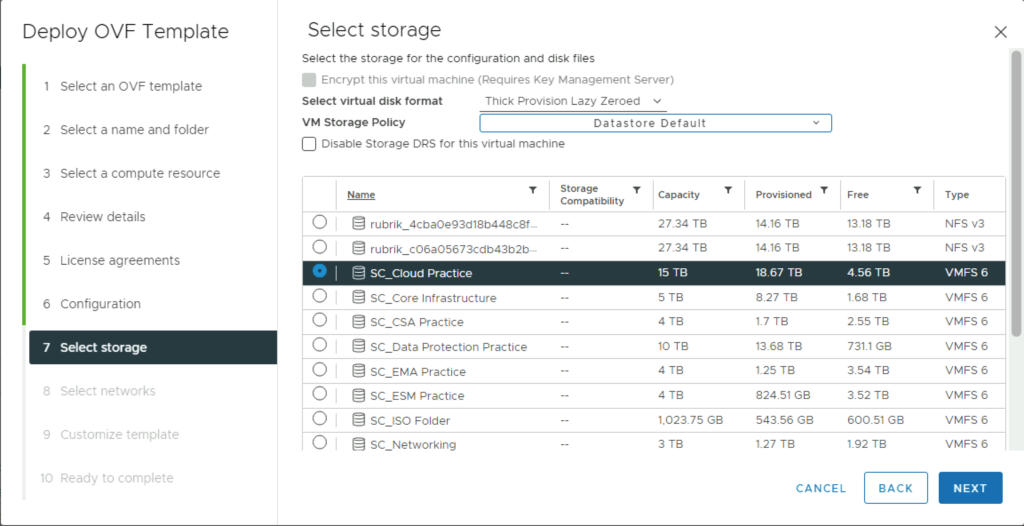
Select a datastore or datastore cluster to use for the deployment. Select the virtual disk format from the dropdown if you want something other than the datastore default listed, click Next.
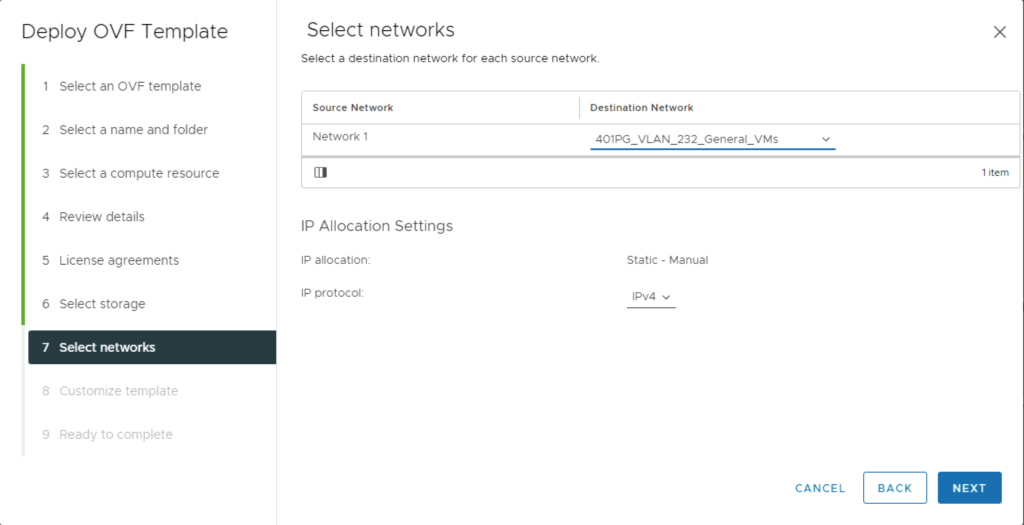
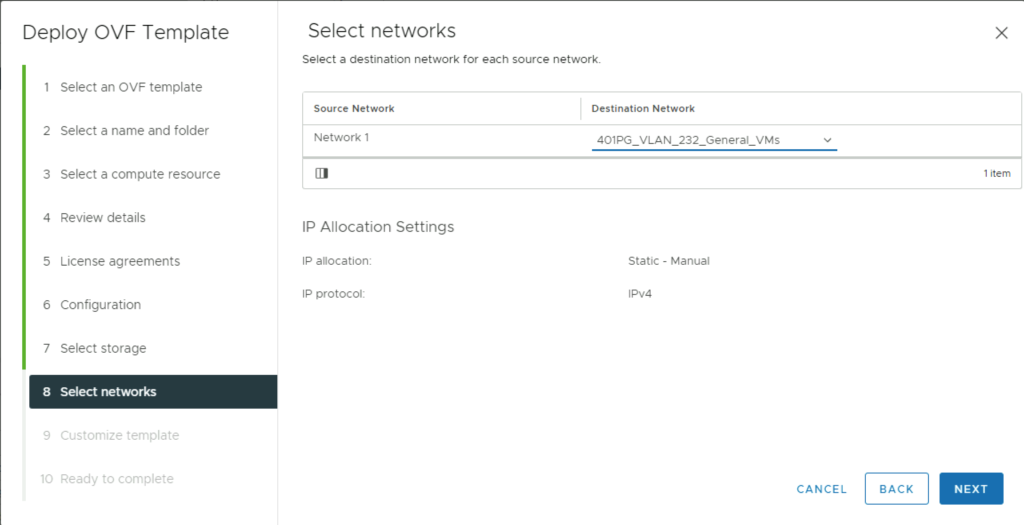
Select the network to attach the appliance to, click Next.
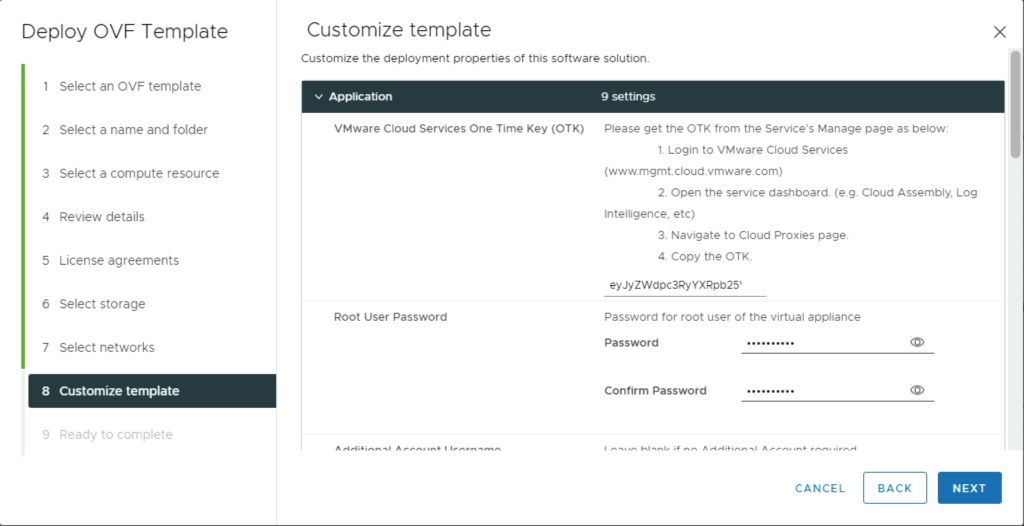
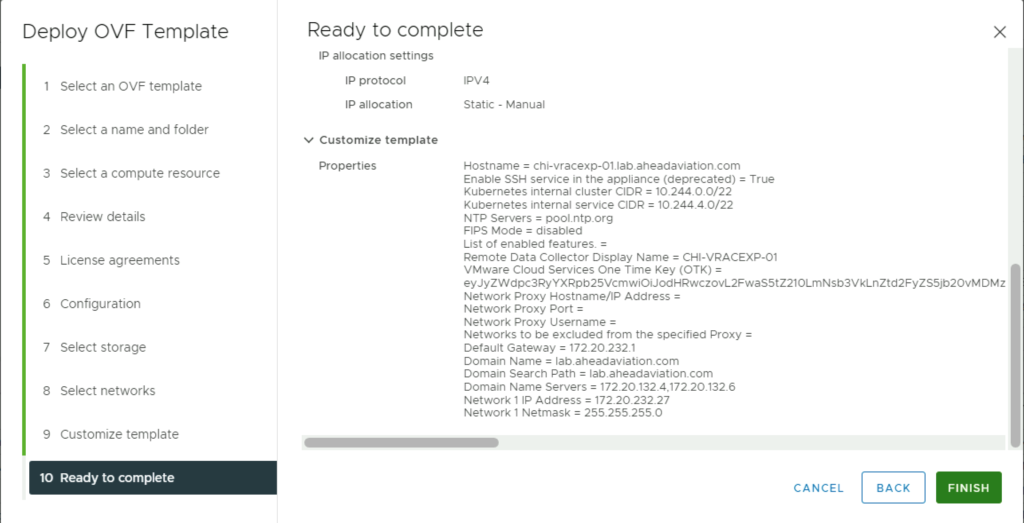
- Fill in all needed configuration items, click Next.
- VMware Cloud Services One Time Key (OTK) – This comes from the window you left open in step. Copy the OTK from item 3 in that window and paste it here.
- Root User Password – type in the password for the root account and confirm the password by entering again.
- Additional Account Username – This is optional. Leave blank if no additional account is needed.
- Additional Account Password – This is optional. Leave blank if you are not adding an additional account.
- Cloud Proxy Display Name – This is how you will see it in vRealize Automation Cloud. This can be a friendlier name than the VM name if you prefer it.
- Network Proxy Hostname/IP Address – If the appliance must use a proxy to gain access to the internet, fill this field in with the FQDN or IP address of the proxy.
- Network Proxy Port – Supply the port number used for proxy host.
- Network Proxy Username – Supply the username to authenticate to the network proxy.
- Network Proxy Password – Supply the password for the account supplied.
- Default Gateway – supply the default gateway the appliance will use on the network. You can leave this blank if you plan to use DHCP.
- Domain Name – Supply the domain name this appliance will be residing. You can leave this blank if you plan to use DHCP.
- Domain Search Path – Supply all domain names to append to searches. This can be multiple domains separated by a comma or a space. You can leave this blank if you plan to use DHCP.
- Domain Name Servers – Supply the IP addresses for the DNS servers you would like to use for name resolution. Do not supply FQDNs. You can leave this blank if you plan to use DHCP.
- Network 1 IP Address – Supply the IP address the appliance will use on the network. You can leave this blank if you plan to use DHCP.
- Network 1 Netmask – Supply the subnet mask for the network (i.e 255.255.255.0). You can leave this blank if you plan to use DHCP.
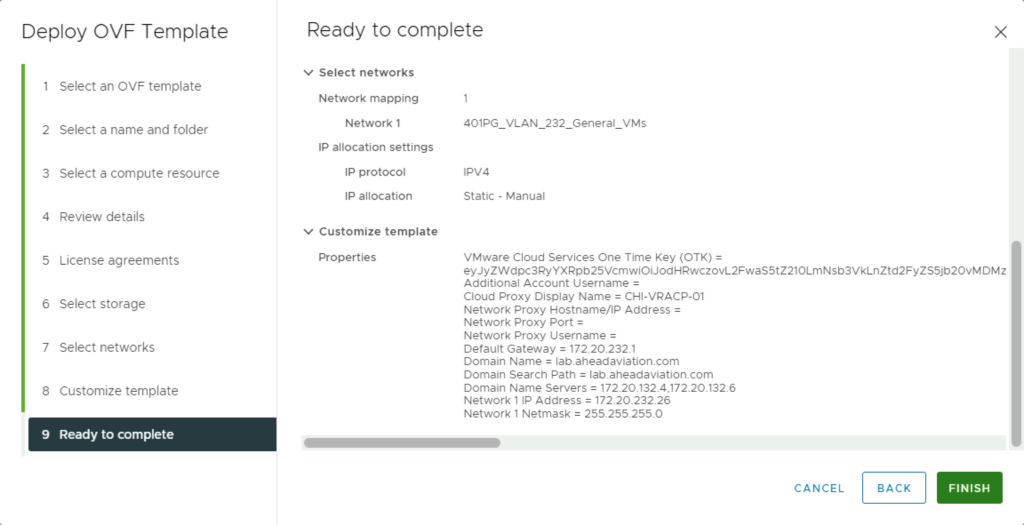
Review everything you have selected before finishing the deployment wizard, click Finish.
Once the deployment is complete, you will need to power on the appliance. Once powered on, it should only take a couple minutes to register inside of the Cloud Proxies tab in vRealize Automation Cloud.
Deploying the cloud extensibility proxy
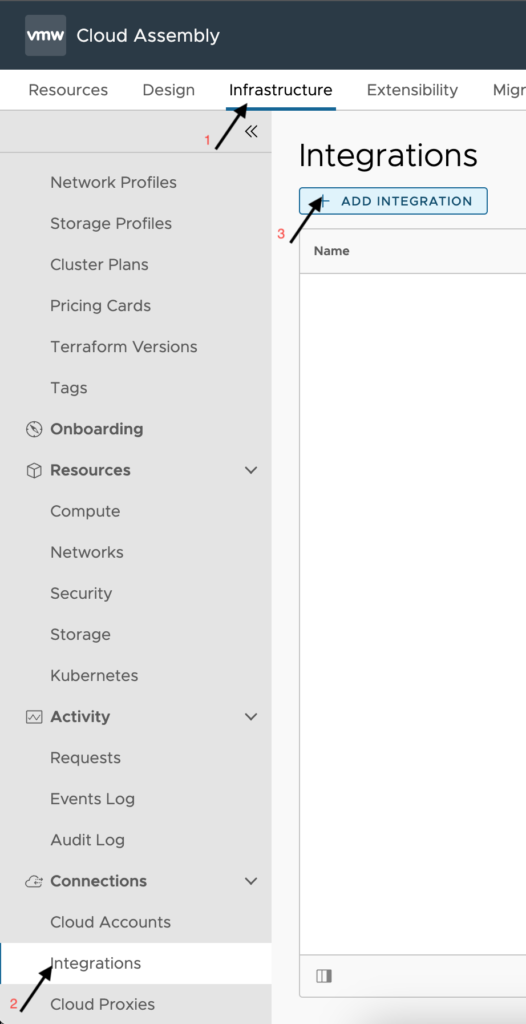
Login to vRA and launch the Cloud Assembly Service. Navigate to Infrastructure > Integrations and click on ‘+ Add Integration’.
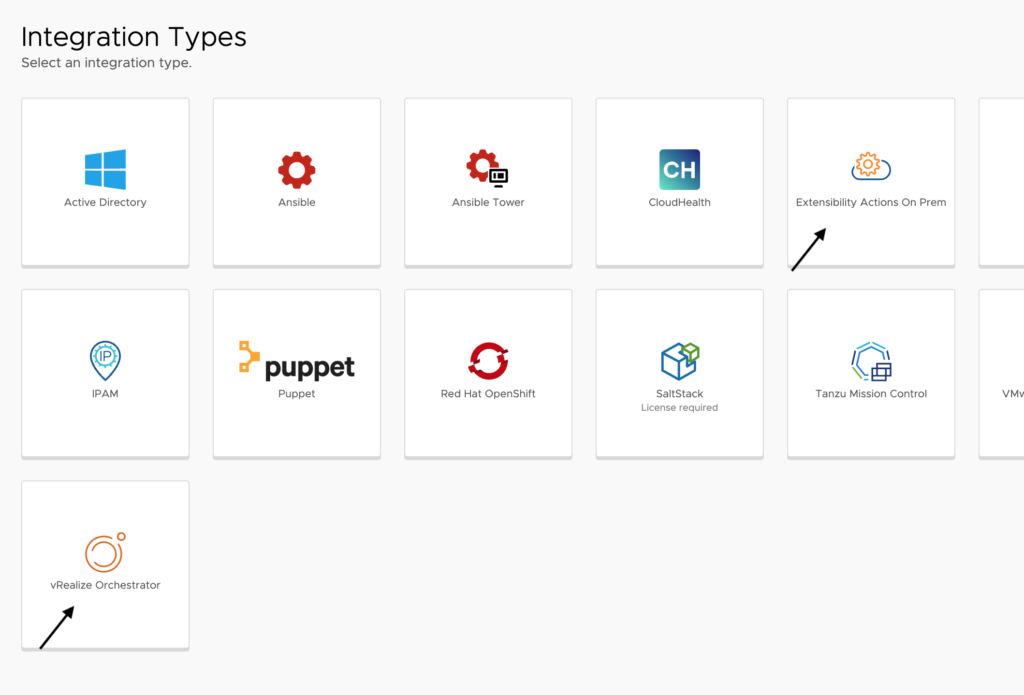
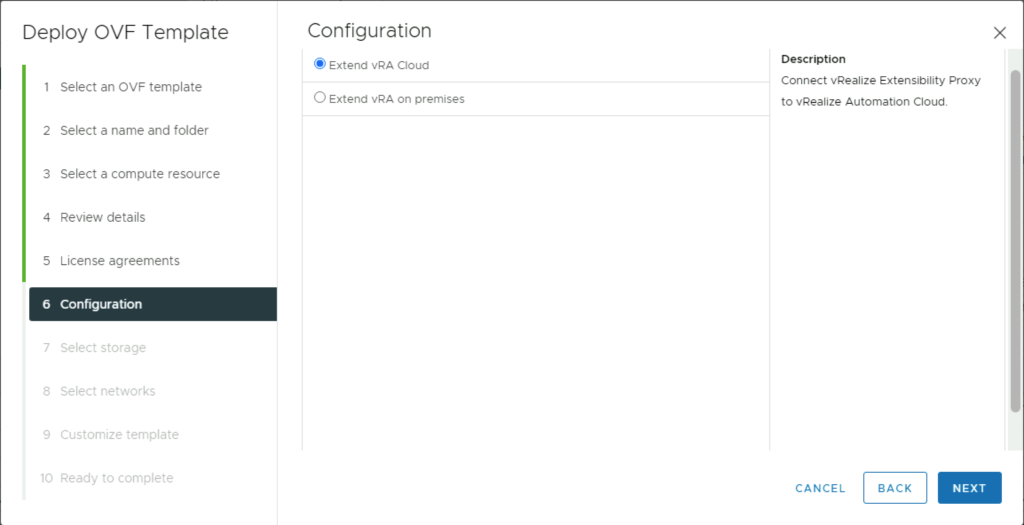
Select either the Extensibility Actions On-Prem or vRealize Orchestrator Integration Type.
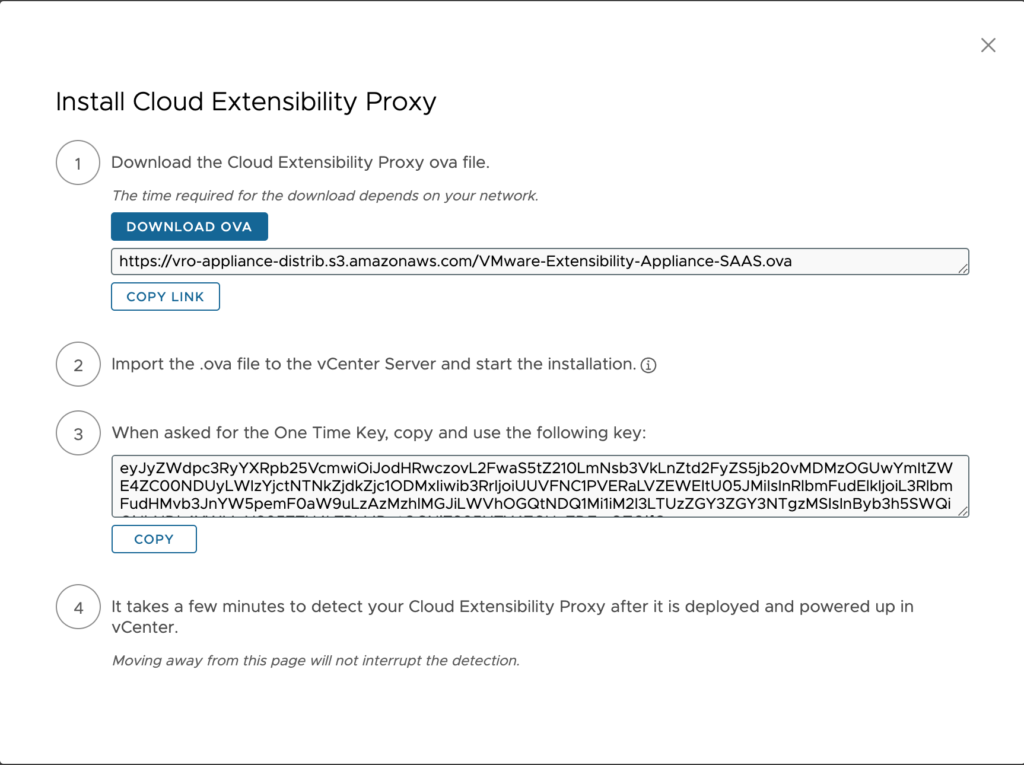
In the middle of the New Integration window, click on ‘New Cloud Extensibility Proxy’
Download the OVA by clicking on “Download OVA”, or by copying and browsing to the URL provided. Leave this window up for later when we need the One Time Key (OTK) during deployment.
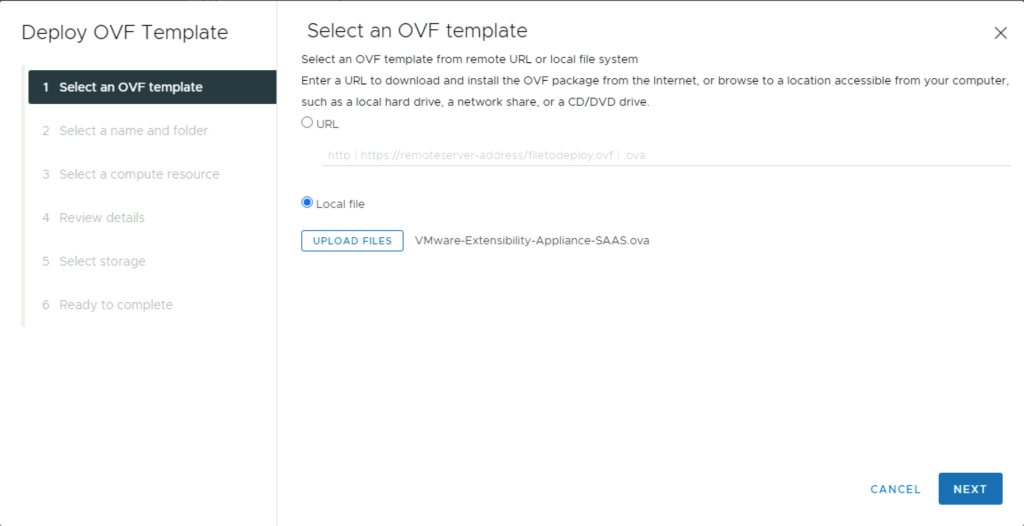
Login to the vCenter where you are deploying the appliance. From the vDC or most any other location point you will be installing the appliance into, you can right click and Deploy OVF Template.
Choose local file, if you downloaded the OVA or you may use the URL copied from Step 2 above, click Next.
Enter the Virtual machine name and select a VM folder location for it, click Next.
Select the ESXi host or cluster to deploy to, click Next.
Review the details of the appliance, click Next.
Accept the license agreement, click Next.
Choose the version of vRealize Automation this is extending, click Next.
Select a datastore or datastore cluster to use for deployment. Select the virtual disk format from the dropdown if you want something other than the datastore default listed, click Next.
Select the network to attach the appliance to, click Next.
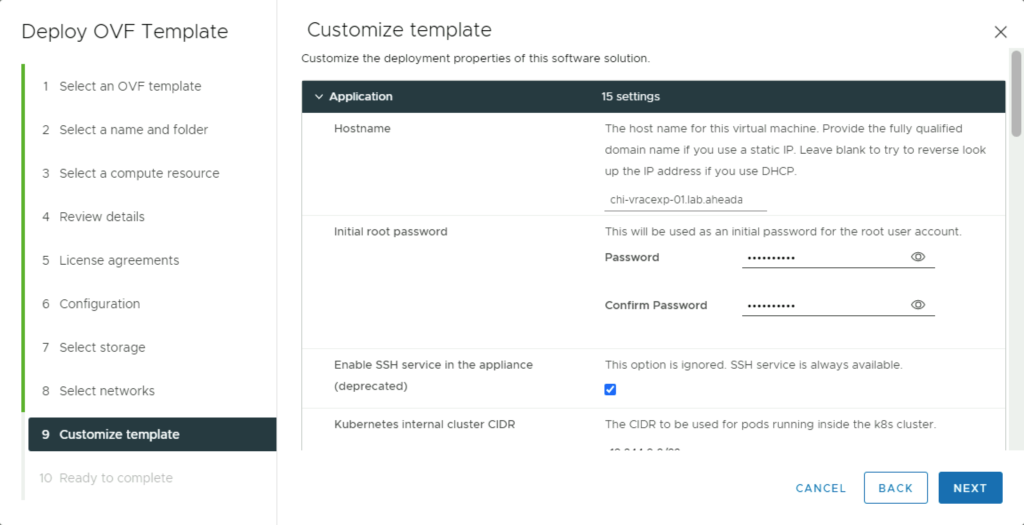
- Fill in all needed configuration items, click Next.
- Hostname – enter the FQDN of the appliance.
- Initial root password – type in the password for the root account and confirm the password by entering again.
- Enabled SSH service in the appliance (deprecated) – You can check this out of habit as I have done or leave this unchecked.
- Kubernetes internal cluster CIDR – Use the defaults here, unless you have a need to change these due to overlaps in your network IP space.
- Kubernetes internal service CIDR – Use the defaults here, unless you have a need to change these due to overlaps in your network IP space.
- NTP Servers – enter 1 or multiple NTP servers to use to maintain proper time. Multiple entries are to be separated by commas.
- FIPS Mode – default is disabled, but if you require FIPS mode to be enabled select that option.
- Remote Data Collector Display Name – This is how you will see it in vRealize Automation Cloud. This can be a friendlier name than the VM name if you prefer it.
- VMware Cloud Services One Time Key (OTK) – This comes from the window you left open in step 4. Copy the OTK from item 3 in that window and paste here.
- Network Proxy Hostname/IP Address – If the appliance must use a proxy to gain access to the internet, fill this field in with the FQDN or IP address of the proxy.
- Network Proxy Port – Supply the port number used for proxy host.
- Network Proxy Username – Supply the username to authenticate to the network proxy.
- Network Proxy Password – Supply the password for the account supplied.
- Networks to be excluded from the specified Proxy – specify any networks to prevent running through the network proxy.
- Default Gateway – supply the default gateway the appliance will use on the network. You can leave this blank if you plan to use DHCP.
- Domain Name – Supply the domain name this appliance will be residing. You can leave this blank if you plan to use DHCP.
- Domain Search Path – Supply all domain names to append to searches. This can be multiple domains separated by a comma or a space. You can leave this blank if you plan to use DHCP.
- Domain Name Servers – Supply the IP addresses for the DNS servers you would like to use for name resolution. Do not supply FQDNs. You can leave this blank if you plan to use DHCP.
- Network 1 IP Address – Supply the IP address the appliance will use on the network. You can leave this blank if you plan to use DHCP.
- Network 1 Netmask – Supply the subnet mask for the network (i.e 255.255.255.0). You can leave this blank if you plan to use DHCP.
Review everything you have selected before finishing the deployment wizard, click Finish.
Once the deployment is complete, you will need to power on the appliance. Once powered on, it should only take a couple minutes to register inside of the Cloud Proxies tab in vRealize Automation Cloud.
Managing cloud proxies
Cloud proxies can be monitored and managed in some limited capacity from vRealize Automation itself. This is a great way to check the basic health of the proxies for troubleshooting purposes or to upgrade them when new versions of the proxies have been made available in S3. To see the cloud proxies that are connected to vRealize Automation Cloud launch the Cloud Assembly service and click on Infrastructure > Cloud Proxies.
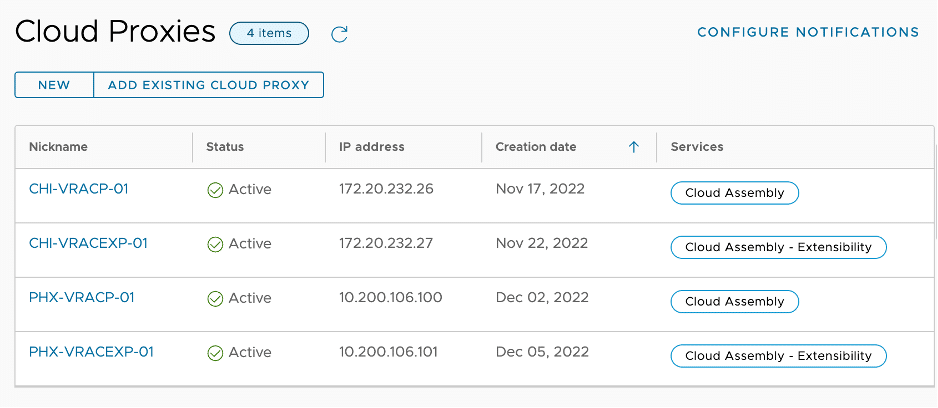
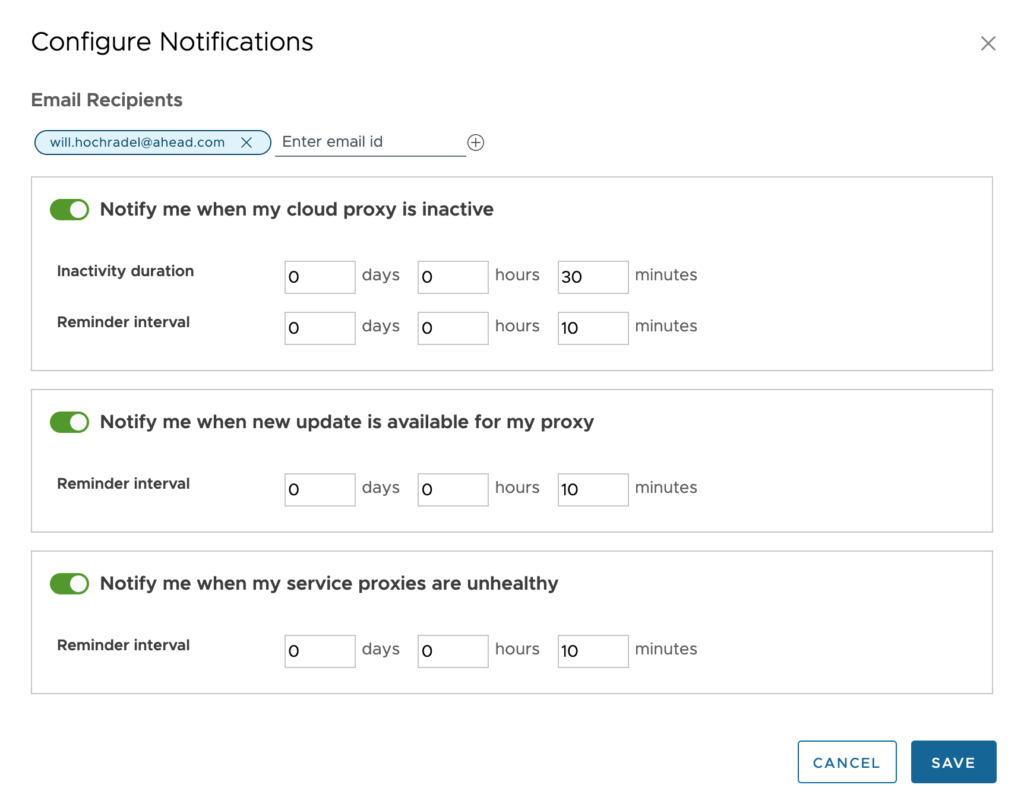
From this page, we can see the Status of each Cloud Proxy and which type they are. The standard Cloud Proxy shows up with the ‘Cloud Assembly’ Service and the Cloud Extensibility Proxy will show up with ‘Cloud Assembly – Extensibility’ service. Clicking into each type will show different information. We can also configure notifications about issues with cloud proxies from here. The defaults are shown below and all items are enabled. You can, however, modify the reminder intervals and inactivity duration in days, hours and minutes. Minimum value is 10 minutes for all options.
Both proxies will show summary data with the hostname and IP Address as well as utilized CPU and memory. We are also able to see the version number. Each cloud proxy has a set of actions that can be done with them as seen at the bottom of the image in a dropdown. The standard cloud proxy has one additional action which is to upgrade the proxy. These are quite helpful actions to have while troubleshooting issues and not having to connect to each vCenter server and working with the appliance directly.
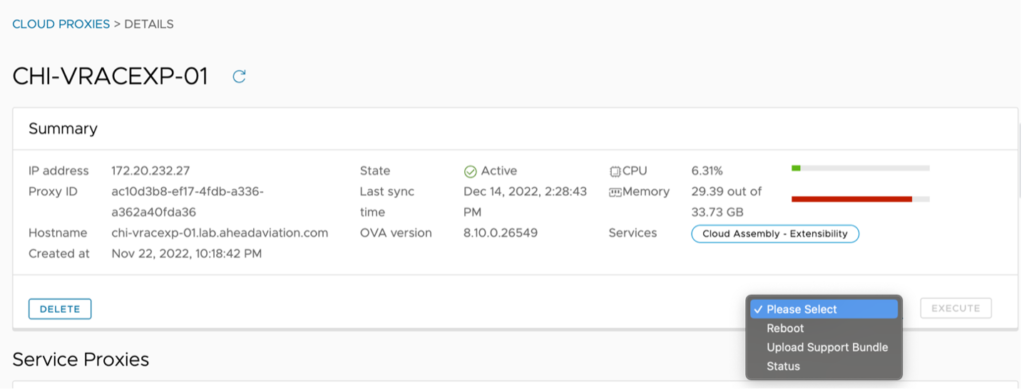
Executing the Status action will bring up the status page that you will also find when you login to the appliances through the console or SSH. This process will take 10 – 30 seconds to load as long as communications with the proxy are good. Below is a sample of what you can see from a status page.
Using the ‘Upload Support Bundle’ action pushes logs into S3 based on your long OrgID that the VMware Engineering teams have access to, but Global Support Services do not seem to have access to, so you may be asked to generate a log bundle and to submit via FTP or another method to your support ticket. To generate the log bundle simply run the following command.
- sh /generate-log-bundle
Grab the log files from /root/log-bundle-directory
Open a browser to https://ftpsite.vmware.com/login and login with username and password of ‘inbound’. You should create a folder with a name of your support case number then upload the support bundle there.
You might also like
Leave A Reply