
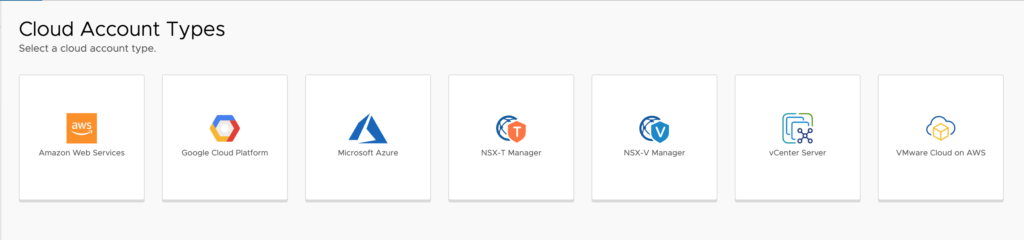
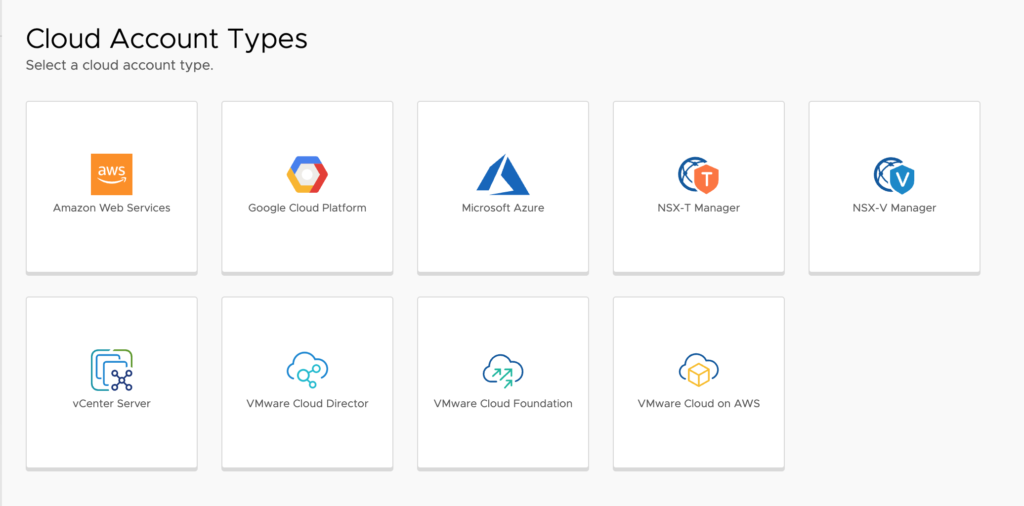
Cloud accounts are the connections to each cloud that you are going to consume with vRealize Automation. Currently there are 7 different options for Cloud Accounts in VMware’s SaaS offering while there are 9 for the On-Prem offering as of the writing of this article, and I am going to walk you through each one.
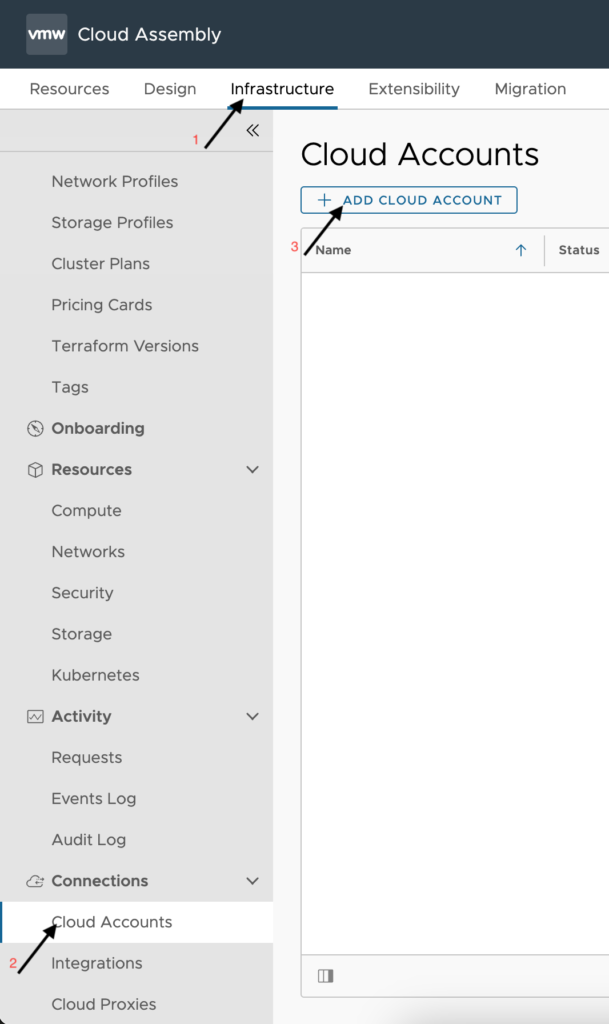
To get started setting up the above Cloud Accounts, you must login to vRealize Automation and launch the Cloud Assembly service and navigate to Infrastructure > Cloud Accounts.
Setting up Amazon Web Services
Pre-Requisite:
Configure Cloud Account:
- Open the Amazon Web Services cloud account configuration window and fill out the required fields.
- Name – Provide a standard naming scheme that fits your needed Accounts / Regions / Environment requirements.
- Description – Add some detail around the cloud account and regions you will be utilizing.
- Access Key ID – Supply the AWS account access key.
- Secret access key – Supply the secret access key for the Access Key ID.
- Validate button – You must validate the connection after supplying the Access Key ID and Secret access key. Once you have run the validation successfully, data collection occurs bringing up AWS regions for selection.
- The account regions associated with the account are collected.
- Allow provisioning to these regions – Select all regions that you will be provisioning to in this AWS Account. All regions that will be consumed must be added within the same Cloud Account. Two separate cloud accounts to the same AWS Account is not permitted.
- Create a cloud zone for the selected datacenters – This will automatically create a cloud zone for each region specified using default naming standards. I tend to leave this unchecked so that I can create them myself.
- Capability tags – These are the tags used to define the capabilities of this cloud account.

Setting up Google Cloud Platform
Pre-Requisite:
- A user account with the required permissions
- Create a JSON key for the service account
- Enable the Compute Engine API
Configure Cloud Account:
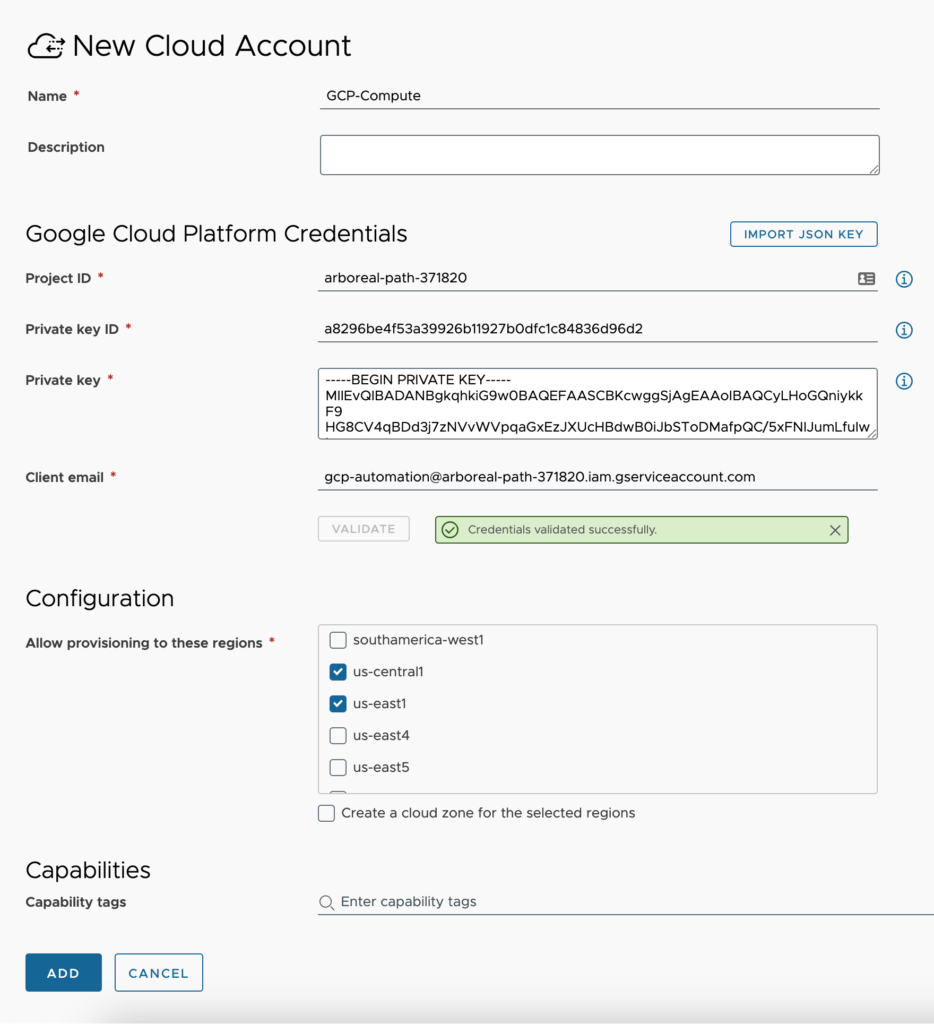
- Open the Google Cloud Platform cloud account configuration window and fill out the required fields.
- Name – Provide a standard naming scheme that fits your needed Accounts / Regions / Environment requirements.
- Description – Add some detail around the cloud account and Regions you will be utilizing.
- Import JSON Key Button – For ease of configuring the credentials for GCP connections, you can download a JSON file for the account you plan to use and import that file here.
- Project ID – This is a grouping of users/billing, monitoring etc. Found by navigating to the API console and selecting Manage all Projects.
- Private key ID – Enter the key generated for the account.
- Private key – Enter the private key generated for the account, including the —–BEGIN PRIVATE KEY—– and —–END PRIVATE KEY—–
- Client email – email address associated with the account.
- Validate button – You must validate the connection after supplying the Project ID, Private key ID, Private key and Client email. Once you have run the validation successfully, data collection occurs bringing up GCP regions for selection.
- The regions associated with the account are collected.
- Allow provisioning to these regions – Select all regions that you will be provisioning to in this GCP account. All regions that will be consumed must be added within the same cloud account. Two separate cloud accounts to the same GCP account is not permitted.
- Create a cloud zone for the selected datacenters – This will automatically create a cloud zone for each region specified using default naming standards. I tend to leave this unchecked so that I can create them myself.
- Capability tags – These are the tags used to define the capabilities of this cloud account.
Setting up Microsoft Azure
Pre-Requisite:
- A user account with the required permissions
- Create an Azure AD Application and authorize it to connect
Configure Cloud Account:
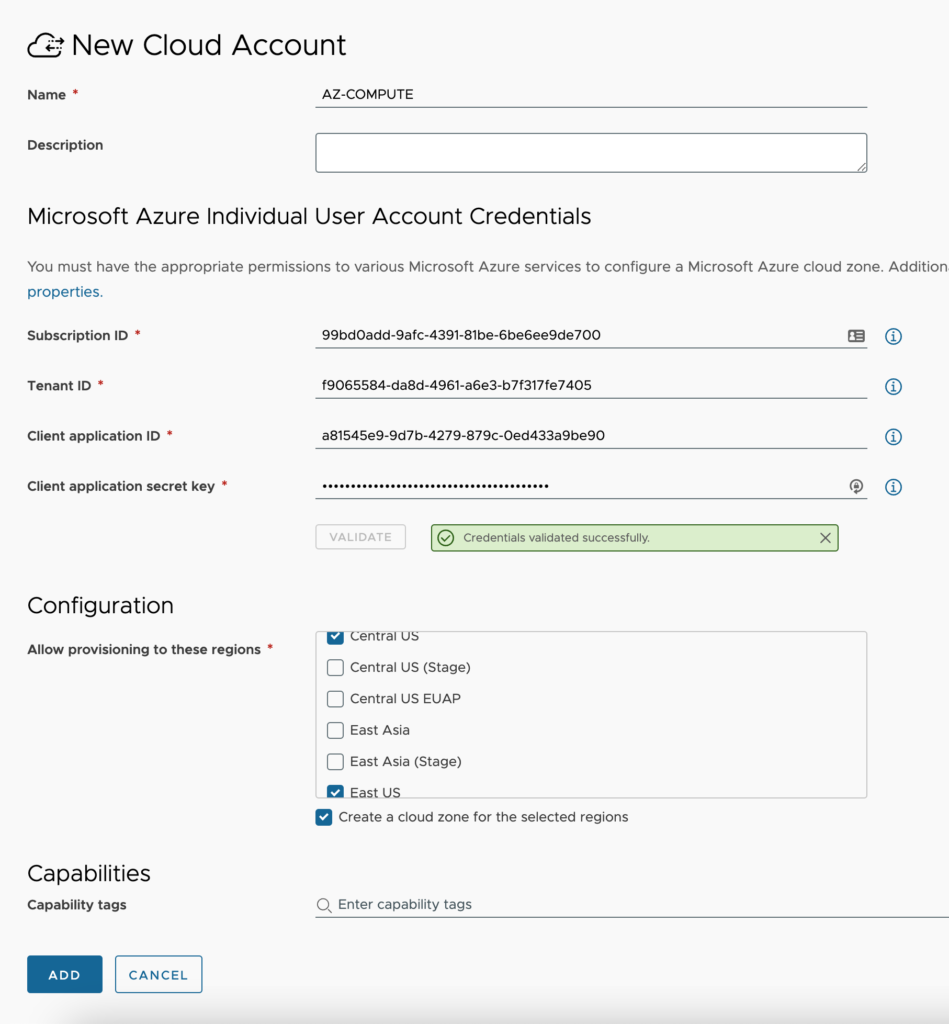
- Open the Microsoft Azure Cloud Account configuration window and fill out the required fields.
- Name – Provide a standard naming scheme that fits your needed Accounts / Regions / Environment requirements.
- Description – Add some detail around the Cloud Account and Regions you will be utilizing.
- Subscription ID – Enter the GUID for your Azure subscription.
- Tenant ID – Enter the GUID for your Azure Tenant.
- Client application ID – Enter the application ID.
- Client application secret key – Enter the application secret.
- Validate button – You must validate the connection after supplying the Subscription ID, Tenant ID, Client application ID and Client application secret key. Once you have run the validation successfully, data collection occurs bringing up Azure regions for selection.
- The account regions associated with the account are collected.
- Allow provisioning to these regions – Select all regions that you will be provisioning to in this Azure account. All regions that will be consumed must be added within the same cloud account. Two separate cloud accounts to the same Azure account is not permitted.
- Create a cloud zone for the selected datacenters – This will automatically create a cloud zone for each region specified using default naming standards. I tend to leave this unchecked so that I can create them myself.
- Capability tags – These are the tags used to define the capabilities of this cloud account.
Setting up NSX-T Manager
Pre-Requisite:
Configure Cloud Account:
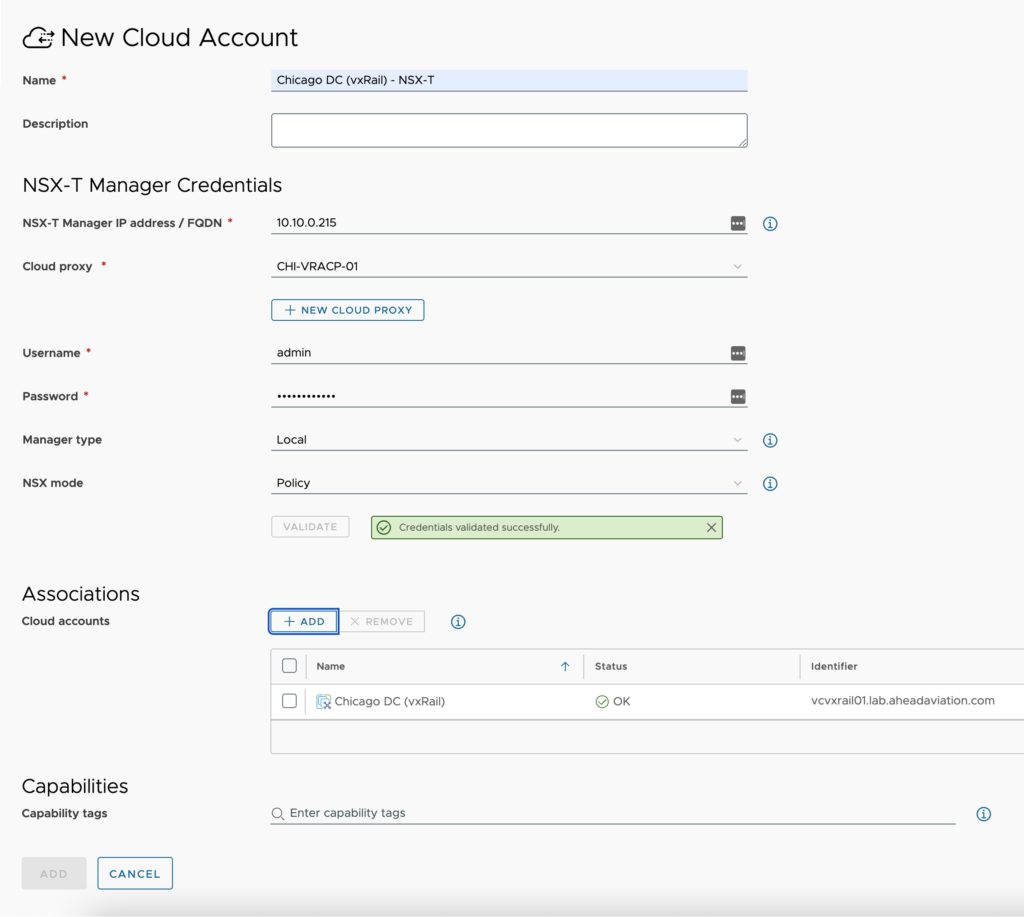
- Open the NSX-T Manager cloud account configuration window and fill out the required fields.
- Name – Provide a standard naming scheme that fits your needed Accounts / Regions / Environment requirements.
- Description – Add some detail around the cloud account and Regions you will be utilizing.
- NSX-T Manager IP address / FQDN – enter the IP Address or FQDN of the NSX Manager. Make sure if using FQDN that DNS entries for the NSX-T Manager were created.
- Cloud Proxy – Select the cloud proxy that was created in this environment. Reference the cloud proxy page for details on setting one up if you have not done so already.
- Username – Enter the username for an account with the required permissions.
- Password – Enter the password for this account.
- Manager Type – Choose whether this is a Local (On-Prem) or Global manager that spans other managers.
- NSX Mode – Choose the appropriate Manager type. Keep in mind that ‘Manager’ is deprecated at the time of writing this.
- Validate button – You must validate the connection after supplying the NSX-T Manager IP address or FQDN, Username, and Password. Once you have run the validation successfully, data collection occurs.
- The networks, tags, and security groups associated with the account are collected.
- Associations
- Cloud Accounts – You can associate all the cloud accounts that this NSX-T Manager is able to provide networking resources for. Once an association is made here, you will see the same association on the other cloud account as well.
- Capability tags – These are the tags used to define the capabilities of this cloud account.
Setting up NSX-V Manager
Pre-Requisite:
Configure Cloud Account:
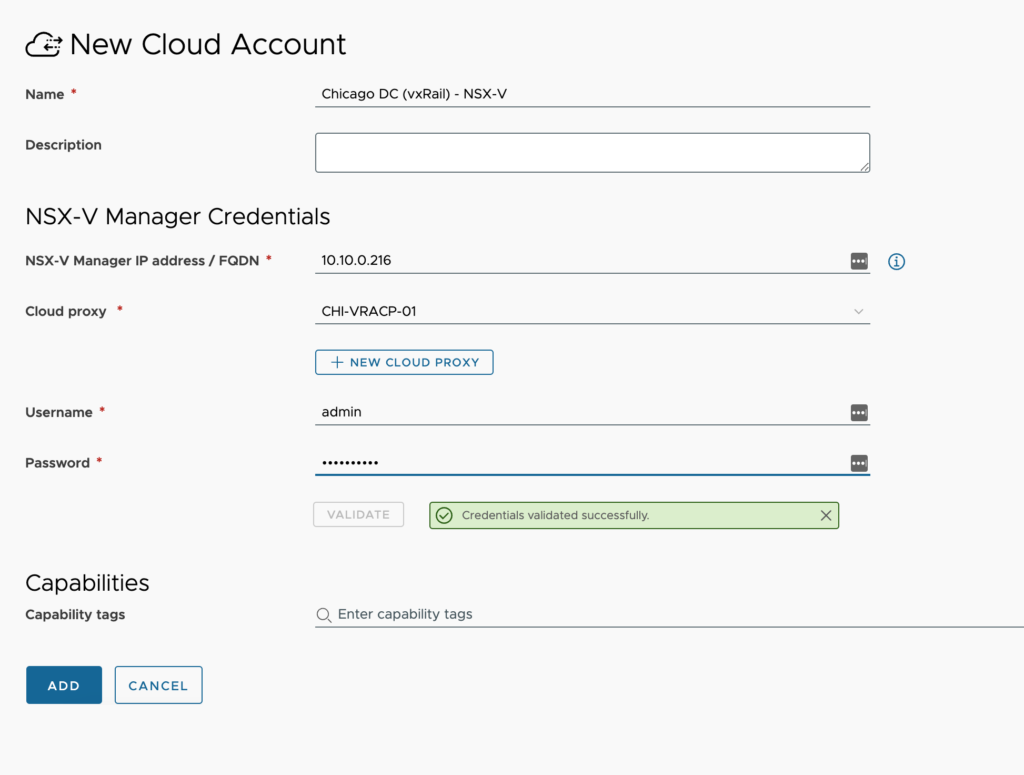
- Open the NSX-V Manager cloud account configuration window and fill out the required fields.
- Name – Provide a standard naming scheme that fits your needed Accounts / Regions / Environment requirements.
- Description – Add some detail around the cloud account and Regions you will be utilizing.
- NSX-V Manager IP address / FQDN – enter the IP Address or FQDN of the NSX Manager. Make sure if using FQDN that DNS entries for the NSX-V Manager were created.
- Cloud proxy – Select the cloud proxy that was created in this environment. Reference the cloud proxy page for details on setting one up if you have not done so already.
- Username – Enter the username for an account with the required permissions.
- Password – Enter the password for this account.
- Capability tags – These are the tags used to define the capabilities of this cloud account.
Setting up vCenter Server
Pre-Requisite:
Configure Cloud Account:
- Open the vCenter Server cloud account configuration window and fill out the required fields.
- Name – Provide a standard naming scheme that fits your needed Accounts / Regions / Environment requirements.
- Description – Add some detail around the cloud account and vDCs you will be utilizing.
- vCenter Server IP Address / FQDN – Provide the IP or FQDN of the vCenter Server.
- Cloud Proxy – This is only required for the SaaS offering and will not be displayed in the On-Prem offering. Select the cloud proxy that was created in this environment. Reference the cloud proxy page for details on setting one up if you have not done so already.
- Username – supply the username in the same format for logging into the vCenter UI. If you use an AD account, you may need to specify the account in UPN format (i.e. username@domain.com).
- Password – Supply the password for the username specified above.
- Validate button – You must validate the connection after supplying the FQDN, Username and Password. Once you have run the validation successfully, data collection occurs bringing up vDCs for selection.
- All data centers that are associated with the vCenter account are data-collected. The following elements are data-collected, as are all vSphere tags for the following elements:
- Machines
- Clusters and hosts
- Port groups
- Datastores
- All data centers that are associated with the vCenter account are data-collected. The following elements are data-collected, as are all vSphere tags for the following elements:
- Allow provisioning to these datacenters – Select all vDCs that you will be provisioning to in this vCenter server. All vDCs that will be consumed must be added within the same cloud account. Two separate cloud account to the same vCenter is not permitted.
- Create a cloud zone for the selected datacenters – This will automatically create a cloud zone for each vDC specified using default naming standards. I tend to leave this unchecked so that I can create them myself.
- NSX Manager – This is to associate the NSX-V Manager or NSX-T Manager cloud account that is controlling NSX for this vCenter Server. If no NSX cloud account type has been configured at this time, the association can be made later when creating the NSX cloud account.
- Capability tags – These are the tags used to define the capabilities of this cloud account.
Setting up VMware Cloud on AWS
Pre-Requisite:
Configure Cloud Account
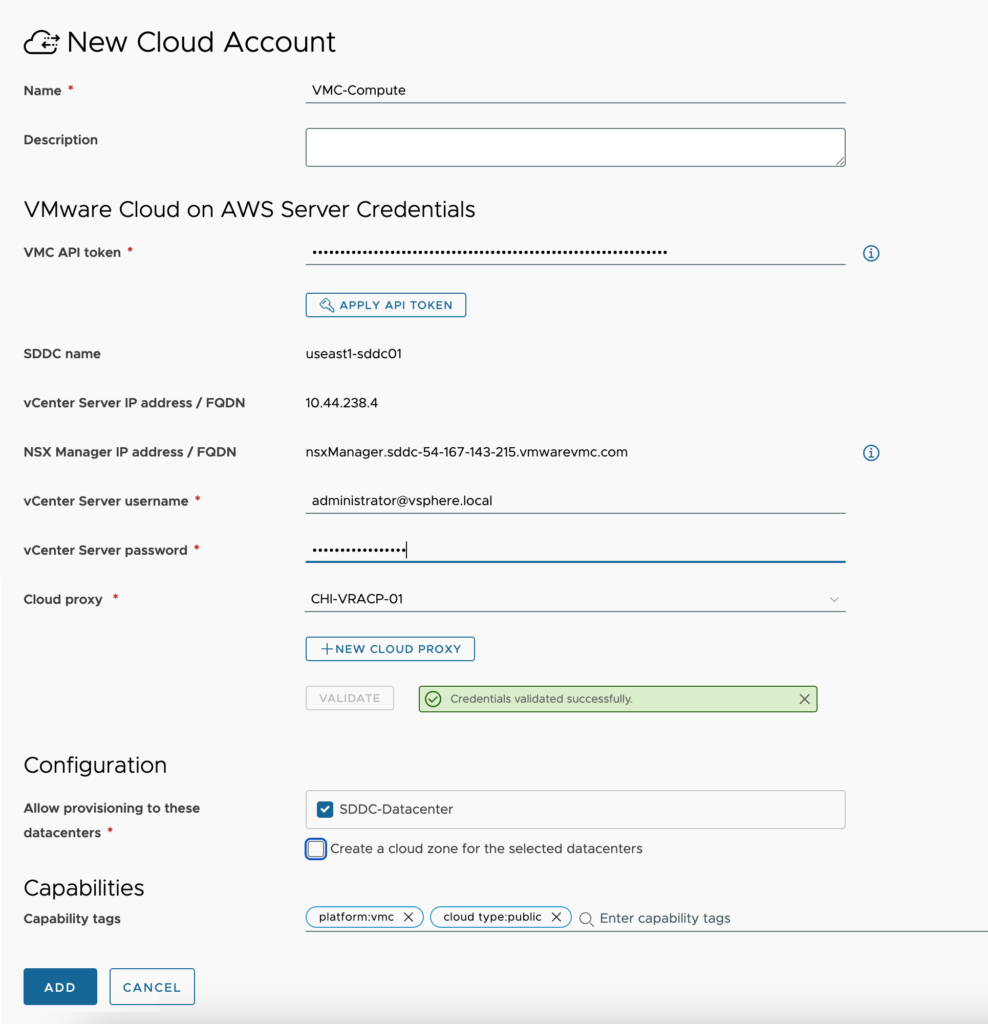
- Open the VMware Cloud on AWS cloud account configuration window and fill out the required fields.
- Name – Provide a standard naming scheme that fits your needed Accounts / Regions / Environment requirements.
- Description – Add some detail around the cloud account and vDCs you will be utilizing.
- VMC API token – This is the API token you should have generated from the pre-requisites that will be used to connect to VMC on AWS.
- Apply API Token button – Click this to authenticate to VMC on AWS to pull the remaining fields.
- SDDC name –
- vCenter Server IP address / FQDN – Supply the IP or FQDN of the vCenter to manage.
- NSX Manager IP address / FQDN –
- vCenter Server username – supply the username in the same format for logging into the vCenter UI. If you use an AD account, you may need to specify the account in UPN format (i.e. username@domain.com).
- vCenter Server password – Supply the password for the username specified above.
- Cloud proxy – This is only required for the SaaS offering and will not be displayed in the On-Prem offering. Select the cloud proxy that was created in this environment. Reference the cloud proxy page for details on setting one up if you have not done so already.
- Validate button – You must validate the connection after supplying the FQDN, Username and Password. Once you have run the validation successfully, data collection occurs bringing up vDCs for selection.
- All data centers that are associated with the vCenter account are data-collected. The following elements are data-collected, as are all vSphere tags for the following elements:
- Machines
- Clusters and hosts
- Port groups
- Datastores
- All data centers that are associated with the vCenter account are data-collected. The following elements are data-collected, as are all vSphere tags for the following elements:
- Allow provisioning to these datacenters – Select all vDCs that you will be provisioning to in this vCenter server. All vDCs that will be consumed must be added within the same cloud account. Two separate cloud account to the same vCenter is not permitted.
- Create a cloud zone for the selected datacenters – This will automatically create a cloud zone for each vDC specified using default naming standards. I tend to leave this unchecked so that I can create them myself.
- Capability tags – These are the tags used to define the capabilities of this cloud account.
You might also like
Leave A Reply