Once you have vRealize Automation stood up in your environment, there are a few things that you will want to do just to get the environment off the ground. I always make sure to set the Datacenter location in vRealize Suite Lifecycle Manager to the appropriate location and setup my VMware account to pull software and license keys. I will also walk you through getting VMware Identity Manager connected to Active Directory and setup a little bit of branding before assigning users and groups access to the vRealize Automation applications.
Change the datacenter location
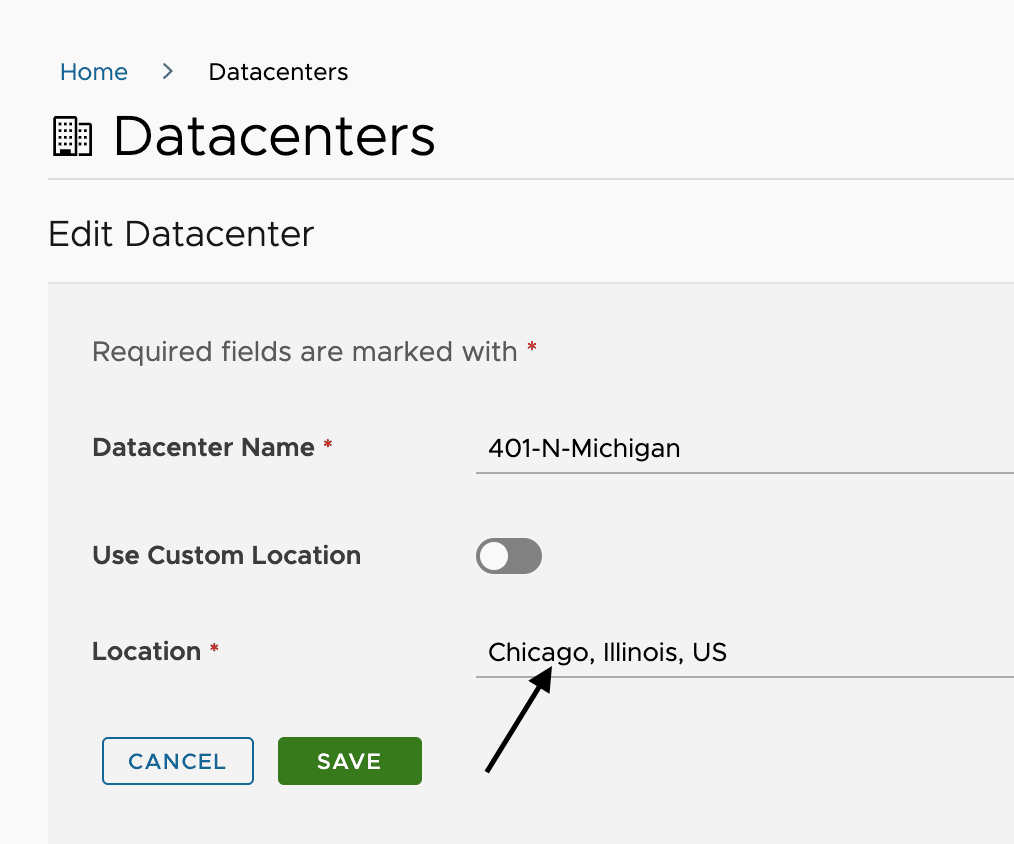
Let’s start with getting that datacenter changed from Palo Alto, California, US. Log in to vRealize Suite Lifecycle Manager with a username of admin@local and the password you used during install. Once in, you should be on the Dashboard page, and you will want to click on the Manage Datacenters button at the top.

Now you will want to click the pencil icon on the right side next to your vCenter count as shown below.

Now just type in the city name and select your location from the search.
Setup your My VMware connection
Setting up the My VMware connection allows vRealize Suite Lifecycle Manager to download product updates and installers for everything within the vRealize Suite. This connection can also pull all VMware licensing that is visible from the user’s account.
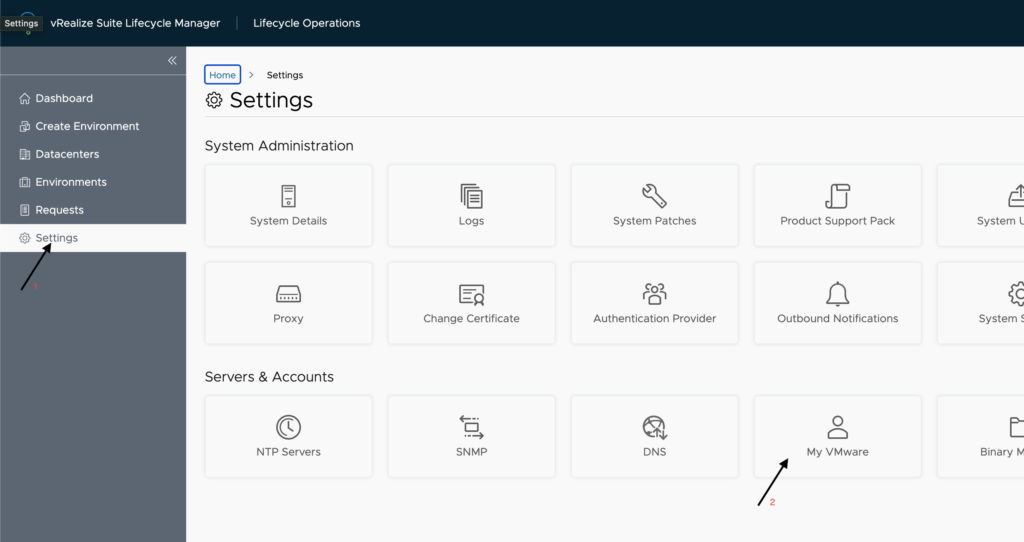
On the left, click on Settings and then My VMware
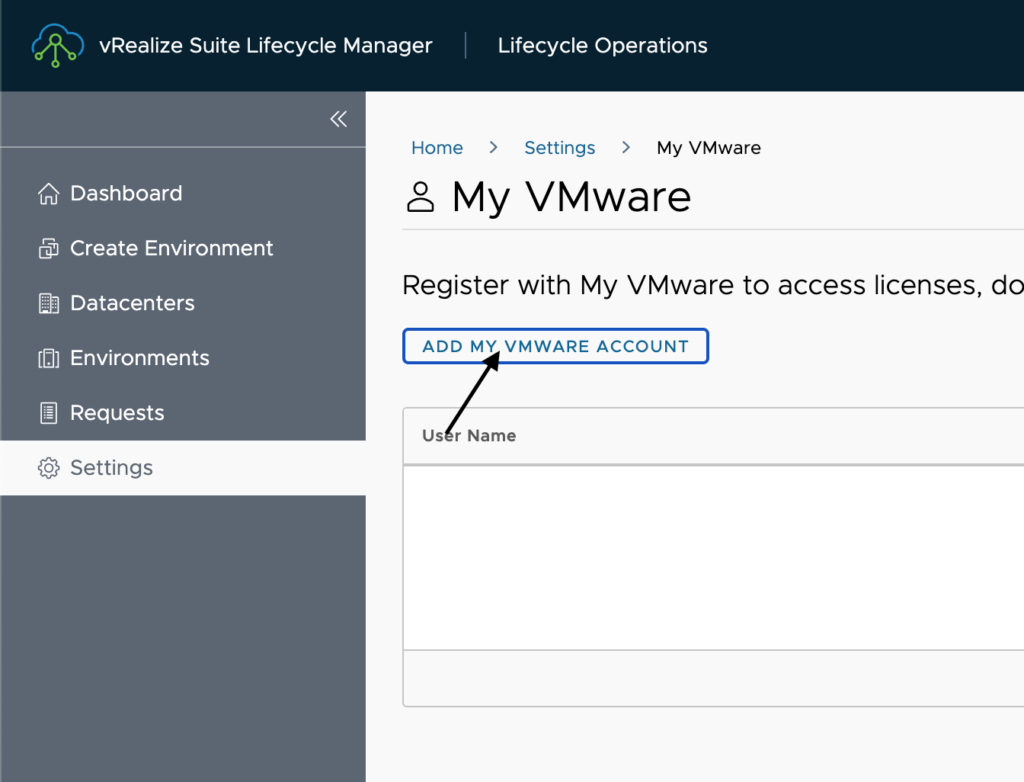
Click on Add My VMware Account
First, we will want to setup a password credential in the system. Click on ‘click here’.
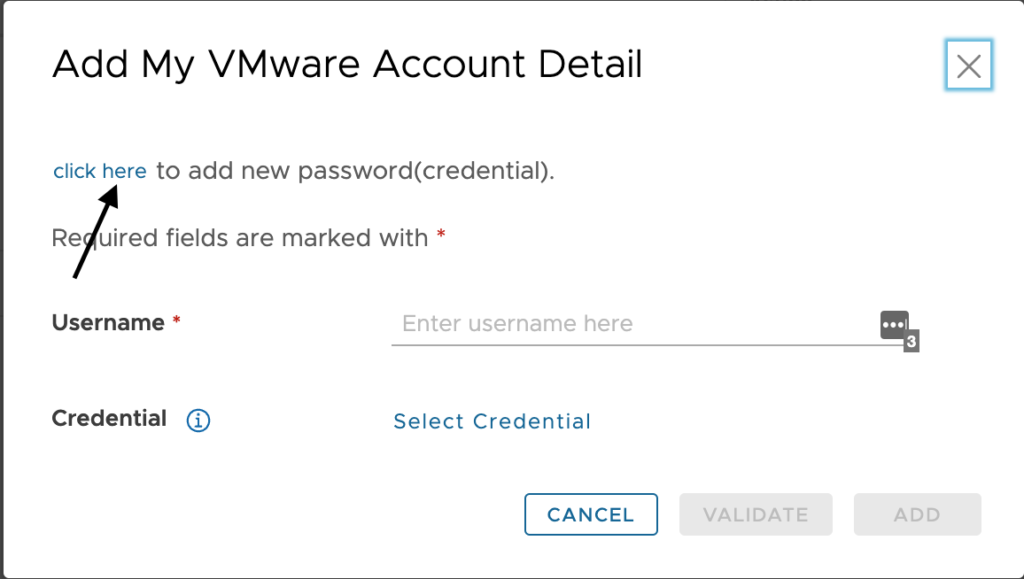
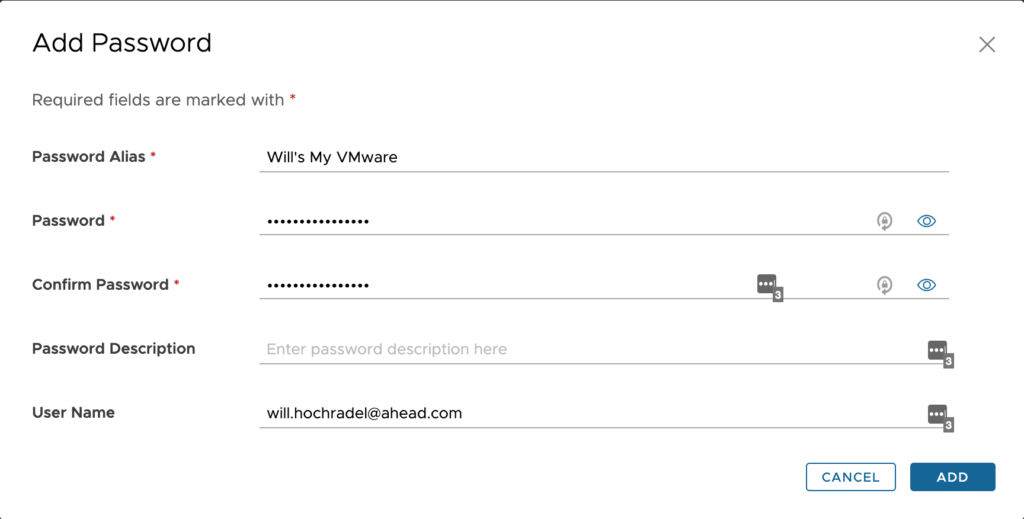
Fill out the Password Alias with a friendly name to reference this password by. Now add the Password and Confirm password and supply the User Name for this password and supply a description if you would like. I feel my Alias is good enough for a description in this case, so I am leaving it out. Once done, click Add to add this to the locker in vRealize Suite Lifecycle Manager.
Now input the username for accessing vmware.com and click on Select Credential.

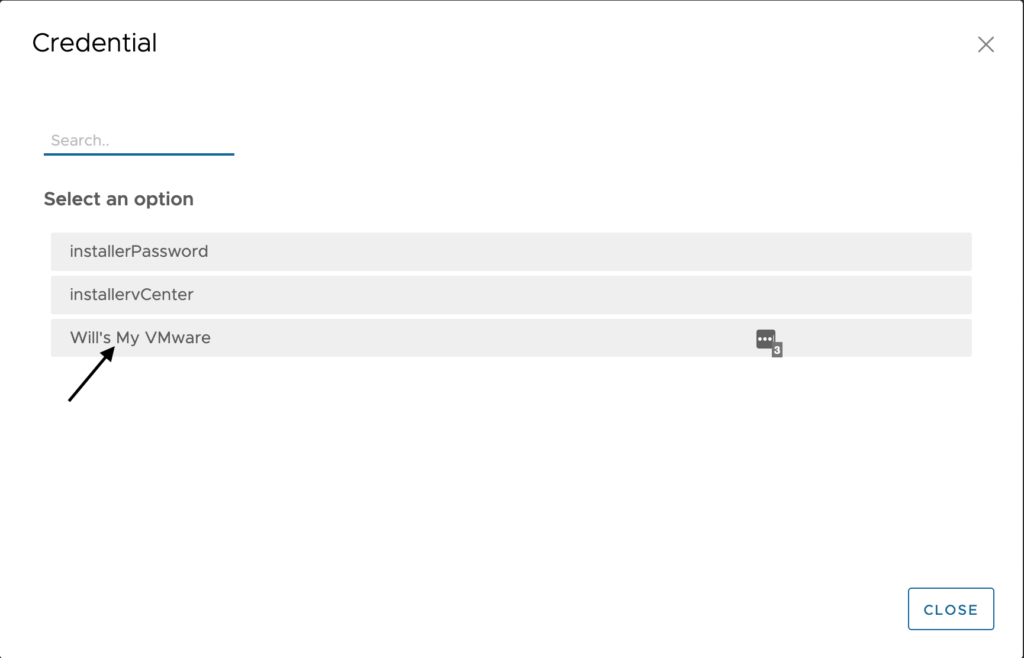
Choose the credential we just added.
Validate the credential works to connect to vmware.com by clicking the Validate button.

Now you should see a success message and be able to click Add. Once this is done you are all setup to pull updates and installers as well as licensing from vmware.com.

Setup Active Directory in VMware Identity Manager
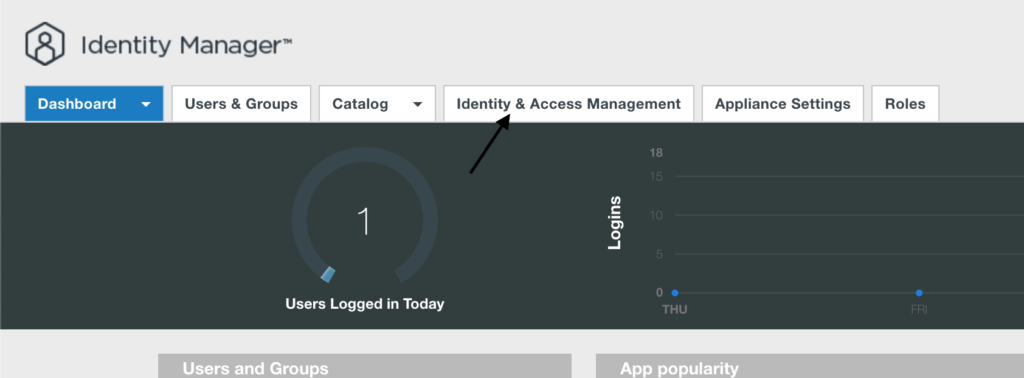
Log in to VMware Identity Manager with a username of admin and the password you used during install. Once in you should be on the Dashboard page. From here, you will click on the Identity & Access Management tab at the top menu.
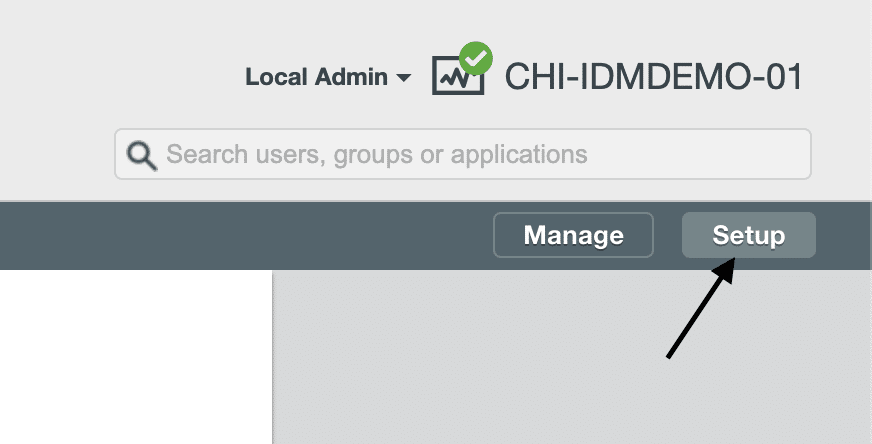
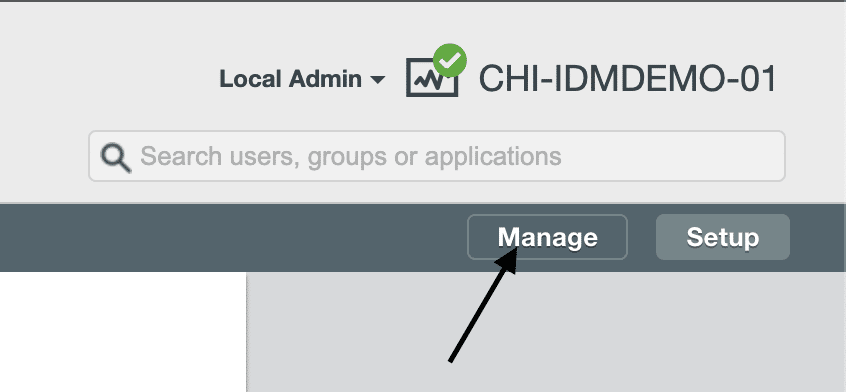
Click on Setup in the upper right of the screen to toggle from the Manage sub-menu to the Setup sub-menu options.
Now click on User Attributes in the sub-menu.

I like to uncheck the required box for email as this can cause issues with pulling in user accounts if they do not contain an email. Once changed, scroll down to click Save.

Now click Manage to go back to the manage sub-menu.
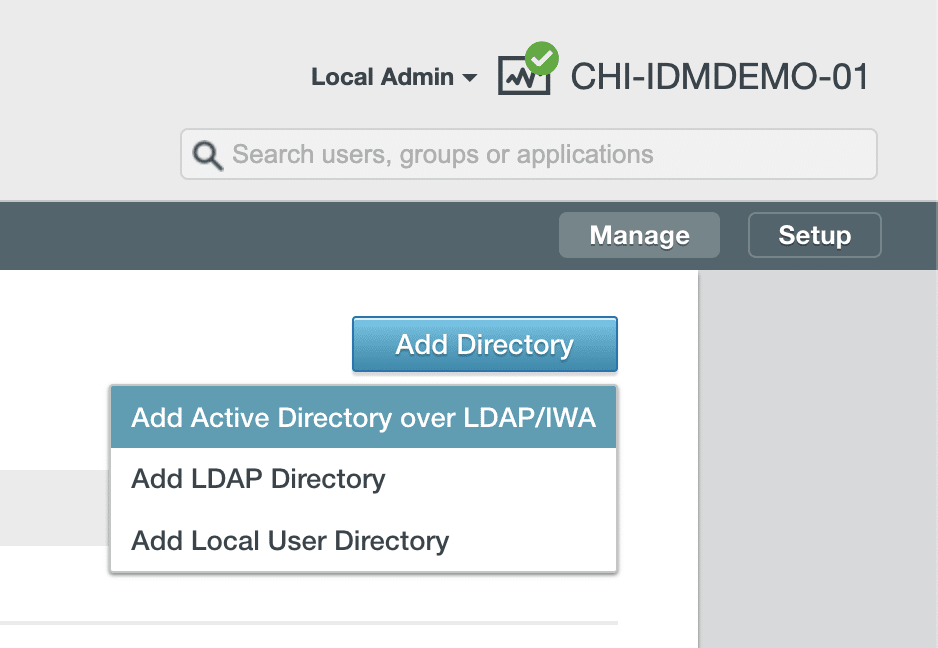
You should now be back on the Directories sub-menu item. Click on the Add Directory button on the right side.

Select the Add Active Directory over LDAP/IWA open as highlighted below.
Now let’s setup our connection to Active Directory.
Configuration:
- Directory Name – Choose a friendly name to assign this connection. We can link this Identity Manager to multiple directories so keep that in mind when selecting a name.
- Directory Type – I am choosing to setup this connection as Active Directory over LDAP as it has always proved to me to be more stable and simpler. I have seen environments where choosing Integrated Windows Authentication caused service disruptions when AD was not functioning properly.
- Sync Connector – This is the appliance that is connecting to Active Directory. You will want to make sure there is network communication over your choice of AD port (389, 636, 3268 or 3269) between this node and your Active Directory environment. If this is a clustered Identity Manager deployment, you will see multiple nodes listed.
- Authentication – Select Yes if this same node will handle the authentication requests for this directory. In standard environments this is usually left as Yes which is the default.
- Directory Search Attribute – Can either be sAMAccountName or UserPrincipalName. I typically leave this with the default as well.
- Server Location – You can uncheck the box if you would rather specify the domain controller and port number, otherwise leave the box checked so that a lookup of the domain through DNS will provide a dynamic list of domain controllers based on Active Directory Sites and Services.
- Encryption – Allows you to check a box and supply a certificate if your Active Directory requires a certificate to talk over port 636 or 3269. Otherwise leave it unchecked to allow port 389 or 3268 communication.
- Base DN – The lowest level you can go and still include all users, groups and service accounts you will be adding into VMware Identity Manager.
- Bind DN – The account that will be handling the domain lookups and authentication.
- Bind User Password – The password for the account specified in the Bind DN field.
Click on Test Connection to validate successful communications. Once you are successful, you can click Save & Next.


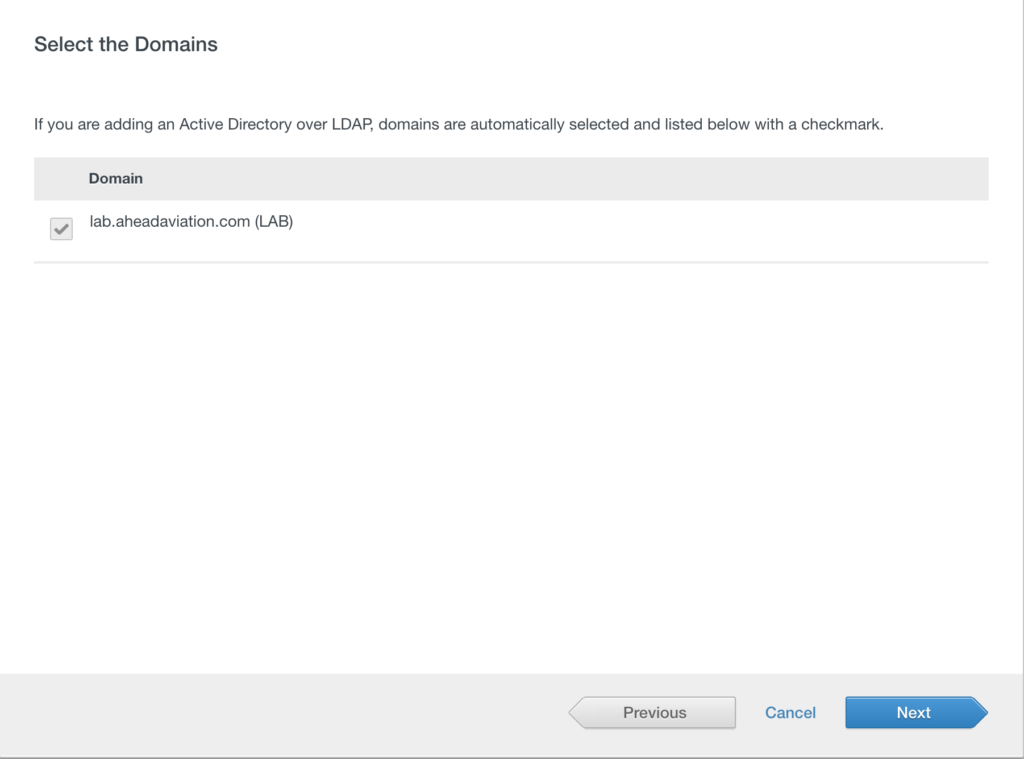
The next window shows us a list of domains on the domain controller we are communicating with. In our case there is only one domain, so we just click Next
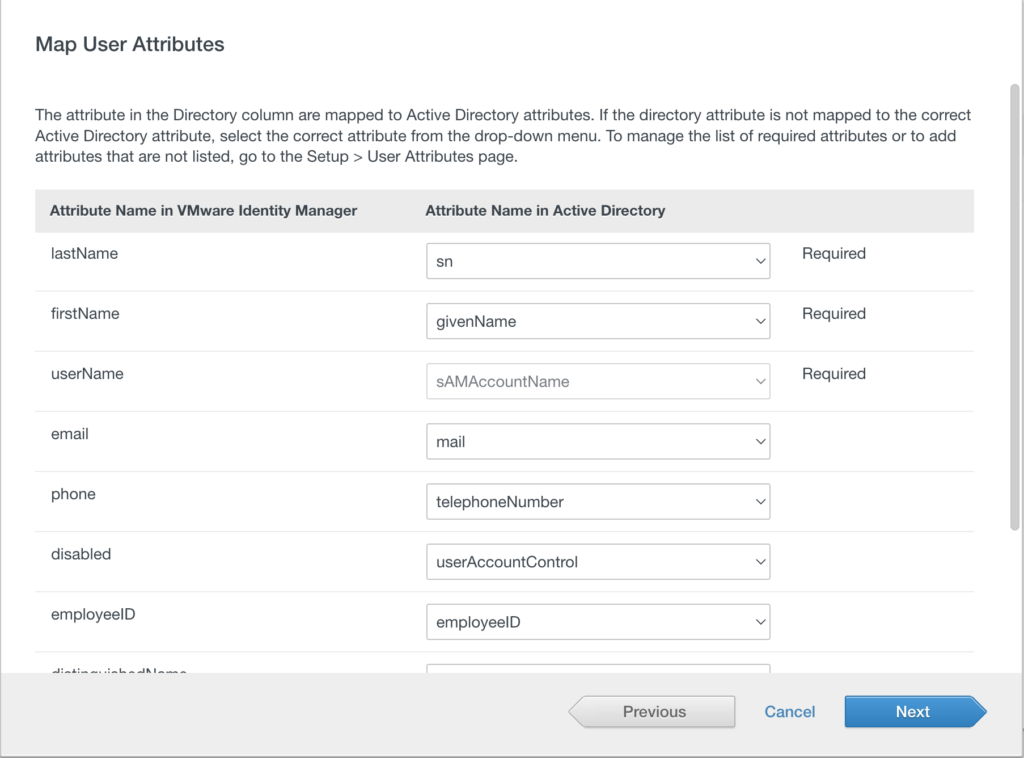
The next window is all about mapping user attributes. Unless your active directory environment has changed any of these defaults, you can likely click next through this as I have. You can also notice that the email field is not ‘Required’ since we unchecked the attribute requirement previously.
Now we can type in the base DN to search for groups to add into this directory. Once you add a base DN, the number of groups will be listed under the Groups to Sync. You can either check the box to Select All and synchronize all the groups or click on the number in Groups to sync to search for and add only a select set of groups.
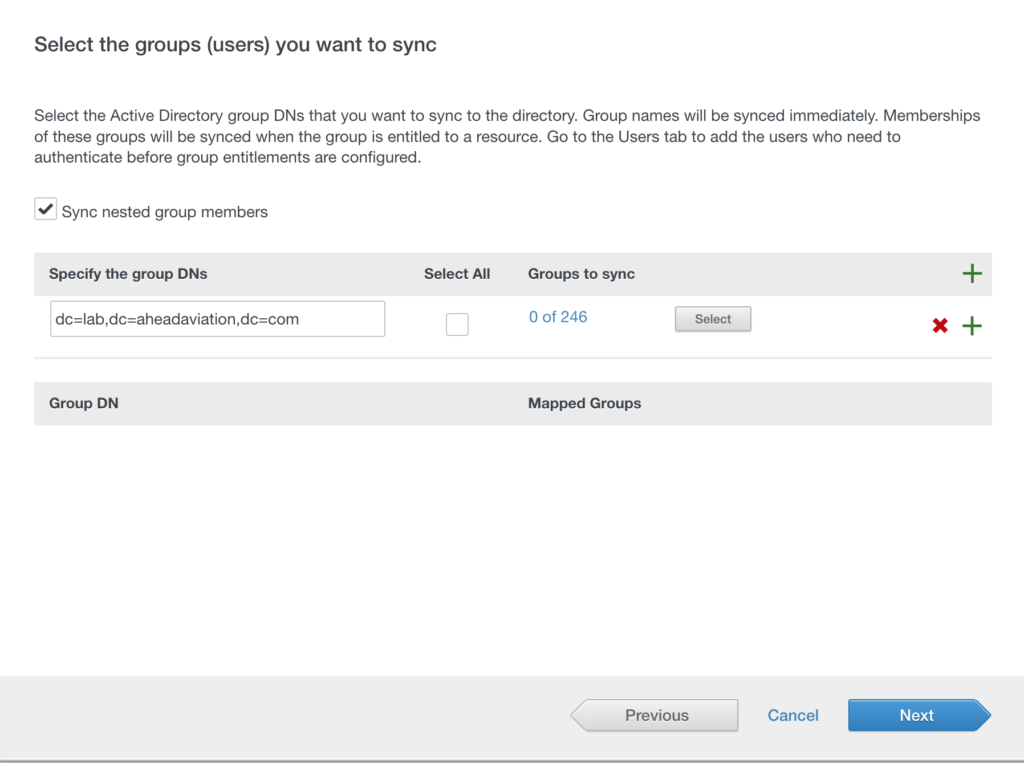
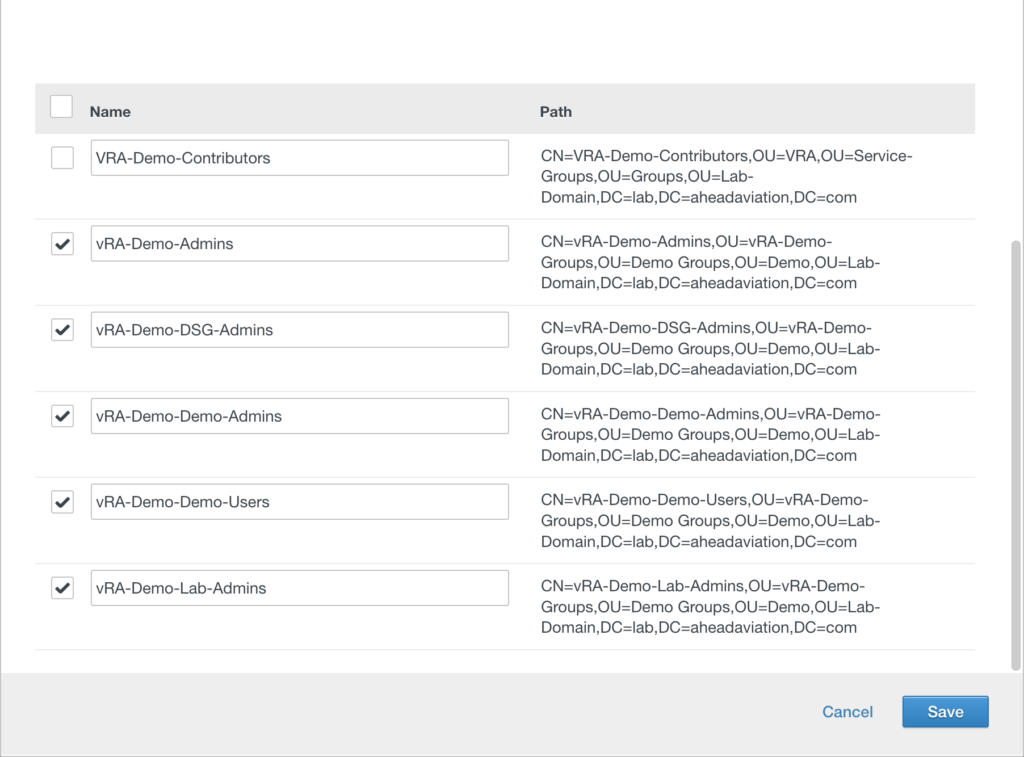
Here, I have searched for and found 5 groups I want to add. Now click save.
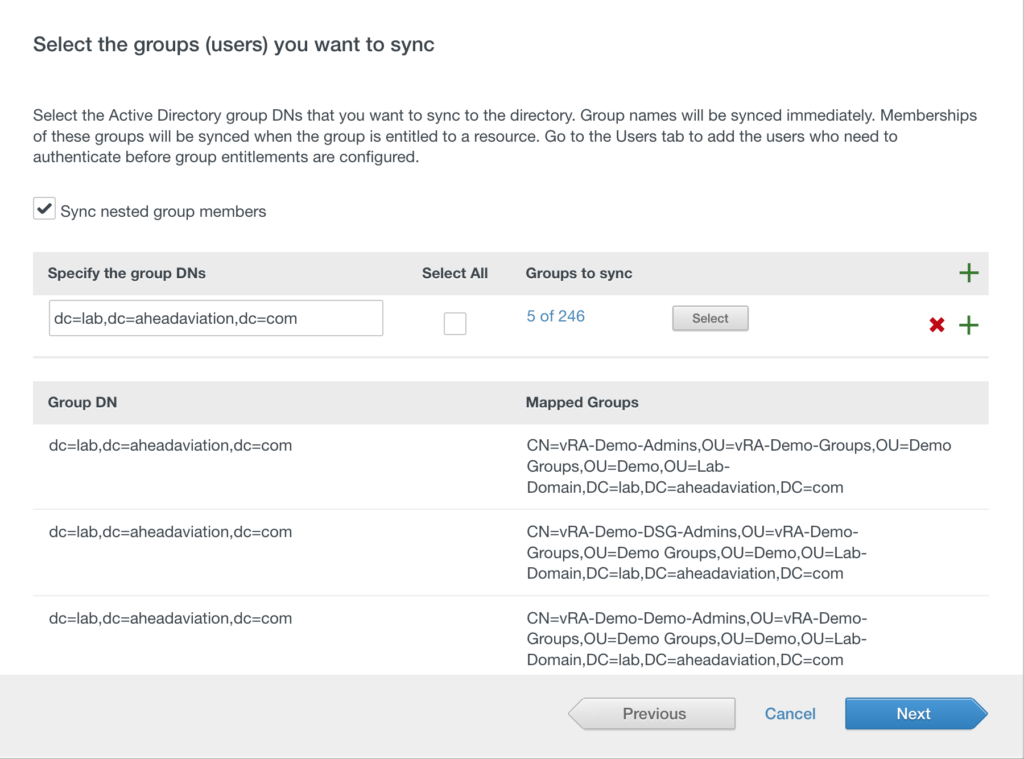
Now I can see my 5 groups listed below. I have left the checkbox selected to Sync nested group members so that I make sure I bring each user into Identity Manager with the groups. Now click Next.
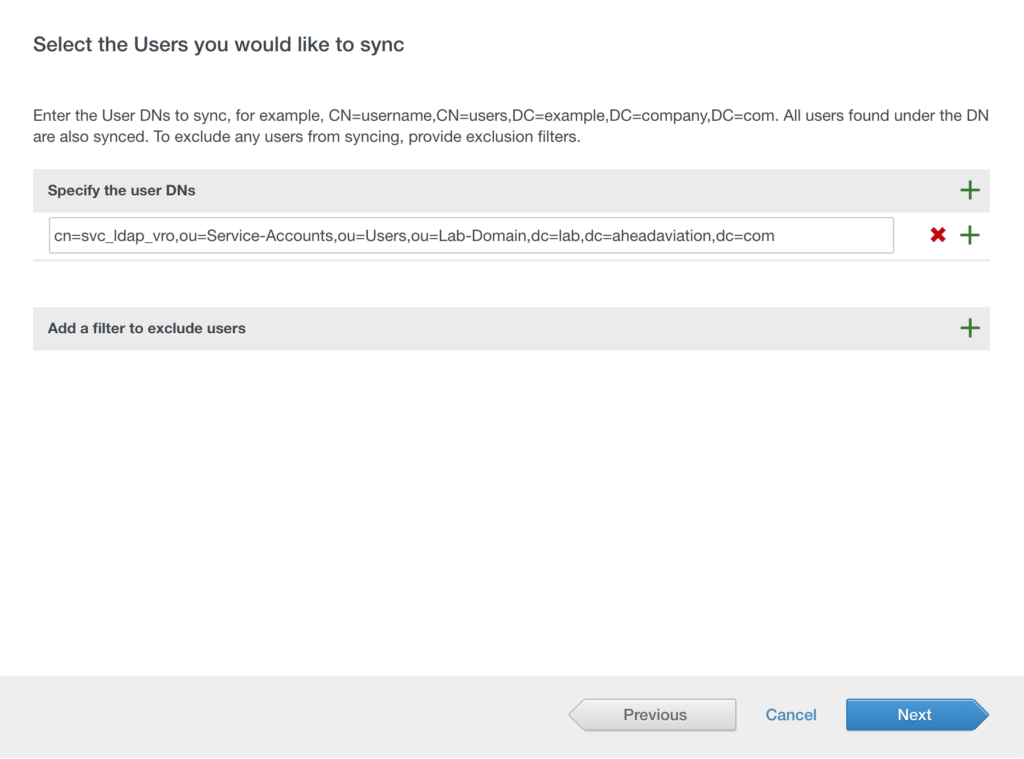
On the next window, we see the DN for the service account that is handling the synchronization. We can leave this here to pull that account into Identity Manager too. You may also add individual users by entering their DN in here as well. Once done here, we can click next.
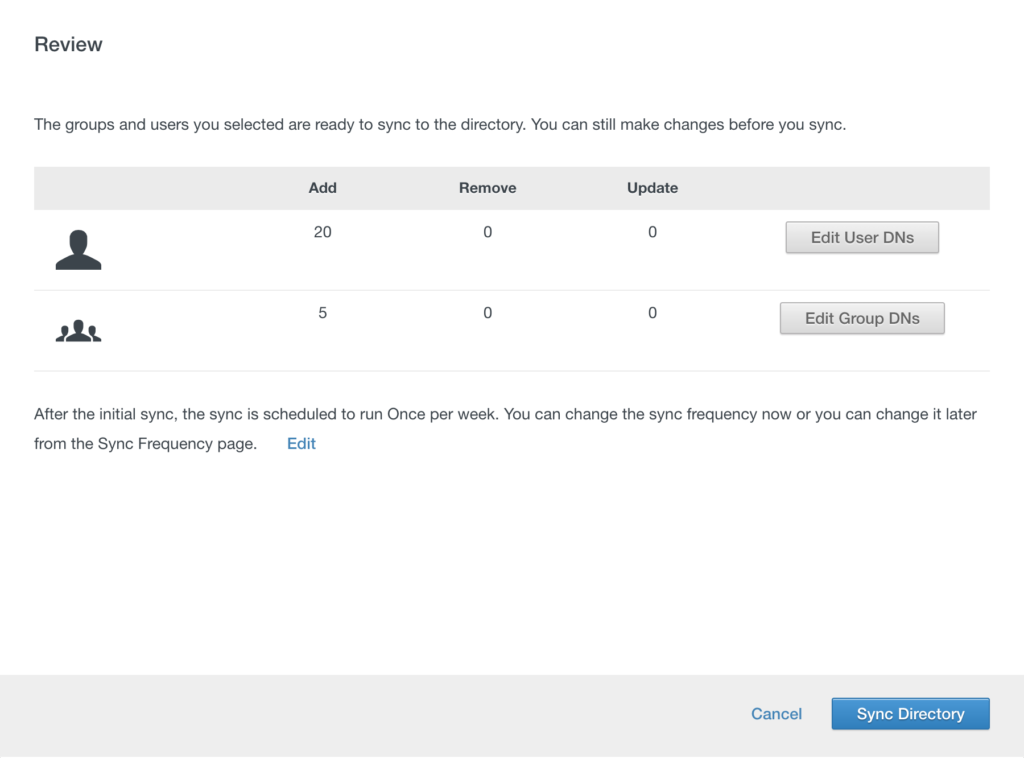
We can now review the changes that will occur with this sync. Since we have not run a sync previously all changes are adds. In the future this could be adds, removes or updates. Click Sync Directory to begin pulling the users and groups into Identity Manager.
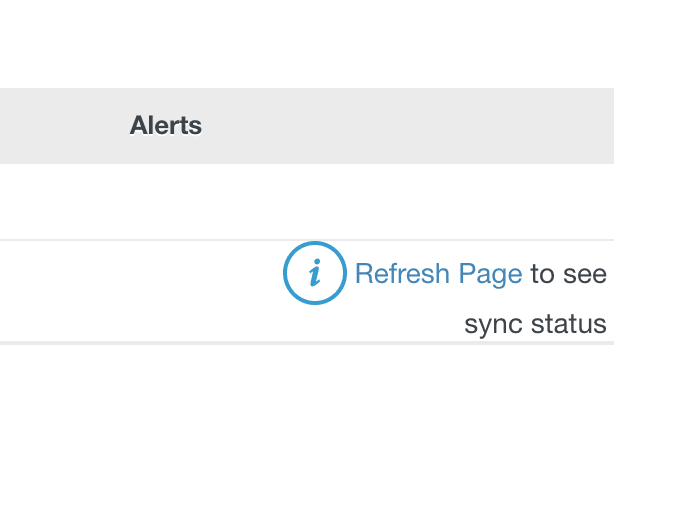
Once back to the main directory page, you will see that your new directory shows that you need to Refresh Page to see sync status. You can click the words Refresh Page until you see a green check mark.
Now we are all setup and have users and groups pulled into VMware Identity Manager. Next, we need to get these users and groups access into vRA, but first lets setup branding.

Setting up branding for your login page
Log in to VMware Identity Manager with a username of admin and the password you used during install. Once in you should be on the Dashboard page. From here, you will click on the Identity & Access Management tab at the top menu.

Click on Setup in the upper right of the screen to toggle from the Manage sub-menu to the Setup sub-menu options.

Now click on Custom Branding in the sub-menu.

Change the Company Name, Product Name and even upload a new Favicon image. Once complete, be sure to click Save before moving over to the Sign-in Screen.

Click on Sign-In Screen and make your changes here. You can see a bit of the branding changes as a preview on the left as you change colors and such.

Once complete, be sure to click Save. Now logout of Identity Manager and check it out!
Setup user access to vRealize Automation
Now we are going to use that configuser account that we setup during the installation wizard to login and grant access to additional accounts. First, we need to launch the vRealize Automation URL. You should see your new branding in place at the login screen.
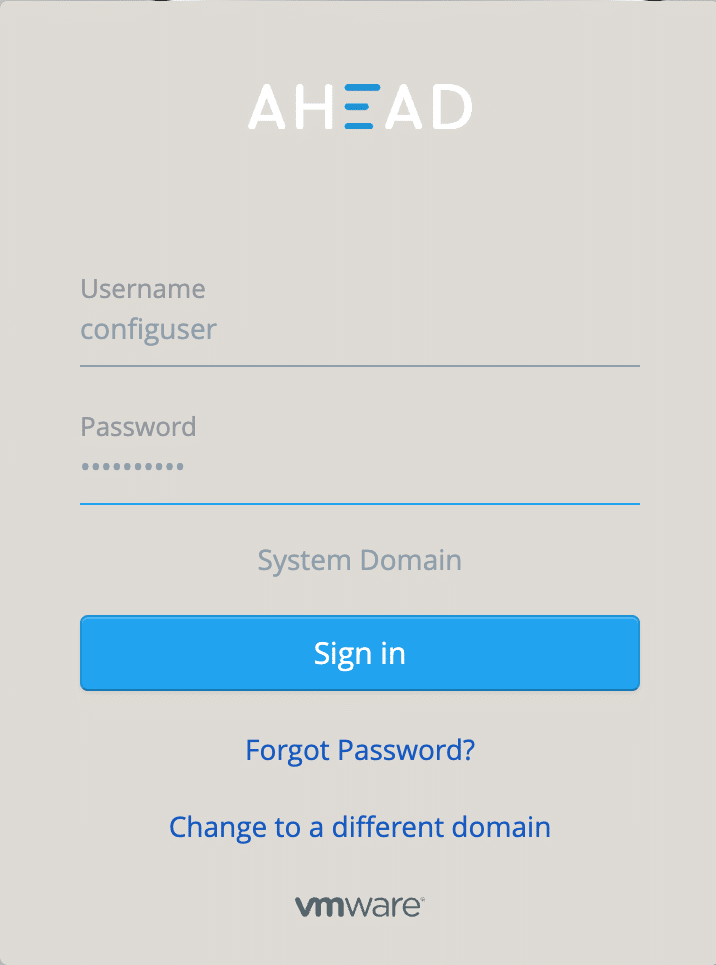
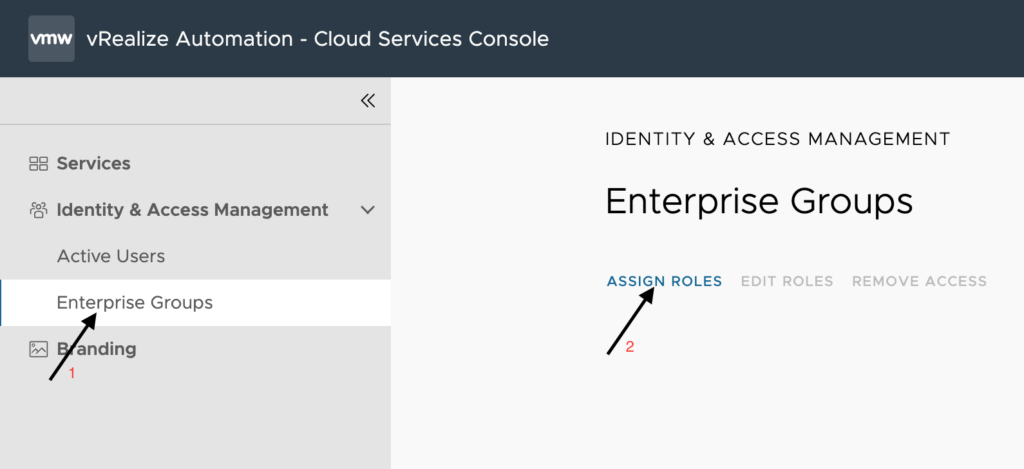
Once logged in, you will see the Services page of the Cloud Services Console. To setup user access, click on Enterprise groups in the left menu and then Assign Roles as shown below.
Use the search bar to find the group or groups that will have the same access level. Here I am setting up the global admin level account. This will have access to all services and functions within vRealize Automation. Selecting Organizational Owner will grant the users and groups selected the ability to manage permissions in this manner. If you do not want to grant that permission, make sure you use Organizational Member.
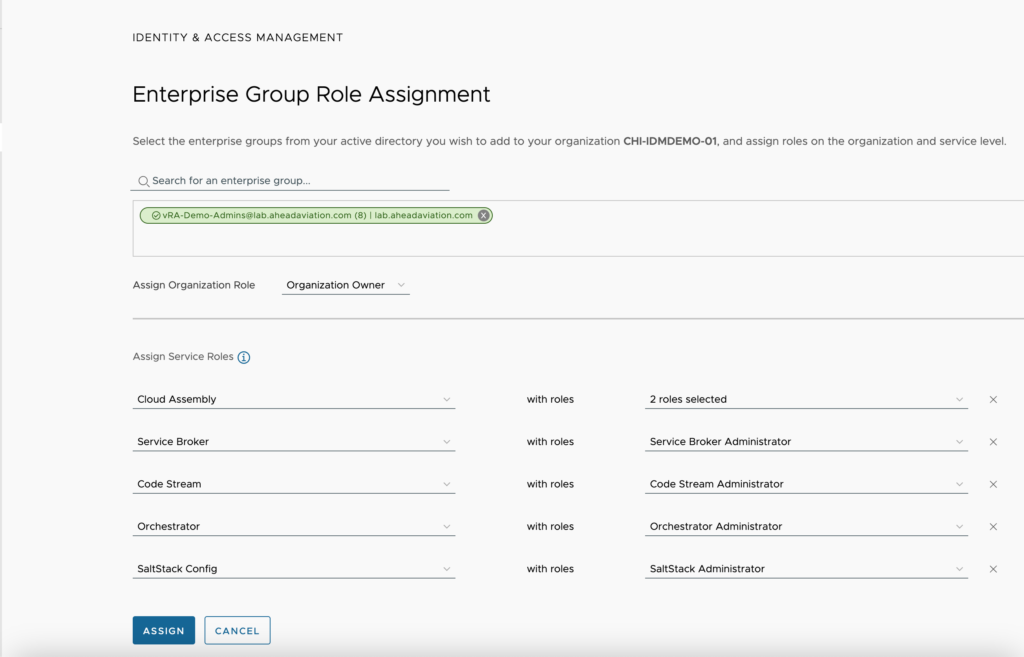
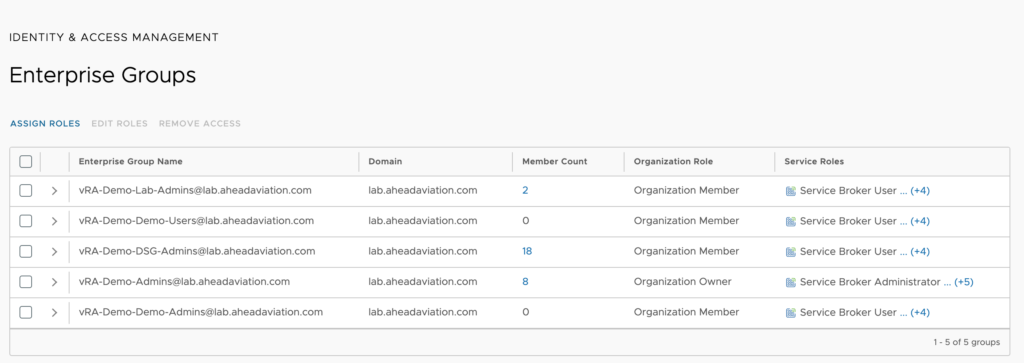
Repeat this process for additional role assignments. Once complete, you should see a list like this and you are ready to login to vRealize Automation with an Active Directory account.
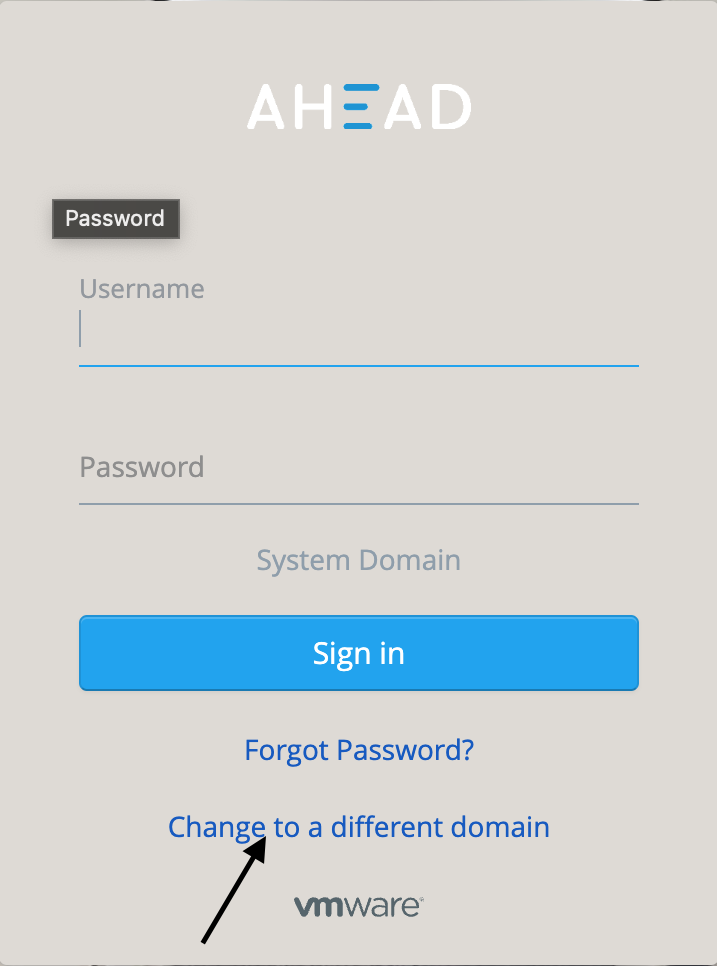
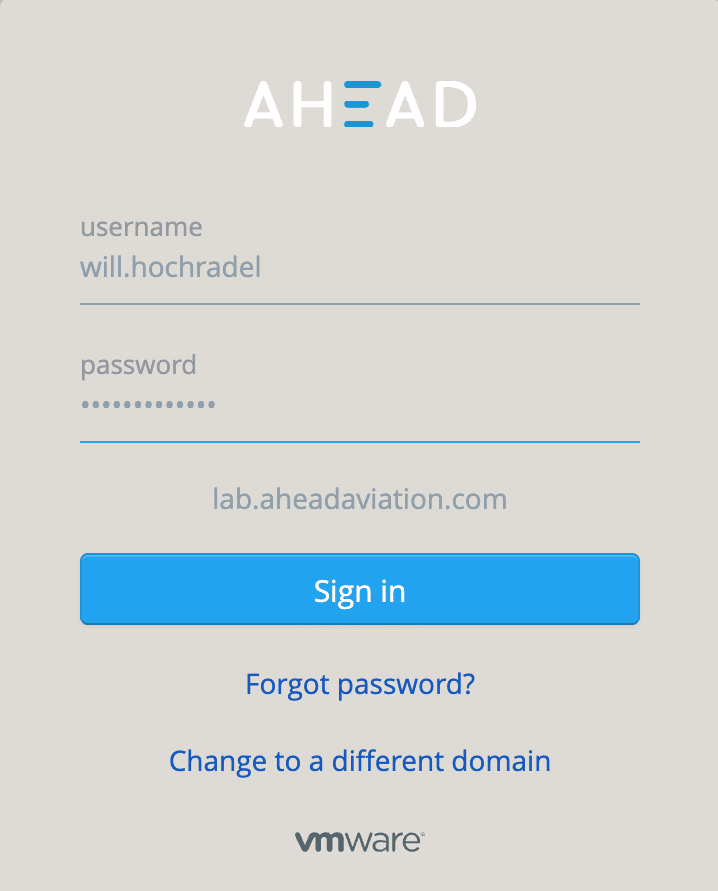
Let’s test out our login. I will be using a global admin account that is an Organizational Owner so that I can setup vRealize Automation branding next. You can see that it is currently set to System Domain, so first, we need to make sure to change to our new domain by clicking ‘Change to a different domain’ at the bottom.
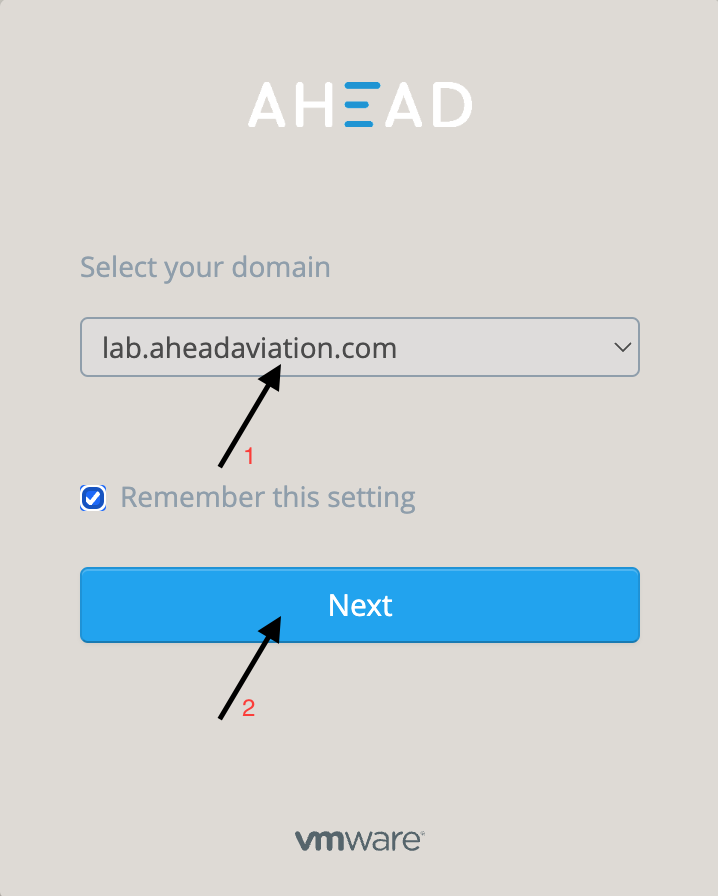
Now, select the domain that we will be logging into and click next.
Now enter in your username and password and click Sign in
You should now be back to the Services tab of the Cloud Services Console.
Setting up branding for vRealize Automation
We are almost done setting up the basics of our new vRealize Automation environment. We have already branded our login screen through VMware Identity Manager, now let’s quickly setup our vRealize Automation branding to match.
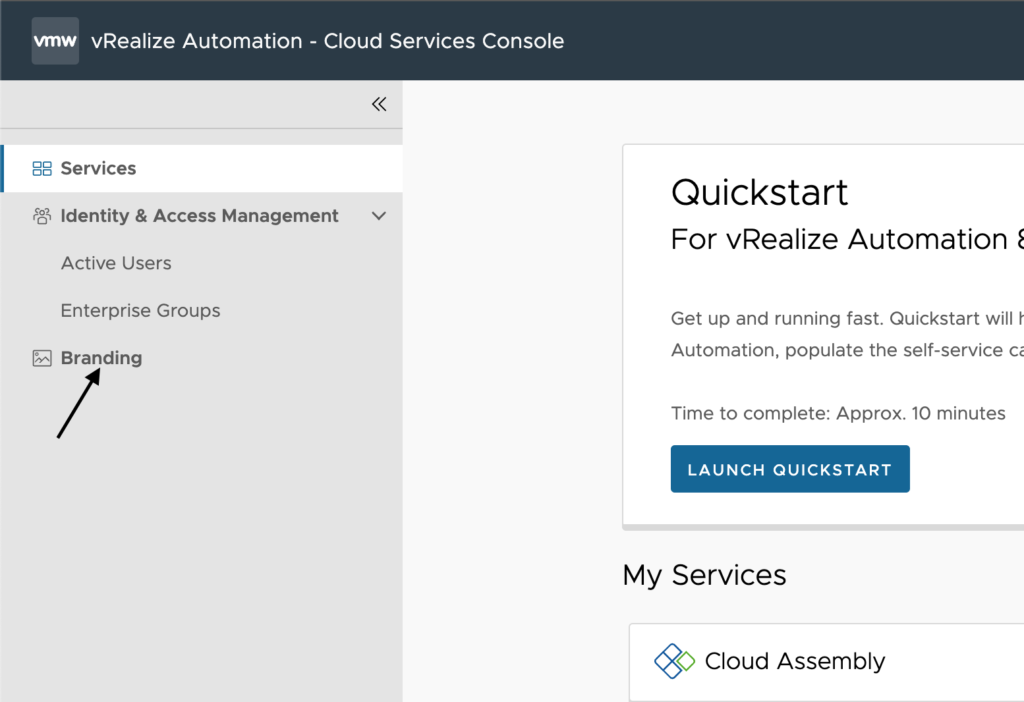
Once you are logged into vRA as either the configuser or an Organizational Owner account, we need to click on Branding in the left menu.
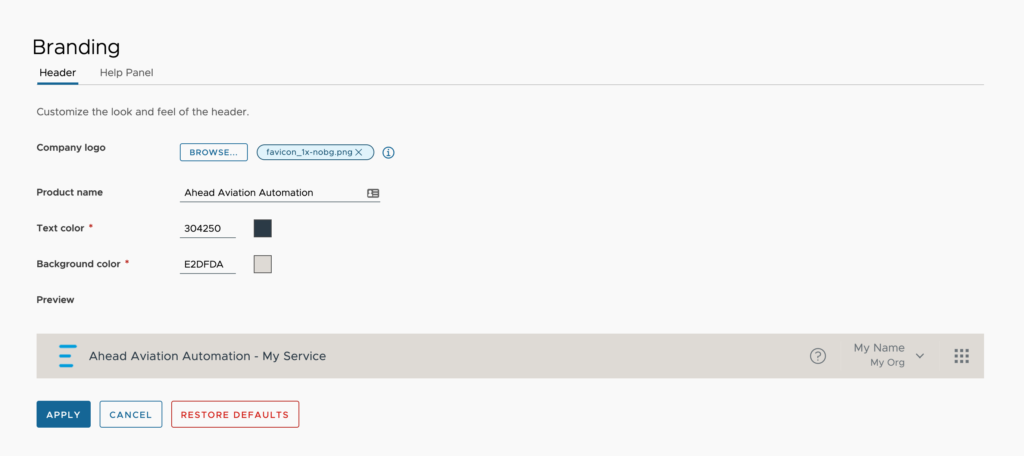
For the header section we can import a company logo, set the product name and modify text and background colors. It is great to have a preview available so you can see what everything will look like before you apply it. I have chosen to use colors from the image on the login screen to make sure things look the same throughout the product.
NOTE: The image should be less than 1MB in size.
Once you are happy with the look, click Apply. This will keep you on the same branding page but update the application to the new branding.
Now let’s look at the Help Panel tab. Here we can set a URL to our own internal forums for community help. The vmware communities page is here by default and since most people don’t typically have an internal forum for this, I tend to leave this as the default.

We have now completed all the basics to get vRealize Automation up and running. If you would like to read more about setting up all the vRealize Automation components, you can find those articles here too.



Leave A Reply