Image mappings are how we map a named image like ‘RedHat 8’ to the images in vCenter, whether from Content Library or VM templates, AWS AMIs etc. This allows us to select a friendly name like ‘RedHat 8’ and the system will automatically pick the right option based on the chosen destination. This is much more dynamic and easier to manage than using the ‘imageRef’ custom property in a cloud template which is where you call out the image name exactly as seen in the destination region. When using image mappings, you would instead supply the image custom property in the cloud template.
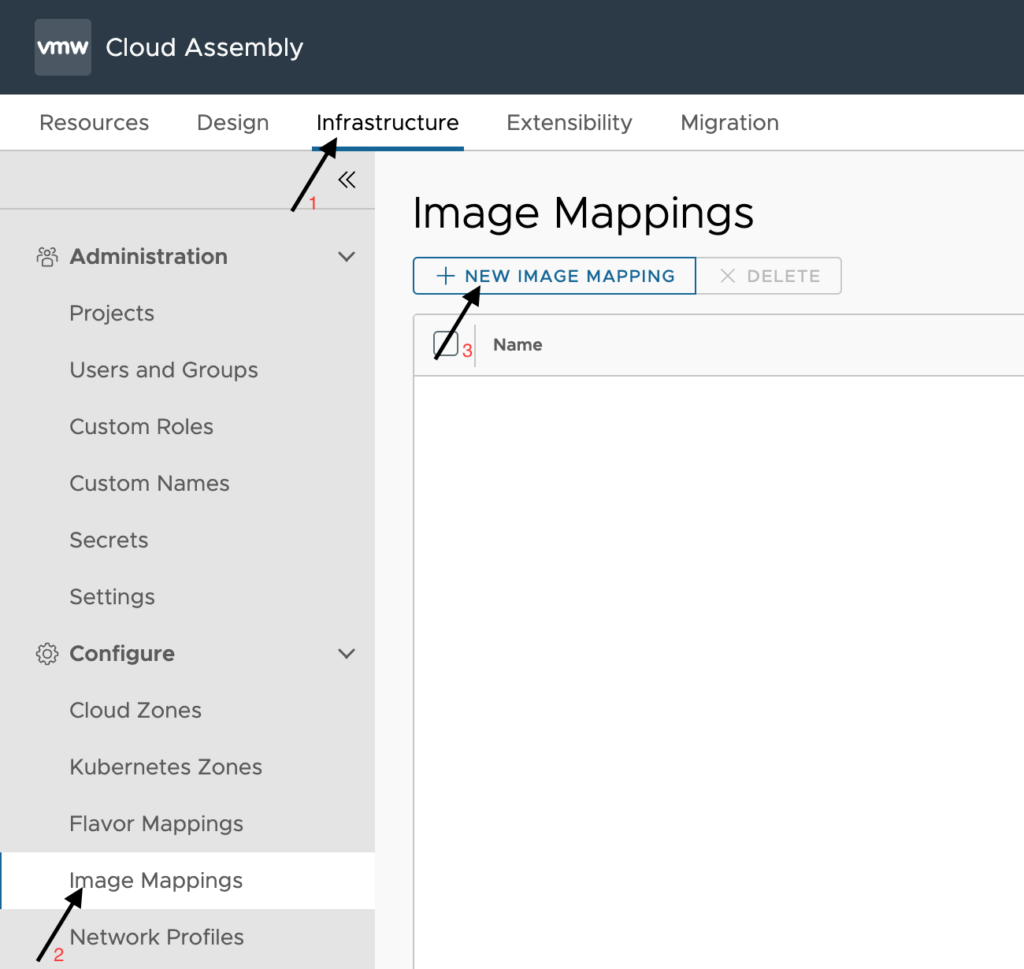
To begin configuring an image mapping, click on Infrastructure > Image Mappings > New Image Mapping as shown in the image.

Configuring a new image mapping is quite simple. So, let’s walk through that real quick.
NOTE: If you just added a template, AMI or similar to its respective environment, an image synchronization will need to run on that cloud account before the new image will be seen. By default this happens every 24 hours, but you can manually trigger a sync while inside the cloud account configuration.
Configuration:
- Image Name – This is what you want to be selecting from a drop down during a deployment. Here I stuck with the example of ‘RedHat 8’
- Configuration – This is where all the mappings are for region to image
- Account / Region – Select from all zones you have built at this point. Once you have a zone configured for this image mapping, it will no longer show up when adding more.
- Image – type in the name the best you can to begin a search through that zone for a matching image. Be sure to click on an option that comes up so that the underlying image id is properly mapped. If this is skipped, you may see an error during deployment that no image mapping was found in the selected zone.
- Constraints – Here we can apply a constraint tag that then has to match to a zone or cluster that matches this constraint with a capability tag. This is useful when segmenting out Linux and Windows images to different clusters for licensing purposes.
- Cloud Configuration – This is where you can supply some CloudConfig code to be applied to that image during deployment. I use this here for running commands in Windows for joining the domain and for Redhat systems to register to a subscription. Since these are OS specific tasks, I place them here rather than the Cloud Template. Read my documentation on CloudConfig for more details.
To add additional configurations, you just need to click the + sign to the far right. If a zone is no longer available due to decommissioning, you can click the – sign to the far right to remove that image mapping and keep your vRealize Automation environment cleaned up.
Reference for instance types per cloud:

OVA Based Image Mapping
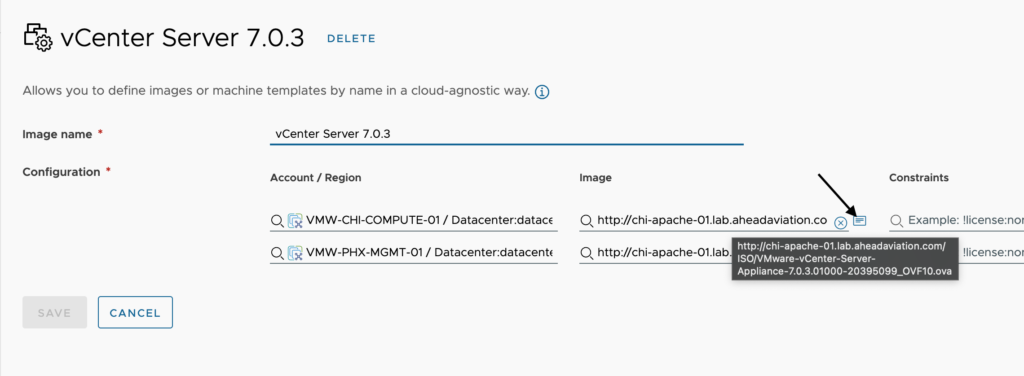
You can setup image mappings for OVA files as well. The best way to do this is by hosting the OVA file on a web server that vRealize Automation can access. This means that if you are using vRealize Automation Cloud, that you need public access to the URL. Even when mapping the image to an Account / Region that is vSphere based, thus having an associated cloud proxy, you are unable to access a private URL.
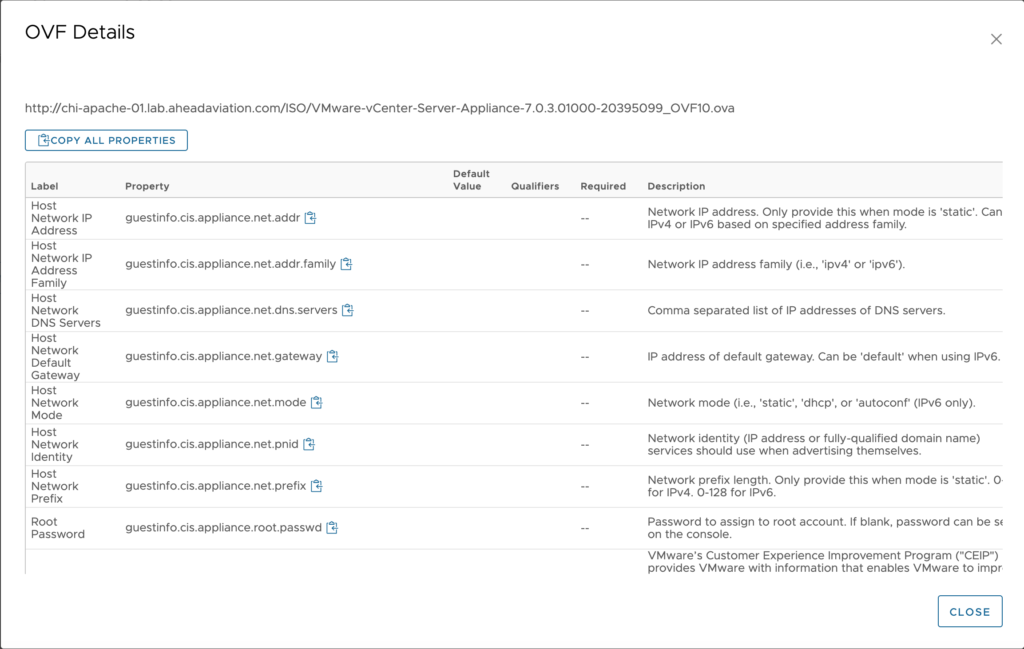
To setup an OVA backed image mapping, specify the Account / Region you want to have the mapping for. In the Image column, specify the full URL path to the OVA. Once you have done so, a small ‘card’ icon pops up that displays the OVF properties that you need to use in your cloud template.

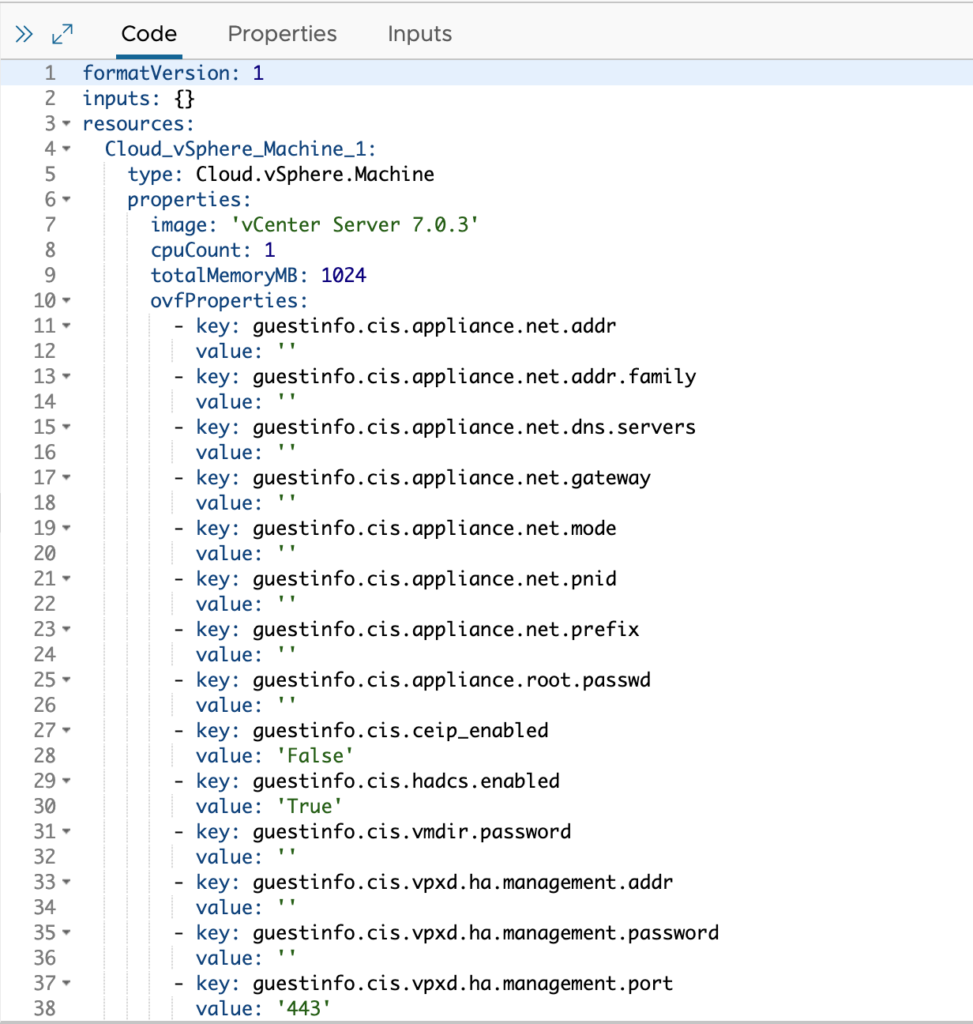
Here, we see a list of OVF properties that we can copy each one individually or just copy all properties. This copies the properties in the format needed for the cloud template.

Once you have copied the properties you can add them to a vSphere machine resource. If you copied all properties, when you paste them, it will include the ‘ovfProperties’ property and all properties formatted as you need them as seen here.


Leave A Reply